
It is a tale as old as time, and one that has ruined more Saturday afternoons than I care to count. You spend your precious weekend hours meticulously measuring out all-purpose flour, creaming premium European butter with brown sugar, and gently folding in those artisanal, ridiculously expensive dark chocolate chunks. You are building a culinary masterpiece. You envision a towering plate of bakery-worthy treats. But then, you pull the baking sheet out of the oven, and reality hits you like a wet dish towel.
Half of your cookies are burnt, crispy hockey pucks with scorched edges. The other half are massive, raw, doughy puddles that collapse the second you look at them. You stand there in your kitchen, the smoke detector blaring in the background, wondering why the baking gods have forsaken you.
Listen to me: the universe is not punishing you, and your recipe is not broken. You do not need to throw your mixer out the window, and you certainly do not need a degree from a French pastry school to figure this out. The culprit behind your wildly inconsistent bake is your lack of standardized portion control. If you want to stop the madness and start baking like a seasoned professional, you need to rethink the essential tools every beginner needs to achieve true culinary consistency.
It is time to put down the mismatched soup spoons, wash the sticky dough off your hands, and embrace the greatest open secret of the commercial kitchen: the spring-loaded portion scoop.
The Thermodynamics of Uneven Dough: Why Your Cookies Hate You Right Now
Baking is not cooking. When you are making a savory soup or a weeknight stir-fry, you can wing it. You can toss in a handful of this, a pinch of that, and adjust the heat on the fly. Baking, on the other hand, is an exact science. It is a rigid laboratory experiment involving chemical leaveners, protein coagulation, and thermodynamic heat transfer. Your oven does not care about your feelings; it only cares about thermal mass.
The Physics of Heat Transfer
When you place a tray of differently sized dough blobs into a 350°F oven, you are essentially setting up a thermodynamic disaster. Heat transfers from the ambient air of the oven (convection) and the hot metal of the baking pan (conduction) into the cookie dough. The rate at which the center of the cookie reaches its target temperature depends entirely on its size and volume.
If you have ever wondered why your cookies always spread flat while the edges burn to a bitter crisp, it comes down to the surface-area-to-volume ratio. A small, one-ounce blob of dough has very little mass. The heat penetrates it rapidly. Within minutes, the starches gelatinize, the egg proteins coagulate, and the edges reach 300°F. This specific temperature is critical because it is the threshold for the Maillard reaction—the chemical reaction between amino acids and reducing sugars that gives browned food its distinctive, complex flavor.
However, if that small cookie is sitting on the same tray as a massive, two-and-a-half-ounce mound of dough, you have an unsolvable problem. By the time the large cookie has finally baked through to the center, the small cookie has blown right past the Maillard reaction and straight into carbonized, burnt territory. Conversely, if you pull the tray out early to save the small cookies, the large ones will be raw, gooey, and structurally unstable in the middle. You cannot cheat physics.
The Two-Spoon Method is a Culinary Crime
For generations, casual home bakers have relied on the dreaded “two-spoon method.” You know exactly what I am talking about. You take a regular dining spoon, scoop out a rough chunk of dough, and use a second spoon to violently scrape it onto the baking sheet.
This method is a culinary crime for two reasons. First, it is impossible to gauge the exact volume of dough by eye. You will inevitably end up with a tray of assorted sizes, triggering the thermodynamic nightmare I just described. Second, the two-spoon method creates jagged, irregular shapes. Instead of a smooth, uniform sphere, you end up with an oblong asteroid covered in thin, wispy peaks of dough.
Those thin peaks and jagged edges have almost zero thermal mass. They will instantly scorch in the ambient heat of the oven, long before the center of the dough has even begun to warm up. Add to that the sheer frustration you experience when your cheap baking sheets keep warping under the uneven heat distribution, and you have a recipe for a weekend meltdown. Furthermore, the two-spoon method is agonizingly slow and messy. Time is money, honey, even on a Saturday afternoon. You do not have a prep team of sous-chefs to clean up your sticky kitchen counters.
The Butter Meltdown: Keep Your Warm Hands Off
Some intuitive bakers realize that the two-spoon method creates terrible shapes, so they attempt to fix the problem by rolling the dough between their palms to create perfect spheres. I applaud the pursuit of geometry, but this method introduces an entirely new, catastrophic variable: body heat.
To understand why this is a terrible idea, we have to talk about the science of butter. Butter is an emulsion. It is composed of roughly 80% butterfat, 15% water, and 5% milk proteins. In a standard cookie recipe, you cream softened butter with sugar to trap microscopic air bubbles, and then you chill the dough to solidify that fat. You want the butter to remain solid when the cookie first enters the oven.
Why? Because as the cookie bakes, the outer structure (the flour and egg proteins) begins to set. When the butter finally reaches its melting point, the trapped water inside the butter turns into steam. This steam expands, creating beautiful, airy, flaky pockets within the dough. This is what gives a premium bakery cookie its incredible lift and chewy texture.
Your hands are a sweltering 98.6°F. Butter begins to soften at 65°F and completely melts between 90°F and 95°F. Do the math. When you sit there rolling a dozen balls of dough between your warm palms, you are prematurely melting the fat before it ever sees the inside of an oven. This is the hidden trap of warm butter that completely ruins the structural integrity of your bake. Because the emulsion is broken and the fat is already practically liquid, the dough will immediately spread out into a flat, greasy puddle the moment it hits the hot baking pan. You lose all aeration, all lift, and all texture.
Enter the Portion Scoop: The Commercial Kitchen Secret
So, if the two-spoon method creates jagged, uneven shapes that burn, and hand-rolling melts the butter and destroys the texture, what is the solution? How do commercial bakeries churn out thousands of flawlessly uniform, thick, chewy cookies every single day without fail?
They use a disher.
What Exactly is a Disher? (And Why You Need One Yesterday)
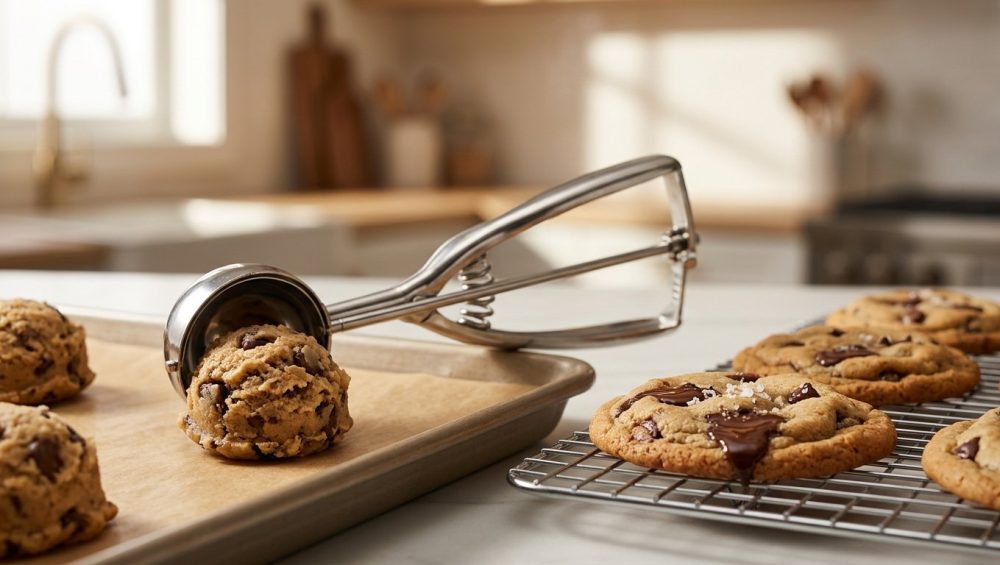
In the professional culinary world, we do not call it a “cookie scoop.” We call it a disher, or a portion scoop. While it looks remarkably similar to a traditional ice cream scoop, it is engineered for a completely different purpose. Ice cream scoops are often made with solid metal handles filled with heat-conductive antifreeze fluid to melt through frozen dairy. A disher, however, features a mechanical, spring-loaded sweeper blade that seamlessly releases sticky batters and dense doughs with a simple squeeze of the hand.
Dishers come in two primary mechanical styles: the thumb-press and the squeeze-handle. The thumb-press utilizes a small lever on the side that you push with your thumb to activate the cog-and-ratchet system of the sweeper blade. The squeeze-handle (often preferred in high-volume settings) is ambidextrous and requires you to squeeze your entire fist to activate the blade. For stiff, chilled cookie dough, the squeeze-handle is generally superior because it utilizes the grip strength of your entire hand, significantly reducing repetitive strain and hand fatigue.
The Magic of the Numbering System
Dishers are not sized by arbitrary labels like “small, medium, and large.” They are meticulously categorized by an industry-standard numbering system based on volume. The number stamped on the inside of the sweeper blade or on the handle indicates exactly how many level scoops it takes to fill a standard 32-ounce quart container.
This means that the larger the number, the smaller the scoop. Understanding this system is the key to unlocking total control over your baking:
- The #60 Scoop (Approx. 1 Tablespoon / 0.5 oz): This tiny workhorse is perfect for bite-sized mini cookies, rolling elegant chocolate truffles, or portioning out uniform melon balls.
- The #40 Scoop (Approx. 1.5 Tablespoons / 0.8 oz): This is the holy grail for the standard home baker. It yields a classic, perfectly proportioned 2.5 to 2.75-inch cookie. If a recipe tells you to “drop by the rounded tablespoon,” this is the exact tool you need.
- The #20 Scoop (Approx. 3 Tablespoons / 2.5 oz): If you want to replicate those massive, thick, gourmet bakery cookies that cost five dollars a pop at trendy cafes, the #20 is your best friend.
- The #8 Scoop (Approx. 1/2 Cup / 4 oz): You won’t use this for cookies unless you are trying to feed a small village with a single pastry, but it is the ultimate tool for portioning out identical mounds of mashed potatoes or serving uniform scoops of macaroni and cheese at a dinner party.
When you use a standardized disher, you guarantee that every single mound of dough on your baking sheet has the exact same mass, the exact same volume, and the exact same surface-area ratio. You completely eliminate the thermodynamic chaos of the two-spoon method.
The “No-Go” Gear Warning: Banishing Toxic Trash from Your Kitchen
Now that you understand the brilliant mechanics of the portion scoop, we need to have a very serious, brutally honest conversation about quality. I have zero patience for cheap, toxic kitchenware. None. I despise it with every fiber of my being, and you should too.
If you walk into a discount big-box store and buy a generic, unbranded four-dollar scoop from a bargain bin, you are actively sabotaging your food, your workflow, and potentially your health. Cheap dishers are universally manufactured using low-grade “mystery metals”—usually a brittle zinc alloy or porous, untreated aluminum.
To make these cheap metals look presentable, manufacturers coat them in a fake, shiny chrome plating. Do you know what happens when you use a cheap, chrome-plated scoop to dig into a bowl of stiff, chilled, brown-sugar cookie dough? The immense mechanical stress causes the cheap plating to micro-fracture. Within a few weeks, that fake chrome will begin to peel and flake off directly into your pristine cookie dough. I don’t know about you, but I do not consider metallic flakes to be a desirable mix-in.
Furthermore, cheap untreated aluminum is highly reactive. Remember that time your cheap ice cream scoop turned gray and left a powdery, metallic residue all over your hands after just one run through the dishwasher? That is the result of harsh alkaline dishwasher detergents aggressively oxidizing the reactive metal. You cannot let that chemical residue touch your food.
The same logic applies to the plastic components on cheap tools. Just like how low-grade silicone spatulas taste like soap because their cheap filler materials absorb chemical detergents, the flimsy plastic handles on bargain dishers will degrade, harbor bacteria, and eventually snap under pressure.
You must treat your kitchen gear with the same scrutiny you apply to your ingredients. You wouldn’t use a toxic aerosol spray that will eventually ruin your nonstick pans, so why would you use a tool that sheds metal into your baked goods?
Finally, there is the issue of structural integrity. Stiff cookie dough is essentially culinary cement. If you use a poorly constructed scoop with a weak cog-and-ratchet system, it will break. Just like the horrifying moment when a cheap glass baking dish shattered in your oven because it couldn’t handle the thermal shock, a cheap disher will literally explode in your hand when you try to squeeze the handle against the resistance of cold dough. The gears will strip, the spring will pop out and fly across the kitchen, and the sweeper blade will bend permanently out of shape.
The Gold Standard: 18/8 Food-Grade Stainless Steel
If you want to bake like a pro, you must invest in professional-grade tools. You are looking for a disher constructed entirely from 18/8 food-grade stainless steel.
In the world of metallurgy, 18/8 refers to the specific composition of the steel alloy: 18% chromium and 8% nickel. The high chromium content is what binds oxygen to the surface of the metal, creating a passive layer that prevents rust and corrosion. The nickel enhances the steel’s durability, gives it a beautiful, polished luster, and makes it highly resistant to the acidic components in your food (like the molasses in your brown sugar or the buttermilk in your muffins).
An 18/8 stainless steel disher is practically indestructible. It will not pit, it will not rust, it will not flake toxic coatings into your dough, and it is 100% dishwasher safe. It will outlive you, and it will ensure that every single cookie you bake for the rest of your life is perfectly portioned. Spend the extra ten dollars. Your sanity is worth it.
The Baking Science: How a Scoop Changes Everything
When you upgrade to a heavy-duty stainless steel portion scoop, you are not just buying a tool; you are buying predictability. Let’s break down exactly how this standardized mass transforms the science of your bake.
Precision Heat Distribution in the Oven
Because every single mound of dough has the exact same volume and surface area, the heat transfer in your oven is completely uniform. The starches in cookie number one will gelatinize at the exact same millisecond as the starches in cookie number twelve. The Maillard reaction will trigger across the entire baking sheet simultaneously.
This means you can finally trust your oven timer. If your recipe says to bake for exactly 11 minutes, you can set your timer, pour yourself a glass of wine, and walk away. You don’t have to hover anxiously by the oven window, rotating the pan frantically to save the tiny cookies while waiting for the giant ones to finish. You get edge-to-edge perfection, every single time.
Aeration and Structural Geometry
Here is a fascinating piece of baking physics that most people overlook: the mechanical action of the disher actually improves the texture of the cookie.
When you scoop dough and scrape it flat against the side of the bowl (more on this technique in a moment), you create a hemisphere. The top is a perfectly smooth dome, and the bottom is completely flat. When you release this hemisphere onto your baking sheet, that flat bottom provides maximum, immediate surface-area contact with the hot metal pan. This direct conduction jumpstarts the melting of the sugars on the bottom of the cookie, creating a beautifully caramelized, crispy base.
Meanwhile, the smooth dome on top ensures that as the cookie spreads, it spreads evenly in a perfect 360-degree circle. There are no jagged edges to burn. Furthermore, because you aren’t crushing the dough with your warm hands, the cold butter remains fully intact, ready to create those glorious pockets of steam-leavened aeration in the oven.
Masterclass: The Professional Scoop and Scrape Technique
Owning a professional disher is only half the battle; you have to know how to use it correctly. If you just haphazardly dig the scoop into the bowl and drop ragged clumps onto the pan, you are defeating the entire purpose of the tool. Follow this strict, step-by-step masterclass to achieve bakery-level perfection.
Step 1: The Non-Negotiable Chill
Before you even touch your disher, you must chill your dough. I cannot stress this enough. chilling your cookie dough allows the flour to fully hydrate, absorbing the moisture from the eggs and butter. It also solidifies the fat, which we have already established is critical for preventing a greasy puddle. Wrap your bowl tightly and leave it in the fridge for at least two hours, though 24 hours is the absolute gold standard for flavor maturation.
Step 2: The Plunge and Pack
Once your dough is properly chilled and firm, take your 18/8 stainless steel disher and plunge it aggressively into the dough. Do not be timid. You want to force the dough deep into the cavity of the scoop. This packs the dough tightly and eliminates any internal air pockets that could cause the cookie to bake unevenly or collapse.
Step 3: The Scrape
This is the most critical step. Once the scoop is full, do not use your fingers to wipe away the excess dough. Instead, pull the scoop up and drag the open face of the bowl firmly against the inside wall of your mixing bowl. This mechanical scraping action shears off the excess dough, leaving you with a perfectly flush, flat bottom packed tightly inside the scoop.
Step 4: The Release
Hold the disher about one inch above your parchment-lined baking sheet. Give the handle a firm, decisive squeeze. The internal sweeper blade will glide effortlessly across the curved bowl of the scoop, cleanly ejecting a flawless, flat-bottomed hemisphere of dough onto the parchment. Repeat this process, spacing your cookies evenly to allow for airflow and optimal heat convection.
Step 5: The Final Rest
If your dough warmed up slightly while you were aggressively scooping and packing, do not rush it straight into the oven. Pop the entire baking sheet of portioned dough balls back into the fridge for 15 minutes. This brief period of resting your dough re-solidifies the butter and relaxes the gluten strands that were agitated during the scooping process, guaranteeing a tender, melt-in-your-mouth crumb.
Beyond the Bakery: The Unexpected Versatility of a Disher
If you think I am demanding you buy a specialized, single-use kitchen gadget just for weekend cookies, you clearly don’t know me. I despise unitaskers. A high-quality portion scoop is one of the most versatile, time-saving workhorses in a modern kitchen. Once you experience the efficiency of standardized mass, you will use this tool for absolutely everything.
The Ultimate Meatball Master
Making homemade meatballs used to be a tedious, messy nightmare of raw ground beef and sticky hands. More importantly, hand-rolling meatballs leads to the exact same thermodynamic problem as hand-rolling cookies. If your meatballs are different sizes, the small ones will dry out and turn to rubber in the skillet, while the massive ones will remain dangerously raw in the center.
By using a #40 or #30 disher to portion your meat mixture, you guarantee that every single meatball cooks at the exact same rate. You can brown them in a skillet or roast them in the oven with total confidence, knowing the internal temperature will be uniform across the board. Plus, the mechanical release keeps your hands entirely clean.
Flawless Muffins and Cupcakes
Have you ever poured muffin batter from a mixing bowl, only to accidentally overfill one cup, underfill the next, and drip raw batter all over the metal tin? When that spilled batter hits the heat of the oven, it burns, setting off the smoke alarm and ruining the flavor of your bake.
A #20 or #16 disher is the ultimate tool for portioning wet batters. You scoop the batter, scrape the excess off the side of the bowl, and release it cleanly into the paper liner. Every single muffin will rise to the exact same height, creating a beautiful, bakery-style display without a single drop of burnt batter on the pan.
Precision Pancakes and Fritters
Trying to pour pancake batter directly from a heavy mixing bowl is a fool’s errand. You end up with weird, amoeba-shaped blobs that cook unevenly and are impossible to flip. Using a large portion scoop allows you to drop perfect, uniform circles of batter onto your hot griddle. Because they are the exact same size, they will bubble and set at the exact same time, allowing you to flip the entire batch in one smooth, rhythmic motion.
The same logic applies to corn fritters, crab cakes, or falafel. Standardized mass means standardized cooking times, which drastically reduces your stress levels when working with hot oil or a smoking griddle.
Conclusion: Upgrade Your Baking Game
You do not need to be a classically trained pastry chef to produce mind-blowing, bakery-quality food in your standard home kitchen. You just need to stop making things harder on yourself. Baking is a science, and science demands precision, consistency, and the right equipment.
The messy, wildly inefficient two-spoon method belongs in the past. Hand-rolling dough and melting your precious butter belongs in the past. It is time to respect your ingredients, respect your time, and respect the laws of thermodynamics.
Invest in a heavy-duty, 18/8 stainless steel portion scoop. Master the plunge, scrape, and release technique. Standardize your mass, and I absolutely promise you: you will never pull a tray of half-burnt, half-raw, oddly shaped cookies out of your oven ever again. Now, go preheat your oven, chill your dough, and bake like the culinary rockstar you are.






