Picture this: It is a beautiful Saturday afternoon. You have spent the better part of your morning meticulously cutting ice-cold butter into flour, carefully drizzling in ice water, and patiently letting your pastry dough rest in the refrigerator. You have done everything right. You dust your countertop with flour, unwrap your perfectly chilled disk of dough, and grab that heavy, squeaky, handled rolling pin you inherited from your grandmother. You press down, roll forward, and—disaster strikes.
The edges of your dough crack like a dry riverbed. The center sticks to the counter. One side is paper-thin and translucent, while the other side is a thick, gummy mound of butter and flour. You try to patch the tears with wet fingers, but the structural integrity of your pie crust is completely compromised. You are sweating, the butter is melting, and you are seriously considering throwing the entire mess into the trash and driving to the nearest bakery.
Listen to me, weekend culinary warriors: you do not need a pastry degree from Le Cordon Bleu to make a mind-blowing, perfectly round, tear-free pie crust. You just need to stop sabotaging yourself with garbage equipment. The problem is not your technique, your recipe, or your lack of professional training. The problem is that clunky, archaic American rolling pin you are wrestling with. It is time to step into the light, ditch the training wheels, and embrace the elegant, foolproof magic of the French rolling pin.
The Anatomy of a Pastry Disaster: Why Your Dough Keeps Tearing
Before we can solve the problem, we need to understand the crime scene. Why does pie dough tear in the first place? Pastry dough is a delicate, temperamental matrix of flour, fat, and water. When you mix water with wheat flour, you develop gluten—a network of proteins that act like microscopic rubber bands. In bread, you want those rubber bands to be strong and stretchy. In pie dough, you want them to be as short and weak as possible to ensure a flaky, tender crust.
Because the gluten network in pie dough is intentionally underdeveloped, the dough lacks elasticity. It does not want to stretch; it wants to shatter. When you apply mechanical force to it, that force must be incredibly even, gentle, and deliberate. If you force it too hard, the weak gluten strands snap, resulting in those infuriating cracks and tears along the edges of your dough circle.
The Clunky Culprit: American Handled Rolling Pins
Enter the traditional American rolling pin. You know the one. It features a heavy central cylinder—often made of cheap wood, hollow aluminum, or even glass—flanked by two handles attached to an internal metal rod with ball bearings. It looks like a sturdy, reliable tool, but from a purely mechanical and ergonomic standpoint, it is an absolute nightmare for delicate pastry.
When you use an American rolling pin, your hands are gripping the handles at the far ends of the tool. You are entirely separated from the central barrel that is actually doing the work. You are essentially trying to drive a car from the backseat. Because your hands are not in direct contact with the dough, you have absolutely zero tactile feedback. You cannot feel the thickness of the pastry, you cannot feel the temperature of the butter, and you cannot feel the resistance of the gluten.
Furthermore, holding the handles forces you to push down from the outside edges. This creates an unnatural bowing effect. You end up applying massive amounts of pressure to the outer edges of the dough while barely touching the center, or you overcompensate and crush the center while leaving the edges thick. This clumsy, uneven distribution of weight is exactly what causes the dough to stretch beyond its breaking point and tear. If you are desperately trying to prevent a tough pie crust, the first thing you need to evaluate is how aggressively you are forcing the dough with a tool that robs you of your sense of touch.
The Science of Uneven Pressure and Thermal Transfer
Let us talk about the physics of rolling. When you push down on those handles, the ball bearings allow the central cylinder to spin freely. This encourages a rapid, back-and-forth “vacuuming” motion. Home cooks tend to aggressively roll the pin back and forth over the dough as fast as they can, treating the pastry like a stubborn stain on a living room rug. This rapid friction builds heat, melting the delicate pockets of butter that are supposed to create flaky layers in the oven. Once the butter melts, the flour absorbs it, creating a tough, dense, and gummy crust.
Additionally, many of these handled pins are made from materials that wreak havoc on dough temperature. Hollow metal pins that you fill with ice water might sound like a brilliant culinary hack, but they are a gimmick. The ice water causes condensation to form on the outside of the metal. That condensation drips onto your dough, making it sticky. To combat the stickiness, you have to add more flour. Adding raw flour to wet dough develops more gluten, which makes the dough tough and prone to snapping. It is a vicious cycle of culinary despair.
Enter the French Rolling Pin: A Masterclass in Tactile Feedback
If the American rolling pin is a blunt instrument, the French rolling pin is a surgeon’s scalpel. It is the ultimate expression of minimalist kitchen design, proving once again that the best tools are often the simplest. Professional pastry chefs and seasoned bakers rarely use anything else, and once you understand how it works, you will immediately see why.
What Exactly is a French Tapered Pin?
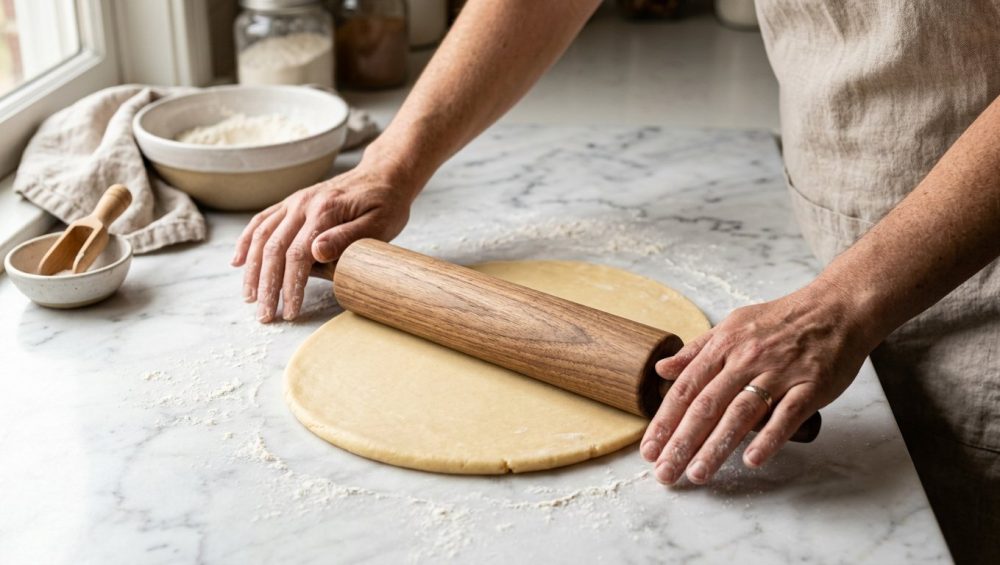
A traditional French rolling pin is a single, solid piece of turned hardwood. It has no handles, no metal rods, and no ball bearings to rust or squeak. It typically measures between 18 and 20 inches in length. The center of the pin is a thick, straight barrel (usually about 1.5 to 2 inches in diameter) that gently tapers off toward both ends.
Because there are no handles, you place your hands directly on the wood itself. You can rest your palms gently on the tapered ends, or you can place your hands flat on the center of the barrel. This direct physical connection changes absolutely everything about how you interact with your food. The wood becomes an extension of your own hands. As you roll, the vibrations and resistance of the dough travel straight through the solid wood and into your palms. You can literally feel a cold, hard chunk of butter. You can feel if the left side of the dough is a millimeter thicker than the right side. You are no longer guessing; you are reading the dough through touch.
The Physics of the Pivot: Why Tapered Ends Matter
The true genius of the French rolling pin lies in those gently tapered ends. They are not just there for aesthetic elegance; they serve a highly specific mechanical purpose. Rolling out a perfect circle of dough requires constant maneuvering. With a heavy, flat-ended American pin, you have to physically lift the entire heavy tool off the counter, rotate it, and place it back down to change your rolling angle.
With a tapered French pin, you never have to lift the tool. You simply apply a tiny bit of downward pressure to one of the tapered ends, and the entire pin effortlessly pivots in a circle like a compass. This allows you to smoothly and continuously roll the dough outward in a radial pattern, gently coaxing the pastry into a flawless, even circle without ever dragging or tearing the delicate edges. It is an elegant, fluid dance. It is incredibly frustrating to deal with, but you can easily fix a lopsided pie crust if you simply pivot your tapered pin and apply targeted, minute pressure exactly where the dough needs to be thinned out.
The Solid Wood Advantage: Banishing Toxic and Gimmicky Gear
As a home cook who values efficiency and health, I have a strict “no-go” policy when it comes to cheap, toxic, or gimmicky kitchen equipment. The modern kitchenware market is flooded with brightly colored, heavily marketed garbage that promises to make your life easier but actually actively ruins your food. It is time to banish toxic kitchen gear from your home and invest in materials that have stood the test of time for centuries.
Why We Say No to Silicone, Hollow Metal, and Plastic
Let us address the horrors of modern rolling pin materials. Plastic rolling pins are lightweight, flimsy, and prone to micro-scratches. These microscopic gouges in the plastic become breeding grounds for bacteria, and as the plastic degrades, it can shed microplastics directly into your food. Nobody wants a side of polymer with their apple pie.
Then there are silicone-coated rolling pins. Manufacturers claim these are “non-stick,” but anyone who has actually used one knows this is a lie. Silicone has a naturally grippy texture. When it gets warm, or when it comes into contact with the fat in your pie dough, it acts like a magnet, tearing the top layer of your pastry right off the counter. Furthermore, cheap silicone coatings can peel or degrade over time.
Solid wood, on the other hand, is nature’s perfect baking material. Hardwoods are naturally antimicrobial. They have a micro-porous surface that holds onto just a microscopic dusting of flour, creating a naturally non-stick barrier between the pin and the dough without the need for toxic chemical coatings. Wood also has a high specific heat capacity, meaning it does not conduct heat quickly. It will not melt the butter in your dough the way a warm metal or glass pin will.
Choosing the Right Wood: Maple, Cherry, or Walnut?
When you are ready to purchase a French rolling pin, you will notice that they are typically crafted from three main types of hardwood: maple, cherry, and walnut. Do not buy cheap bamboo composites; bamboo is technically a grass, and bamboo rolling pins are made of dozens of strips glued together with harsh industrial adhesives that can delaminate and splinter over time. Stick to solid, single-piece hardwoods.
Hard Maple: This is the undisputed gold standard for rolling pins. Maple is incredibly dense, heavy, and tightly grained. Because the grain is so tight, it will not absorb moisture, odors, or fats from your dough. It is incredibly resistant to abrasion and warping. It has a beautiful, light, creamy color that looks stunning in any kitchen. If you want a pin that will outlive you, buy hard maple.
Cherry: Cherry wood is slightly softer than maple but still highly durable and excellent for baking. It features a gorgeous, smooth texture and a rich, reddish-brown hue that naturally deepens and oxidizes over time as it is exposed to light and air. It is a stunning piece of functional art.
Black Walnut: For those who prefer a heavier tool, walnut is a spectacular choice. It is a dense, hard wood with a lush, dark chocolate color. The extra weight of a walnut pin means the tool does a little more of the heavy lifting for you, allowing you to apply even less downward pressure when rolling out stiff, chilled doughs.
When you are building your collection of essential tools for beginners, you should view a solid hardwood French rolling pin not just as a utensil, but as a lifelong culinary companion. It is an heirloom piece that costs less than a week’s worth of takeout coffee.
Step-by-Step: How to Wield a French Rolling Pin Like a Pro
Owning a French rolling pin is only half the battle; knowing how to use it is where the real magic happens. If you are used to the aggressive, back-and-forth sawing motion of an American pin, you need to completely retrain your muscle memory. Rolling out dough with a French pin is an exercise in mindfulness, gentle persuasion, and technique.
Step 1: The Flour Dusting and Dough Prep
Before the pin even touches the dough, your environment must be prepared. We all know that measuring your flour correctly is the foundation of a good dough, but how you flour your work surface is equally critical. You do not want a mountain of flour on your counter; you want a sheer, translucent veil of flour. Toss a small handful of flour across your work surface with a sweeping motion to create an even, microscopic layer.
Take your chilled disk of dough out of the fridge. Let it sit at room temperature for about five to ten minutes. If you try to roll dough that is rock-hard, it will immediately crack and tear, regardless of what pin you use. You want the butter to be cold, but the dough needs to be slightly malleable. Always keep a stainless steel bench scraper nearby to help you lift and rotate the dough without tearing it with your warm fingers.
Step 2: The Center-Out Push
Place your French pin directly in the center of the dough disk. Rest your hands lightly on the tapered ends. Do not grip it like a baseball bat.
Instead of rolling back and forth, you are going to roll in one direction: from the center, outward. Press down gently in the middle of the dough and push the pin away from you, stopping about an inch before you reach the edge. Never roll completely off the edge of the dough! Rolling over the edge flattens it out, making the perimeter of your pie crust paper-thin, fragile, and prone to tearing.
Pick the pin up, place it back in the center, and roll toward yourself, again stopping just short of the edge. You are coaxing the dough outward, stretching the gluten gently rather than forcing it into submission.
Step 3: The Quarter Turn and Pivot
After you have rolled forward and backward, it is time to move the dough. Use your bench scraper to gently lift the dough and rotate it exactly 90 degrees (a quarter turn). Give the counter another microscopic dusting of flour if necessary.
This quarter turn is the secret to a perfectly round, tear-free crust. It ensures that the dough is not sticking to the counter, and it guarantees that you are applying pressure evenly across all axes of the circle. As the circle gets larger, use the tapered ends of your French pin to pivot. Press lightly on the right taper to fan the left side of the pin outward, smoothing out any uneven bumps or thick spots in the dough. You will feel like a maestro conducting an orchestra.
Step 4: Reading the Dough Through Your Palms
As you continue the center-out roll and the quarter-turn rotation, pay close attention to the sensory feedback traveling through the wood. If the dough starts to feel sticky, or if the pin feels like it is dragging rather than gliding, your butter is melting. Stop immediately. Do not force it. Transfer the dough to a baking sheet and put it in the freezer for five minutes to firm back up.
If you feel a thick ridge of dough under the wood, do not smash it flat. Gently rest the pin on the ridge and use short, light, outward strokes to taper the thickness down to match the rest of the circle. Because your hands are directly over the dough, you have the fine motor control necessary to make these micro-adjustments without tearing the surrounding pastry.
Beyond Pie Crusts: The Versatility of the French Pin
While the French rolling pin is famous for saving pie crusts, its utility in the kitchen extends far beyond Thanksgiving desserts. Because it is a solid, handle-less piece of hardwood, it is one of the most versatile, multi-functional tools you can own. It is a workhorse that will earn its keep on a daily basis.
Conquering Sugar Cookies and Tarts
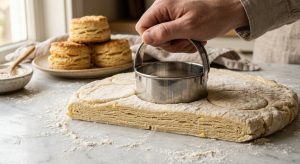
When you are making cutout sugar cookies, gingerbread men, or elegant French fruit tarts, an even thickness is absolutely mandatory. If one side of your cookie dough is thicker than the other, the thin cookies will burn into bitter, blackened discs before the thick cookies have even baked through. The simple act of chilling your cookie dough can completely change its texture, making it stiff and difficult to roll with a clunky American pin.
The French pin allows you to apply firm, even body weight across the entire surface of the stiff cookie dough. You can easily feel the thickness of the dough through the wood, ensuring that your entire batch is rolled to a perfect, uniform quarter-inch. While many people love their silicone baking mats for certain tasks, rolling sticky cookie dough directly on them can be a nightmare; instead, roll your dough on a lightly floured counter with your wooden French pin for ultimate control, then transfer the cutouts to your baking sheet.
Smashing, Crushing, and Tenderizing (The Secret Weapon)
Here is where the solid hardwood construction really shines. Because there are no delicate ball bearings to break or handles to snap off, your French rolling pin doubles as a blunt-force kitchen tool.
Need to crush graham crackers or digestive biscuits for a cheesecake crust? Put them in a zip-top bag and gently whack them with the heavy barrel of your French pin. Need to crack whole peppercorns or coriander seeds but do not feel like hauling out the heavy mortar and pestle? Place the spices on your cutting board, lay the flat barrel of the pin over them, and press down firmly with the heel of your hand to crush them instantly.
You can even use it to tenderize meat. Place a tough chicken breast or a cheap cut of steak between two pieces of plastic wrap, and use the barrel of the French pin to gently pound the meat to an even thickness for quick weekday pan-searing. Just be sure to wash the pin thoroughly afterward.
Maintenance and Care: Keeping Your Wooden Pin Pristine
A high-quality hardwood French rolling pin will easily outlast you and can be passed down to the next generation of home bakers—provided you take care of it properly. Wood is a living, breathing material. It responds to its environment, and it requires a tiny bit of mindful maintenance to stay in pristine condition.
The Golden Rule: Never Use the Dishwasher
I cannot stress this enough: never, ever, under any circumstances, put your wooden rolling pin in the dishwasher. The extreme heat, the harsh, abrasive alkaline detergents, and the prolonged exposure to water will strip the natural oils from the wood. The pin will warp, splinter, and crack, rendering it completely useless and destroying its smooth surface.
To clean your French pin, simply take a bench scraper or a plastic spatula and gently scrape off any stuck-on bits of dough or flour. Then, wipe the pin down with a warm, slightly damp cloth. If you used it to pound meat or crush greasy nuts, you can use a tiny drop of mild dish soap on a sponge, but rinse it immediately and dry it thoroughly with a clean towel. Never leave it submerged in a sink full of water.
Oiling and Conditioning for Lifelong Use
Just like human skin, natural wood needs to be moisturized to prevent it from drying out and cracking. The rules for preventing wood from cracking are universal across all your wooden kitchen tools. Once every few months—or whenever the wood starts to look a little dry, dull, or ashy—you need to condition it.
Use a food-grade mineral oil, or a specialized wood conditioner made from a blend of mineral oil and natural beeswax. Do not use olive oil, vegetable oil, or any other cooking oil, as these organic fats will eventually go rancid and make your rolling pin smell like an old deep fryer.
Apply a generous coat of mineral oil to the entire surface of the pin using a clean cloth or paper towel. Let the oil soak into the wood grain for at least twenty minutes, or even overnight. Then, take a dry cloth and buff away any excess oil until the pin feels smooth, sleek, and perfectly dry to the touch. A well-conditioned French rolling pin will repel moisture, resist staining, and maintain that naturally non-stick, velvety surface that makes rolling dough an absolute joy.
The Verdict: Upgrading Your Baking Arsenal
Baking is often described as an exact science, a rigid discipline where one wrong move ruins the whole project. While it is true that baking requires precision, it should also be a tactile, joyful, and deeply satisfying experience. You should not be fighting your ingredients, and you certainly should not be fighting your equipment.
Even the most foolproof recipes for beginners will fail if you are trying to execute them with clumsy, poorly designed tools that actively work against you. The traditional American handled rolling pin is a relic of bad ergonomic design. It encourages heavy-handedness, uneven pressure, and a total lack of sensory connection to your food, resulting in torn, tough, and frustrating pastry dough.
By upgrading to a minimalist, solid hardwood French rolling pin, you are doing more than just buying a new kitchen gadget. You are fundamentally changing the way you interact with your dough. You are gaining the tactile feedback necessary to feel the temperature of the butter and the tension of the gluten. You are utilizing the physics of the tapered pivot to effortlessly shape perfect circles. You are taking back control of your kitchen.
So, do yourself a favor. Take that squeaky, handled torture device, throw it in the donation bin, and invest in a beautiful piece of maple, cherry, or walnut. Stop tearing your pie dough, stop stressing over your weekend baking projects, and start rolling like the confident, capable home cook you truly are. Your pies—and your sanity—will thank you.