
Picture this: It is 10:00 PM on a Friday. You have poured your heart, soul, and premium European butter into a batch of chocolate chip cookie dough. You slide the tray into the oven, pour yourself a well-deserved glass of wine, and wait for the culinary magic to happen. But when the timer finally dings, you do not pull out a tray of bakery-worthy perfection. Instead, you are greeted by a tragic, chaotic tray of mutant cookies. Some are burnt, lacy puddles; others are raw, doughy blobs; and a few have merged into a single, monstrous mega-cookie that covers half the pan.
You blame the oven. You blame the recipe. You might even blame the humidity or the alignment of the stars. But let me stop you right there, my friend. The culprit is sitting right on your counter: it is those two messy spoons you used to portion the dough.
Welcome to the definitive masterclass on why your cookies bake unevenly, and the sheer genius of the kitchen’s most unsung hero—the spring-loaded scoop. As a home cook, you absolutely do not need a culinary degree to make mind-blowing, professional-level food in a standard residential kitchen. You just need to stop sabotaging yourself with inefficient methods. Eyeballing your dough size is one of those classic rookie kitchen mistakes that will consistently ruin your weekend baking projects. Today, we are banishing the guesswork, embracing the science of thermodynamics, and revolutionizing your baking game forever.
The Thermodynamics of a Ruined Cookie (Why Size Matters)
I have zero patience for pretentious chef-speak, but if we want to fix your baking, we need to talk about physics. Baking a cookie is not just a quaint domestic activity; it is a violent, chaotic chemical reaction. When you place a tray of raw dough into a 350-degree oven, you are initiating a complex transfer of energy.
According to the first law of thermodynamics, energy cannot be created or destroyed, only transformed. In your kitchen, the electrical or gas energy of your oven is transformed into thermal energy. This heat is then transferred to your cookie dough through convection (hot air circulating around the oven) and conduction (the hot metal pan making direct contact with the bottom of the dough).
The Science of Thermal Mass
Here is where the two-spoon method destroys your dreams. Every individual ball of cookie dough has a specific thermal mass, which dictates how much heat energy it takes to raise its internal temperature.
Let us say you haphazardly drop one dough ball that weighs 1 ounce, and right next to it, you drop a dough ball that weighs 2 ounces. The smaller cookie has exactly half the thermal mass of the larger one. As the oven aggressively pumps thermal energy into the pan, the 1-ounce cookie reaches 300°F—the temperature where the Maillard reaction (the chemical reaction between amino acids and reducing sugars that gives browned food its distinctive flavor) kicks into high gear—much faster than the 2-ounce cookie.
By the time the large cookie has finally absorbed enough energy to melt its fats and gelatinize its starches in the center, the small cookie has completely dehydrated and carbonized into a hockey puck. You cannot bake two different volumes of mass in the same environment and expect them to finish at the same time. It defies the laws of physics.
Oven Hot Spots and Heat Distribution
To make matters worse, residential ovens are notorious liars. They are riddled with hot spots and cold zones. If you place inconsistently sized cookies into an oven with uneven heat distribution, you are essentially playing culinary Russian roulette. A small cookie placed in a hot spot will burn in minutes, while a massive dough blob in a cold corner will remain raw entirely. Uniform volume is the only way to establish a baseline of control in an inherently chaotic environment.
The Two-Spoon Method is a Culinary Crime
If you are still using a soup spoon and a teaspoon to scrape sticky dough onto a baking sheet, we need to have a serious intervention. Ditching the two spoons is the first critical step to fixing your chaotic cooking routine and actually enjoying the process of making food.
Wasted Time and Messy Kitchens
Time is money, especially when you are trying to clean up the kitchen after a long day. The two-spoon method is infuriatingly slow. You scoop with one spoon, scrape with the other, inevitably get dough all over your fingers, wash your hands, dry your hands, and repeat. It turns a simple five-minute prep job into a twenty-minute sticky ordeal. Weekday cooking and weekend baking should be efficient, streamlined, and joyful—not a frustrating battle against sticky ingredients.
The Illusion of “Rustic” Baking
Often, home bakers will look at their jagged, asymmetrical, unevenly browned cookies and lovingly refer to them as “rustic.” Let us be brutally honest: “rustic” is just a polite, socially acceptable word for “I messed up the portioning.”
When dough is dropped from a spoon, it forms jagged peaks and thin, wispy edges. Those thin edges have almost zero thermal mass, meaning they will burn and turn bitter before the center of the cookie even begins to bake. True bakery-quality cookies are uniform, perfectly round, and evenly baked from edge to center.
Enter the Spring-Loaded Scoop (Your Kitchen’s Unsung Hero)
The solution to all of this thermodynamic chaos is a simple, mechanical tool that has been around for over a century: the spring-loaded scoop, professionally known as a culinary disher. This is without a doubt one of the most essential beginner kitchen tools you can possibly own, and its history is as brilliant as its functionality.
The Brilliant Legacy of Alfred L. Cralle
We owe our perfectly round cookies to Alfred L. Cralle, a Black businessman and inventor born in Virginia in 1866. While working in Pittsburgh, Cralle noticed that servers at a local hotel were struggling immensely to scoop ice cream. They were using two hands and two separate utensils to pry the sticky, frozen treat out of the carton, much like you struggle with your cookie dough today.
Recognizing the gross inefficiency, Cralle engineered a brilliant solution. On February 2, 1897, he patented the “Ice Cream Mold and Disher”. His design featured a mechanical lever and a built-in sweeping blade that allowed the user to scoop and release sticky substances with just one hand. Over 125 years later, his fundamental mechanical design remains the gold standard in professional kitchens worldwide.
What Exactly is a Culinary Disher?
It is crucial to understand that a spring-loaded disher is not an ice cream scoop. In the culinary industry, an ice cream scoop is a solid, heavy-duty spade designed to chisel through rock-hard frozen dairy. A disher, on the other hand, is a precision portioning tool designed for soft, malleable products like doughs, batters, mashed potatoes, and ground meats. Using a disher for hard ice cream is the fastest way to break its internal gears, but using it for cookie dough is pure magic.
The “No-Go” Rule: Banishing Toxic Garbage from Your Kitchen
Before you run out and buy a disher, we need to establish my strict “No-Go” rule. I absolutely despise cheap, toxic kitchenware. The market is flooded with garbage scoops made from mystery metals, cheap aluminum, and flimsy plastics that have no business touching your food.
Do not ever buy a scoop with a non-stick coating. These coatings inevitably chip and peel under the friction of the sweeping blade, depositing toxic flakes of forever chemicals directly into your baked goods. Furthermore, avoid raw aluminum scoops. Aluminum is a highly reactive metal. When it comes into contact with acidic ingredients (like brown sugar or cocoa powder) or alkaline ingredients (like baking soda), it oxidizes. This oxidation will literally turn your beautiful cookie dough an unappetizing shade of metallic gray.
You must only invest in a high-quality, 18/8 stainless steel disher. Stainless steel is non-reactive, incredibly durable, completely non-toxic, and dishwasher safe. A heavy-duty stainless steel scoop will cost you a few extra dollars upfront, but it will last you a lifetime and keep your food safe.
The Mechanics of Perfection: How the Scoop Guarantees Even Baking
When you use a high-quality stainless steel disher, you are completely eliminating human error from the portioning process. Combine a perfectly uniform scoop with the secret power of chilling dough, and you will achieve bakery-level thickness and texture every single time.
Uniform Volume Equals Uniform Baking
By pressing the dough firmly into the bowl of the disher and leveling it off, you are guaranteeing that every single cookie has the exact same volume, and therefore, the exact same thermal mass. When that tray goes into the oven, every cookie requires the exact same amount of thermal energy to bake. They will all reach the Maillard reaction simultaneously. They will all gelatinize their starches simultaneously. You will pull out a tray where the cookie in the front left corner is just as perfectly baked as the cookie in the back right corner.
The Perfect Dome: Surface Area to Volume Ratio
Beyond just weight, the disher creates a perfect geometric dome. In baking, the surface-area-to-volume ratio is critical. A jagged, spoon-dropped cookie has a massive surface area with thin, vulnerable edges. A perfectly scooped dome minimizes surface area relative to its volume.
As the spherical dome heats up in the oven, the butter melts evenly from the outside in. The dough spreads outward in a perfect, symmetrical circle. Because there are no wispy, jagged edges, the entire perimeter of the cookie browns at the exact same rate, leaving you with crispy edges and a deeply gooey, soft center.
Sizing Decoded: What the Numbers Actually Mean
If you have ever looked at professional dishers, you have likely noticed they are categorized by numbers: #16, #20, #40, etc. To the uninitiated, these numbers seem completely arbitrary. However, they are based on a very specific, mathematical industry standard. While weighing your ingredients with a digital kitchen scale is crucial for making the batter perfectly, the numbered scoop handles the final portioning.
The Scoop Math Formula
The number stamped on the sweeping blade or the handle of a disher represents the number of level scoops it takes to fill one standard quart (which is 32 fluid ounces).
The formula is brilliantly simple: 32 ÷ Scoop Number = Fluid Ounces per Scoop.
For example, if you have a #16 scoop, you divide 32 by 16, which equals 2. Therefore, a #16 scoop holds exactly 2 fluid ounces (or 1/4 cup) of volume. If you have a #40 scoop, you divide 32 by 40, which equals 0.75 fluid ounces (or 1.5 tablespoons).
Which Sizes Should You Actually Buy?
You do not need to buy the entire rainbow of color-coded scoops. For a highly functional home kitchen, you only really need three sizes to cover 99% of your culinary needs:
- The #60 Scoop (1 Tablespoon / 0.5 oz): This is your precision tool. It is absolutely perfect for portioning rich chocolate truffles, shaping mini meatballs for Italian wedding soup, or making bite-sized, miniature cookies.
- The #40 Scoop (1.5 Tablespoons / 0.75 oz): This is the workhorse. It is the standard size for traditional, everyday chocolate chip cookies, standard dinner meatballs, and perfectly portioned falafel.
- The #20 Scoop (3.5 Tablespoons / 1.875 oz): This is your jumbo tool. If you want to make massive, bakery-style, palm-sized cookies, this is the scoop you need. It is also the absolute perfect volume for filling standard muffin and cupcake tins without dripping batter everywhere.
Beyond Cookies: The Ultimate Time-Saving Multitasker
While we are focusing heavily on baking, the true genius of the spring-loaded scoop is its versatility. I am a firm believer that time is money, especially on a frantic Tuesday evening. A multi-use tool like this is the secret to maintaining a permanently organized kitchen without overflowing your drawers with single-use gadgets.
Meatballs, Falafel, and Fritters
If you have ever tried to roll meatballs by hand, you know it is a nightmare. Your hands get coated in a thick layer of raw ground meat, and the meatballs always end up in wildly different sizes. This is a massive food safety issue. If you bake inconsistently sized meatballs, the small ones will dry out into tough little pebbles, while the massive ones will remain dangerously raw in the center.
Using a #40 scoop allows you to rapidly portion perfectly uniform meatballs directly onto a baking sheet. You do not even need to roll them in your hands; the scoop creates a perfect dome that bakes beautifully. The exact same logic applies to frying falafel, portioning potato pancakes, or dropping corn fritters into hot oil.
Muffins, Cupcakes, and Pancakes
Pouring liquid batter from a heavy bowl into a muffin tin is a recipe for disaster. You inevitably drip batter onto the metal pan, which immediately burns in the oven and fills your kitchen with smoke. A #20 disher allows you to cleanly transfer wet batters from the bowl to the tin with zero drips. Every single muffin will bake to the exact same height, giving you a professional, uniform presentation.
For weekend breakfasts, using a disher for pancake batter guarantees that every pancake finishes cooking at the same time, making flipping and serving a breeze.
Masterclass Technique: How to Use Your Scoop Like a Pro
Owning a professional tool is only half the battle; you must know how to use it correctly. Just like I always tell you to stop scooping your flour directly from the compacted bag, there is a right and wrong way to scoop your cookie dough.
The Scoop and Scrape Method
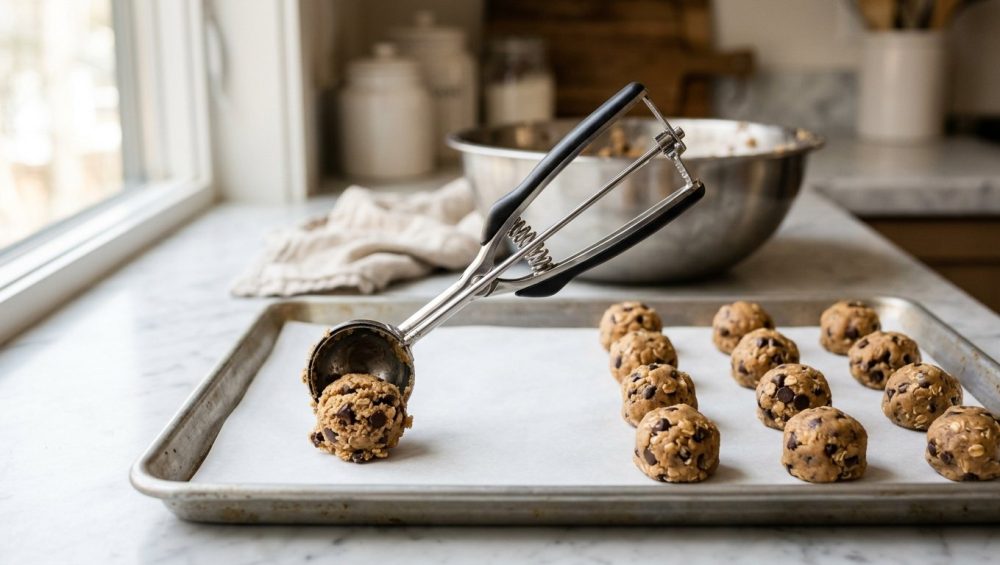
Do not just gently dig the disher into the bowl. To achieve perfect volumetric consistency, you must pack the dough into the scoop. Plunge the disher deep into the chilled dough, filling the bowl completely. Then, press the open face of the scoop firmly against the inside wall of your mixing bowl and drag it upward.
This “scoop and scrape” motion does two things: it forcefully packs the dough into the hemisphere, eliminating any hidden air pockets, and it shears off the excess dough perfectly flush with the rim. When you squeeze the spring-loaded handle, the sweeping blade will cleanly eject a flawless, flat-bottomed hemisphere of dough.
The Temperature Factor
Dishers work best with dough that has structure. If your cookie dough is too warm and greasy, it will stick to the sweeping blade and deform upon release. Always chill your dough for at least 30 minutes before scooping. The cold temperature solidifies the butter, giving the dough the structural integrity needed to pop out of the disher cleanly.
Troubleshooting Your Bake: It’s Not Always the Scoop’s Fault
If you have invested in a high-quality stainless steel scoop, mastered the scoop-and-scrape technique, and your cookies are still baking unevenly, it is time to audit the rest of your equipment. The scoop guarantees uniform thermal mass, but it cannot fix a broken thermal environment.
If your baking sheets keep warping violently in the oven, that uneven, buckled surface will cause the melting butter to pool on one side, ruining your perfectly scooped dough. You must use heavy-gauge, bare aluminum half-sheet pans that remain dead-flat under high heat.
Furthermore, examine what you are lining your pans with. And do not get me started on the hidden flaw in silicone baking mats that prevents proper browning. Silicone is a thermal insulator; it actively blocks the conductive heat of the pan from reaching the bottom of your cookie. For the best results with your newly scooped dough, stick to standard, unbleached parchment paper. It provides a non-stick surface without interfering with the thermodynamics of the bake.
Maintenance and Care for Your Culinary Disher
A high-quality 18/8 stainless steel disher is a rugged piece of mechanical engineering, but it still requires proper maintenance to ensure the spring and gear mechanism continue to operate smoothly for decades.
Cleaning the Mechanism
Never let sticky dough, batters, or raw meat dry inside the mechanical crevices of the scoop. The sweeping blade is attached to a small gear system housed near the handle. If starches dry inside these gears, the scoop will jam, and the handle will become impossibly stiff.
Immediately after use, drop the scoop into a bowl of hot, soapy water. If you bought a professional stainless steel model, it is entirely dishwasher safe. However, for longevity, I recommend keeping it open and running hot water directly through the gear mechanism to blast away any hidden debris before running it through a cycle.
What to Do When It Jams
If your disher ever feels stiff or squeaky, do not force it. Forcing a jammed handle will bend the sweeping blade out of alignment. Instead, soak it in boiling water to dissolve any hardened sugars or starches. Once clean and dry, apply a single drop of food-safe mineral oil to the gear mechanism and work the handle back and forth. It will spring back to life instantly.
The Bottom Line for the Home Baker
Recent statistics show that despite the convenience of store-bought goods, a dedicated core of consumers—roughly 11%—still bake at home at least once a week. Furthermore, engaged home bakers are investing heavily in their craft, spending nearly three times as much on ingredients as occasional bakers. If you are going to spend your hard-earned money on premium vanilla bean paste and high-fat European butter, you owe it to yourself to portion that expensive dough correctly.
Baking should not be a stressful game of chance. You have the power to control the thermodynamics of your oven simply by controlling the volume of your ingredients. Throw away those sticky spoons. Banish the toxic, peeling gadgets to the garbage bin. Invest in a heavy-duty, stainless steel spring-loaded scoop. It really is one of those simple steps to culinary artistry that requires zero culinary school debt. You can absolutely bake like an expert—you just need the right gear to let your talent shine.






