
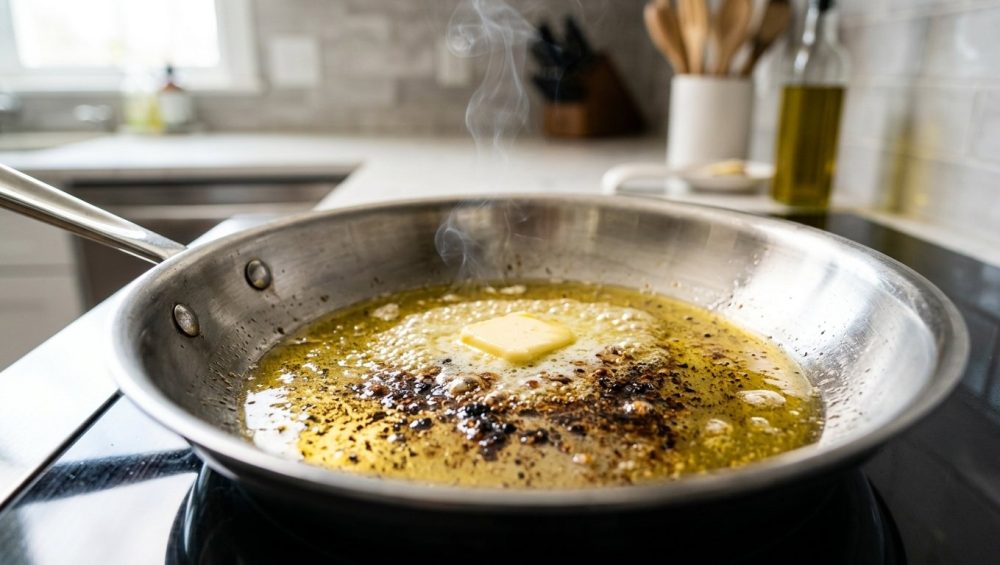
Listen up, weekend warriors and weeknight survivors. We need to have a serious, glass-of-wine-in-hand intervention about what is happening in your skillet. You’ve had a long day, you’ve finally decided to treat yourself to a gorgeous, thick-cut ribeye or a delicate piece of fish, and you drop a generous knob of beautiful, expensive butter into a ripping hot pan. Within ten seconds, your kitchen sounds like a warzone, a plume of acrid gray smoke hits the ceiling, and your smoke detector starts screaming the song of its people.
Your butter is black. Your dinner tastes like a bitter charcoal briquette. And you are left wondering why cooking feels like a punishment.
If you want to be the kind of home cook who has stopped burning dinner every night, you have to stop blindly following terrible internet advice. You do not need a culinary degree to cook like a professional in your own kitchen; you just need a basic understanding of thermal dynamics and the willingness to call out kitchen myths when you see them. Today, we are tearing down the most pervasive, stubbornly persistent lie in the culinary world: the idea that mixing a little oil into your butter will somehow magically prevent it from burning.
Spoiler alert: It doesn’t. Physics doesn’t care about your olive oil.
We are going to exhaustively break down the molecular anatomy of butter, scientifically debunk the oil-and-butter myth, and equip you with the actual, functional techniques—like clarification, the arroser method, and masterful heat modulation—that will allow you to harness the rich, nutty power of butter without smoking out your apartment.
The Anatomy of Butter: Why Your Pan Looks Like a Crime Scene
To understand why your butter is violently combusting, we first have to look at what butter actually is. In the United States, commercial butter is mandated by the USDA to contain a minimum of 80% butterfat. But it’s the other 20% that causes all the chaos in your skillet.
The Three Pillars of Butter
Butter is essentially a water-in-oil emulsion, and it is composed of three distinct elements:
- Butterfat (approx. 80-82%): This is the pure, glorious lipid content. It is stable, rich, and can actually withstand relatively high temperatures on its own.
- Water (approx. 15-18%): Yes, butter is nearly one-fifth water. This moisture is trapped within the fat matrix during the churning process.
- Milk Solids (approx. 1-2%): These are the residual proteins (casein and whey) and sugars (lactose) left over from the cream. Though they make up a tiny fraction of the butter, they are the absolute dictators of flavor and color.
The Thermal Danger Zone
When you drop a cold pat of butter into a hot pan, a rapid, violent sequence of physical and chemical reactions occurs. Understanding this sequence is the key to controlling it.
First, as the temperature in the pan hits 212°F (100°C), the trapped water phase undergoes a rapid transition from liquid to gas. The water boils and flashes into steam, forcing its way out of the fat matrix. This violent evaporation is exactly why your butter always splatters and foams up aggressively when it hits the heat. The foam you see isn’t the butter “cooking”—it is steam escaping through a fragile film of lipids.
Once the water has completely evaporated—indicated by the sudden cessation of the bubbling and popping sounds—the temperature of the remaining fat and milk solids skyrockets.
Between 250°F and 300°F (120°C to 150°C), the milk solids begin to toast. The proteins and lactose undergo the Maillard reaction, browning beautifully and developing those intoxicating, nutty, caramel-like aromas we associate with brown butter (beurre noisette).
But here is where the tragedy strikes: at around 350°F (175°C), those delicate milk solids cross the point of no return. They stop browning and start carbonizing. They burn, turning into bitter, acrid, blackened specks of ruined potential. If you are trying to sear a steak, your pan is likely sitting somewhere between 400°F and 500°F. At those temperatures, raw butter doesn’t stand a chance. It is a thermodynamic impossibility for the milk solids to survive.
The Great “Oil and Butter” Myth Debunked
Now we arrive at the granddaddy of all culinary misconceptions. If you’ve ever watched a morning cooking show or read a vintage recipe blog, you’ve undoubtedly heard this “hack”: Just add a splash of vegetable or olive oil to the pan with your butter! The oil raises the smoke point and stops the butter from burning!
I say this with all the love in my heart, but that is absolute, unadulterated nonsense.
Physics Doesn’t Care About Your Olive Oil
Let’s get one thing straight: adding a high-smoke-point oil (like avocado, grapeseed, or canola) to butter does absolutely nothing to alter the chemical composition of the milk solids. The lactose and proteins are still sitting right there in the pan.
Think of it this way: if you sit in a sauna that is 350°F, you are going to burn. If you sit in that same 350°F sauna while holding a glass of water that can withstand higher temperatures, you are still going to burn.
When your pan reaches 350°F, the milk solids in the butter will combust. The surrounding oil does not act as a magical, heat-deflecting forcefield. The proteins will scorch, turn black, and release bitter-tasting furans and benzopyrenes into your food. If your steaks turn out gray, it’s usually because you were terrified of burning your butter and kept the heat too low, resulting in a steamed piece of meat rather than a seared one. Conversely, if you cranked the heat to get a crust, your oil-and-butter mixture still burned.
Why the Myth Persists
So why do so many people, including some professional chefs, swear by this trick? Are they all lying? Not intentionally. There are two scientific reasons why this myth refuses to die:
First, dilution. If you have a pan full of burned butter, it tastes overwhelmingly bitter. If you have a pan full of neutral oil with a little bit of burned butter in it, the bitter flavor is diluted across a larger volume of fat. It still tastes bad, but it’s slightly less aggressive on the palate, tricking people into thinking the butter didn’t burn as badly.
Second, specific heat capacity and thermal mass. Oil heats up slightly slower than butter. When you add cold oil and cold butter to a pan together, the increased volume of fat takes marginally longer to heat up, delaying the water evaporation and subsequent browning by perhaps 30 to 60 seconds. It buys you a tiny window of time, but it does not change the ultimate temperature threshold. Once the pan hits 350°F, the solids burn. Period.
The Maillard Reaction vs. Straight-Up Combustion
To truly master the kitchen, you have to respect the fine line between flavor development and total destruction. We want the Maillard reaction; we do not want combustion.
The Maillard reaction is a complex chemical dance between amino acids (proteins) and reducing sugars that occurs when food is heated. In butter, this reaction happens to the milk solids, creating hundreds of new flavor compounds that taste like toasted hazelnuts, caramel, and butterscotch. This is the holy grail of flavor.
However, heat is a blunt instrument. When you are cooking a delicate piece of fish or sautéing vegetables, you can keep the pan at a moderate 300°F (150°C), allowing the butter to brown slowly and beautifully. But for high-heat applications—like getting a steakhouse-quality crust on a piece of beef—you need temperatures that will instantly incinerate those solids. Furthermore, you must stop adding garlic first into a screaming hot pan for the exact same reason; minced garlic will burn and turn bitter just as fast as butter solids.
So, how do we get the rich flavor of butter on a high-heat sear without the bitter burnt taste? We rely on actual, professional techniques.
Solution 1: Clarified Butter and Ghee (The High-Heat Heroes)
If the milk solids are the culprit behind your smoking skillet, the most logical solution is to evict them entirely. This is where clarified butter and its deeply toasted cousin, ghee, come into play.
By removing the water and the milk solids from the equation, you are left with 100% pure butterfat. Pure butterfat is a high-heat powerhouse, boasting a smoke point of roughly 450°F to 485°F (232°C to 252°C). It behaves just like a refined cooking oil, but it retains a distinct, luxurious buttery flavor.
How to Clarify Butter Like a Pro
Because time is money, especially on a Tuesday night when you just want to get dinner on the table, I do not recommend clarifying butter every single time you cook. Make a large batch on a Sunday afternoon, store it in a glass jar in your pantry (it is shelf-stable for months because the spoilage-prone water and dairy proteins are gone), and use it all week long.
- The Melt: Place a pound of high-quality, unsalted butter into a heavy-bottomed saucepan over the lowest possible heat. Do not rush this. Let it melt gently.
- The Separation: As the butter melts, it will naturally separate into three layers. A white, foamy layer of whey proteins will rise to the top. The pure, golden butterfat will sit in the middle. The heavier casein proteins and water will sink to the bottom.
- The Skim: Once the bubbling subsides (meaning the water has evaporated), use a spoon to meticulously skim the white foam off the top.
- The Pour: Carefully pour the clear, golden butterfat into a clean glass jar, leaving the sunken milk solids behind in the pot.
You now have clarified butter. You can sear a steak in this at 450°F, and it will not burn.
The Magic of Ghee
Ghee is the traditional Indian variation of clarified butter, and it takes the flavor profile one step further. To make ghee, you follow the exact same process as clarifying, but instead of immediately removing it from the heat once the water evaporates, you let it continue to cook on low.
The milk solids at the bottom of the pot will begin to toast, turning a deep golden brown. This infuses the pure butterfat with an incredible, nutty, aromatic depth. Once the solids are browned, you strain the liquid through a cheesecloth to remove them. You get the high smoke point of clarified butter, combined with the intoxicating flavor of brown butter. It is a secret weapon that every home cook should have in their arsenal.
Solution 2: The Arroser Technique (End-Stage Basting)
Let’s say you don’t have any clarified butter on hand, but you still want that classic, rich, raw-butter flavor on your pan-seared steak or pork chop. You cannot cook the meat in butter from start to finish. Instead, you must use the classic French technique known as arroser, which translates to “to baste.”
This is how high-end steakhouses achieve that perfect, edge-to-edge crust while still delivering a massive hit of butter flavor.
Step 1: The High-Heat Sear
Start your meat in a pan with a truly high-smoke-point fat. Tallow, grapeseed oil, avocado oil, or even clarified butter. Get the pan screaming hot. Lay the steak down and let the intense heat do its job, creating a gorgeous Maillard crust on the exterior of the meat. Flip the steak to sear the other side. Up to this point, raw butter is absolutely nowhere near the pan.
Step 2: The Temperature Drop
Once your steak is about two minutes away from being perfectly cooked (roughly 10 to 15 degrees shy of your target internal temperature), it is time to modulate the heat. Turn your burner down to medium-low. If you are using an electric or induction stove that holds heat stubbornly, you may even need to slide the pan off the burner for thirty seconds. You must wait for the pan to cool down below that critical 350°F threshold.
Step 3: The Tilt and Spoon Maneuver
Now, drop a generous knob of cold, unsalted butter into the pan, along with your aromatics (a smashed clove of garlic, a sprig of fresh thyme or rosemary). Because the pan has cooled slightly, the butter will melt and foam vigorously, but it will not instantly turn black.
Grab the handle of the skillet and tilt it slightly toward you, so the melting butter, oil, and rendered meat juices pool at the bottom edge. Using a large spoon, rapidly and continuously scoop up this foaming, aromatic fat and bathe the top of the steak with it.
This continuous basting does three things:
- It cooks the top of the steak gently with hot fat, speeding up the cooking process.
- It infuses the meat with the flavor of the butter and herbs.
- The physical act of moving the butter around the pan and over the cooler meat regulates the temperature of the fat, preventing the milk solids from sitting in one hot spot and burning.
By the time your steak hits its perfect internal temperature, your butter will have reached a beautiful, golden-brown noisette stage. Pull the meat out to rest, and pour that glorious pan sauce right over the top.
Solution 3: Masterful Heat Modulation for Weeknight Dinners
While the arroser technique is brilliant for weekend culinary projects, sometimes you are just trying to get some scrambled eggs or sautéed vegetables on the table on a frantic Wednesday night. For everyday cooking, preventing burnt butter comes down to mastering heat modulation.
The Cold Pan Start
If you are cooking something delicate that doesn’t require a hard sear—like sweating onions for a soup base, or lightly toasting pine nuts—do not preheat your pan. Place your cold butter and your cold ingredients into a cold pan, and turn the heat to medium-low.
By starting cold, the ingredients and the butter heat up together. The moisture from the onions (or whatever vegetable you are sweating) will release into the pan before the butter reaches its smoke point. This added moisture caps the temperature of the pan at 212°F (the boiling point of water) until the water evaporates, acting as a natural thermal shield that completely protects the milk solids from burning.
Managing Carryover Heat and Emulsions
Another vital technique is understanding that your pan stays hot long after you turn off the burner. If you are making a delicate pan sauce, you should never boil raw butter. The intense heat will not only burn the solids, but it will completely break the emulsion, leaving you with a greasy, separated mess.
Instead, rely on the secret power of cold butter. When your wine or broth has reduced, take the skillet completely off the heat source. Wait a moment for the bubbling to stop. Then, aggressively whisk in cubes of fridge-cold butter. The residual heat of the pan and the liquid is more than enough to melt the butter gently, while the cold temperature of the butter rapidly cools the sauce down, preventing the solids from scorching and forcing the fat and liquid to emulsify into a silky, glossy masterpiece.
The “No-Go” Gear Warning: Stop Cooking on Toxic Trash
I cannot write a definitive masterclass on pan-searing and temperature control without addressing the elephant in the room: the actual pan you are using. As a staunch advocate for the home cook, I have a strict, zero-tolerance policy for cheap, toxic, poorly manufactured kitchenware.
If you are trying to execute high-heat sears or delicate butter basting in a $15 scratched Teflon pan you bought at a supermarket five years ago, you are actively sabotaging your food and your health.
The Teflon Tragedy
Traditional non-stick coatings (PTFE) are absolutely fundamentally incompatible with high-heat cooking. When these pans are heated past 500°F (a temperature easily reached when preheating a pan for a steak), the chemical coating begins to break down, releasing invisible, toxic fumes that can literally cause flu-like symptoms in humans and are fatal to pet birds. Furthermore, as the coating degrades, it flakes off into your food.
If you are using aerosol cooking sprays on these pans, you are making it worse. The propellants and emulsifiers in those sprays carbonize at low temperatures, creating a sticky, polymerized micro-layer on the pan. This is exactly why cooking spray is the enemy of non-stick surfaces; it builds up over time and completely destroys the non-stick properties.
The Holy Trinity of Safe Cookware
If you want to cook like an expert, you need to use the materials the experts use. They are safer, they last a lifetime, and they actually allow you to control heat properly.
- Fully Clad Stainless Steel: A high-quality, heavy-bottomed, multi-ply stainless steel skillet is the workhorse of the kitchen. Because of the aluminum or copper core sandwiched between the steel, it distributes heat perfectly evenly. This means no “hot spots” that will spontaneously burn your butter. Yes, food can stick to steel, but if you learn proper temperature control and utilize the Leidenfrost effect, you can easily achieve stick-free searing on stainless steel. If you drop cold protein into a cold steel pan, it will bond like superglue, which is why everything sticks to your stainless steel when you don’t preheat it properly.
- Carbon Steel: The darling of professional restaurant kitchens. It is lighter than cast iron, responds incredibly fast to temperature changes (crucial for dropping the heat before butter-basting), and once properly seasoned, is as slick as any toxic non-stick pan on the market.
- Cast Iron: The ultimate heat-retainer. It takes a long time to heat up, but once it gets hot, it stays hot. This makes it phenomenal for the initial sear on a steak. However, you must maintain it. Stop soaking it in the sink, stop putting it in the dishwasher, and stop ruining your cast iron by aggressively scraping off your hard-earned seasoning with harsh abrasives.
Throw away your peeling, scratched non-stick skillets. I am begging you. Start banishing toxic kitchen gear from your cabinets today. Your food will taste better, your butter will brown more evenly, and you won’t be ingesting mystery chemicals with your Tuesday night chicken breast.
Conclusion: Empowering the Home Cook
Cooking is not magic; it is applied physics and chemistry wrapped in an apron. The moment you stop blindly following old wives’ tales—like the myth of oil preventing butter from burning—and start understanding the actual mechanics of your ingredients, the kitchen stops being a place of stress and starts being a place of creation.
You now know that milk solids have a strict thermal limit of 350°F. You know that oil cannot save them from combustion. You know how to clarify your butter to remove the volatile solids, how to use the arroser technique to baste your meats safely, and how to modulate your pan’s temperature to protect delicate pan sauces.
You have all the tools you need. So pour yourself that glass of wine, turn on the stove, and go make something incredible. Just leave the smoke detector out of it this time.






