
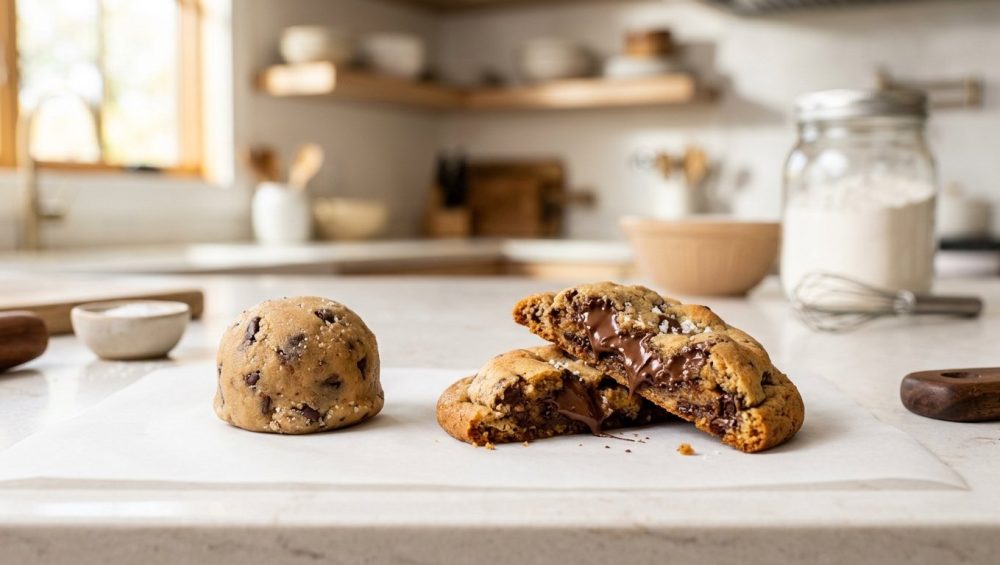
Listen, we’ve all been there. You spend your precious weekend meticulously measuring ingredients, dreaming of those thick, bakery-style chocolate chip cookies that look like they belong in a magazine. You slide the tray into the oven, set the timer, and pour yourself a well-deserved glass of wine. But when the buzzer goes off, you peer through the glass and your heart sinks. Instead of gorgeous, domed masterpieces, you are staring at a single, greasy, interconnected continental plate of dough. You’ve baked a cookie puddle.
It is infuriating, it is demoralizing, and frankly, it is a waste of good chocolate. But before you throw your whisk across the kitchen and swear off baking forever, let’s get one thing straight: you do not need a culinary degree to fix this. You don’t need a professional bakery setup or a pretentious chef screaming at you. You just need to understand a little bit of kitchen science. Baking is not magic; it is chemistry. And right now, your chemistry is out of whack.
When your cookies spread into giant puddles, it is a structural failure. It means the fats melted and the liquids expanded long before the proteins in your flour and eggs had a chance to set and hold the shape. Today, we are going to tear down the anatomy of a cookie, isolate exactly where you are going wrong, and rebuild your technique from the ground up. We are going to talk about butter melting points, gluten hydration, and why your cheap, toxic baking gear is actively sabotaging your life. Grab your apron and your attitude, because we are fixing this once and for all.
The Anatomy of a Cookie Puddle: Why Your Dough Gives Up
To stop the spread, you have to understand what actually happens when a ball of dough enters a 350°F environment. The moment that tray hits the heat, a high-stakes race begins between the melting ingredients and the setting ingredients. If the melters win, you get a puddle. If the setters win, you get a rock. If they tie, you get perfection.
The Great Butter Meltdown (68°F to 85°F)
Let’s talk about butter, the undisputed diva of the pastry world. Butter is an emulsion. It is roughly 80 percent butterfat, 15 percent water, and 5 percent milk solids. That 15 percent water is crucial because, as it heats up, it turns into steam and helps puff the cookie. But the 80 percent fat is where things go off the rails.
Butter has a remarkably narrow melting point. It begins to soften at around 68°F and turns into a complete liquid puddle between 82°F and 97°F. Now, consider the temperature of your kitchen, the friction from your stand mixer, and the heat of your own hands while rolling the dough. By the time your cookies go into the oven, that butter might already be hovering dangerously close to its melting point.
When dough enters a hot oven, the butter begins to melt almost immediately. As it liquefies, the dough loses its structural integrity and begins to flatten out. Meanwhile, the proteins in the flour and the eggs—the structural scaffolding of your cookie—do not begin to coagulate and set until they reach about 144°F to 160°F. If your butter melts completely at 90°F, and your eggs don’t set until 144°F, your dough has a massive temperature gap where it is doing nothing but spreading into a greasy disc.
The Flour-to-Fat Ratio Trap
If butter is the liquid instigator, flour is the structural defender. The ratio of flour to fat in your recipe dictates the final spread. If you have too much butter and not enough flour, there simply isn’t enough starch and protein to absorb the melting fat, resulting in a lacey, wafer-thin mess.
Flour provides two things: starches that gelatinize to absorb moisture, and proteins (glutenin and gliadin) that link together to form a web-like structure called gluten. This gluten web traps the steam and the expanding gases from your leavening agents. If your dough is too wet (meaning the hydration level is too high relative to the flour), that web collapses under the weight of the melting fat. You need enough flour to hold the line, but not so much that you end up baking a hockey puck.
Sugar Science: White vs. Brown
You might think sugar is just there for sweetness, but in the baking world, sugar is a structural liquid. Yes, you read that right. Sugar is highly hygroscopic, which is a fancy way of saying it aggressively attracts and holds onto water. When sugar heats up in the oven, it dissolves into the water provided by the butter and the eggs, effectively thinning out the dough and encouraging spread.
The ratio of white sugar to brown sugar heavily influences your cookie’s footprint. White granulated sugar is neutral and highly crystalline. It melts quickly and spreads outward, giving you those crispy, caramelized edges. Brown sugar, on the other hand, contains molasses. Molasses is slightly acidic, which reacts with baking soda to create a faster upward lift, and it introduces extra moisture that makes the cookie chewier and thicker. If you use 100% white sugar, your cookies will spread significantly more than if you use a blend of white and brown.
The Magic of Chilling: Why the Fridge is Your Secret Weapon
If there is one absolute, non-negotiable rule I enforce in my kitchen, it is this: you must chill your cookie dough. I know, I know. You want cookies right now. You don’t want to wait 24 hours. But remember our golden rule: time is money, except when it comes to weekend baking projects, where time is flavor and structure. Skipping the chill is the number one reason rookie bakers fail. Here is the hardcore science behind why resting your dough is mandatory for thick, professional-quality results.
Re-Solidifying the Lipids
Remember that terrifying temperature gap between the butter melting and the eggs setting? Chilling the dough is how you close that gap. When you put your dough in the refrigerator for at least two hours (or ideally overnight), you force the butterfat to re-solidify into firm, cold crystals.
When rock-cold dough enters a 350°F oven, the butter takes significantly longer to reach its melting point. By the time the butter finally liquefies, the outer edges of the cookie have already heated up enough for the flour and egg proteins to coagulate and set. The edges form a solid wall, trapping the rest of the melting dough inside, forcing the cookie to bake upward into a thick, glorious dome rather than outward into a puddle.
Hydrating the Gluten (The 24-Hour Rule)
Chilling isn’t just about temperature; it’s about hydration. When you first mix your dough, the flour is essentially just sitting in a pool of wet ingredients. It takes time for the starches and proteins in the flour to fully absorb the water from the eggs and the butter.
During a 24-hour rest in the fridge, the flour acts like a slow sponge. It drinks up the free moisture, which makes the dough significantly thicker, firmer, and less prone to spreading. This hydration process also softens the proteins, meaning the resulting cookie will be dense and chewy rather than dry and crumbly. If you bake the dough immediately, that free moisture turns to steam too quickly or thins out the dough, leading to a flat, spread-out mess.
Flavor Development and the Maillard Reaction
As a snarky culinary blogger, I refuse to let you serve bland food. Resting your dough doesn’t just fix the spread; it fundamentally alters the flavor profile. As the dough sits, enzymes begin breaking down the complex carbohydrates in the flour into simple sugars, and the proteins into individual amino acids.
These free sugars and amino acids are the fuel for the Maillard reaction—the chemical process that occurs above 285°F where food turns beautifully brown and develops deep, complex, caramel, and butterscotch flavors. A cookie baked immediately tastes like sweet flour. A cookie baked after a 48-hour chill tastes like a professional bakery masterpiece.
Flour Power: Are You Measuring Like a Rookie?
Let’s have a brutally honest conversation about how you are measuring your ingredients. If you are still shoving a plastic measuring cup into a densely packed bag of flour, you are the architect of your own demise. Baking is a game of precise ratios, and volume measurements are a chaotic gamble.
The Scoop and Level Disaster
When you plunge a measuring cup into a bag of flour, you are compressing the ingredient. Depending on how heavy-handed you are, a single “cup” of flour can weigh anywhere from 120 grams to 160 grams. If a recipe calls for two and a quarter cups of flour, and you are scooping aggressively, you might accidentally add an extra 90 grams of flour to your dough. That is nearly an entire extra cup!
Conversely, if you sift the flour or spoon it too lightly, you might end up with far too little flour. As we established earlier, a lack of flour means a lack of structure, which guarantees a flat, greasy cookie. You have to stop scooping your flour with a cup and hoping for the best. It is a rookie mistake that I simply will not tolerate in a modern kitchen.
The Undeniable Truth of Grams
The only way to guarantee perfectly thick cookies every single time is to weigh your ingredients. You need a highly accurate digital kitchen scale. Period. End of discussion.
When you weigh your flour (standard all-purpose flour is generally agreed to be 120 grams per cup), you are adding the exact chemical mass required to balance the fat and sugar in the recipe. A scale eliminates the guesswork, speeds up your prep time (no more washing five different measuring cups), and ensures that your dough has the exact structural integrity needed to fight off the dreaded oven spread.
The Butter Dilemma: Creamed, Melted, or Browned?
The physical state of your butter before you mix it into the dough plays a massive role in how the cookie behaves in the oven. Different recipes call for different techniques, and substituting one for the other without adjusting the rest of the formula is a one-way ticket to Puddleville.
The Creaming Method
Most classic recipes require creaming softened butter and sugar together until light and fluffy. This process physically punches tiny air pockets into the butter, which are held in place by the sharp edges of the sugar crystals. In the oven, your leavening agents (baking soda or powder) expand these air pockets, giving the cookie a cakey, lifted texture.
However, if your butter is too warm when you cream it (anything above 70°F), it won’t hold the air. The emulsion breaks, the butter turns greasy, and the resulting cookie will be dense and flat. Your butter should be “cool room temperature”—around 65°F to 68°F. It should yield slightly when you press it with a finger, but it should not look shiny or greasy.
The Melted Butter Route
Some modern, chewy cookie recipes call for melted butter. Melted butter creates a denser, fudgier texture because it does not trap air like creamed butter does. Because melted butter makes cookies chewier, it is a favorite for weekend hobbyists looking for a brownie-like center.
But here is the catch: if you use melted butter, your dough will be incredibly soft and wet. If you bake it immediately, it will spread into an unrecognizable slick of grease. Recipes utilizing melted or browned butter must be chilled thoroughly to allow the melted fat to re-solidify before hitting the oven.
Oven Temperatures: The Silent Killer of Perfect Cookies
You’ve weighed your flour in grams. You’ve chilled your dough for 48 hours. You put the cookies in the oven, and they still spread. What gives? It is time to look at the giant metal box in your kitchen, because chances are, it is lying to you.
Why Your Appliance is Lying to You
Home ovens are notoriously inaccurate. When you set your oven to 350°F, the internal temperature could actually be hovering anywhere from 315°F to 385°F. Furthermore, ovens cycle on and off to maintain heat, meaning the temperature constantly fluctuates.
If your oven is running cold (say, 325°F instead of 350°F), the butter in your dough will melt long before the oven is hot enough to set the flour and egg proteins. A slow, low bake encourages maximum spread. Conversely, a hotter oven (375°F) hits the dough with a blast of heat that sets the outer edges immediately, halting the spread and resulting in a thicker, chunkier cookie with a gooey center.
If you don’t know what temperature your oven actually is, you are flying blind. You must invest in a cheap, reliable oven thermometer. Place it right in the center of the middle rack. You might be shocked to find out that your “350°F” oven takes an extra 20 minutes to actually reach that temperature.
The Convection Conundrum
If you have a convection oven (one with a fan that circulates the hot air), you need to adjust your strategy. Convection baking accelerates heat transfer, which can be great for roasting chickens but tricky for delicate cookies. The fast-moving hot air can sometimes blow the dough outward, or set the crust so quickly that the inside remains completely raw. If you use the convection setting, always drop the recipe’s temperature by 25°F and keep a close eye on the spread rate.
The Baking Sheet Betrayal: Ditching Toxic Gear for Good
Alright, buckle up, because this is where I get really fired up. You can have the perfect dough, the perfect chill, and the perfect oven, but if you are baking on garbage equipment, your cookies are doomed. As your sassy sous-chef, I have a strict “no-go” rule on cheap, toxic kitchenware.
The Danger of Flimsy, Peeling Non-Stick Pans
If you are using a scratched, peeling, lightweight non-stick baking sheet you bought at a discount store ten years ago, throw it in the trash immediately. Traditional non-stick coatings are often made with PFAS (per- and polyfluoroalkyl substances), commonly known as “forever chemicals”. When these pans are subjected to high heat or become scratched, they can degrade and leach toxic compounds. We do not serve a side of endocrine disruptors with our chocolate chip cookies.
Beyond the health hazards, dark non-stick pans absorb heat aggressively. This blasts the bottom of your cookie with intense thermal radiation, causing the fat to melt too quickly and the bottom to burn before the center is cooked. Furthermore, cheap, thin metal pans cannot handle thermal shock. If your baking sheets warp and twist violently in the oven, it creates an uneven surface, causing your melting dough to slide into misshapen puddles.
And don’t even get me started on the auditory jump-scare when a cheap baking sheet pops in the oven. Invest in heavy-duty, uncoated, thick-gauge aluminized steel or pure aluminum half-sheet pans. They conduct heat evenly, they don’t warp, and they don’t poison your food.
Parchment Paper vs. Silicone
The surface you bake on also dictates how much the dough will spread. A slick, greased baking sheet offers zero friction, meaning the dough will slide outward unimpeded. You need a liner to provide a bit of grip.
Parchment paper is the gold standard in professional kitchens. It provides just enough friction to slow down the spread while preventing sticking. However, many home bakers have switched to reusable silicone mats. While I appreciate the eco-friendly sentiment, you need to understand that silicone baking mats are thermal insulators. They block the direct heat of the pan from reaching the bottom of the cookie. This means the butter melts slower, which can reduce spread, but it also prevents the bottom of the cookie from getting crispy and caramelized. If you want a perfectly textured, thick cookie with a crisp edge, stick to unbleached parchment paper.
Troubleshooting the Spreading: Quick Fixes for the Home Cook
We’ve covered the deep science, but I know you are busy professionals who sometimes just need to get dessert on the table without a 48-hour fermentation process. Here are my favorite time-saving hacks and quick fixes to ensure thick cookies when you are on the clock.
The “Scoop and Freeze” Time-Saver
If you don’t have time to let a giant bowl of dough rest in the fridge for a day, you can accelerate the lipid-solidifying process by portioning first. Once your dough is mixed, immediately use a spring-loaded cookie scoop to portion the soft dough into balls. Place the balls close together on a small tray and throw them directly into the freezer for 15 to 20 minutes.
Because the individual dough balls have a much smaller thermal mass than a giant bowl of dough, the freezer will flash-chill the butter in a fraction of the time. You won’t get the deep flavor development of a 24-hour hydration, but you will successfully halt the dreaded oven spread. Plus, keeping a stash of frozen, pre-scooped dough balls in a zip-top bag means you can bake two or three perfect cookies on a random Tuesday night in under 15 minutes. Efficiency is everything.
The Baking Soda vs. Baking Powder Pivot
If your recipe is consistently spreading too much despite your best efforts with temperature control, take a look at the leavening agents. Baking soda (sodium bicarbonate) is highly alkaline. It encourages outward spread and speeds up the Maillard browning reaction. Baking powder, which contains its own acid, encourages upward lift and a puffier, more cake-like texture.
If you want a thicker cookie, try replacing half of the baking soda in your recipe with an equal amount of baking powder. The added acidity will help the egg proteins coagulate slightly faster in the oven, setting the structure before the butter completely melts.
The Secret of the Tall Dough Ball
Geometry plays a role here, too. If you roll your dough into perfect, smooth spheres, they will naturally melt into flat circles. To combat spread, change the shape of the dough before it bakes. Instead of a sphere, form the dough into a tall cylinder—like a wine cork or a tater tot standing on its end. When the tall cylinder hits the oven, it has a much longer distance to collapse before it becomes flat. By the time it melts down into a normal cookie shape, the edges will have already set, leaving you with a wonderfully thick center.
Conclusion: Reclaiming Your Baking Confidence
Baking is not a mystical art reserved for people with French culinary degrees, and a flat cookie is not a personal failure. It is simply a thermodynamic equation that got slightly out of balance. By understanding the melting point of your butter, giving your flour time to hydrate, ditching the toxic, flimsy bakeware, and treating your oven temperature with a healthy dose of skepticism, you can take total control of your kitchen.
You no longer have to cross your fingers and pray to the pastry gods when you slide a tray into the oven. You have the science, you have the technique, and you have the snarky blessing of your favorite sous-chef. Now stop staring at your screen, go buy a digital scale, throw away that peeling non-stick pan, and go bake the thickest, most majestic batch of cookies your kitchen has ever seen. You’ve got this.






