
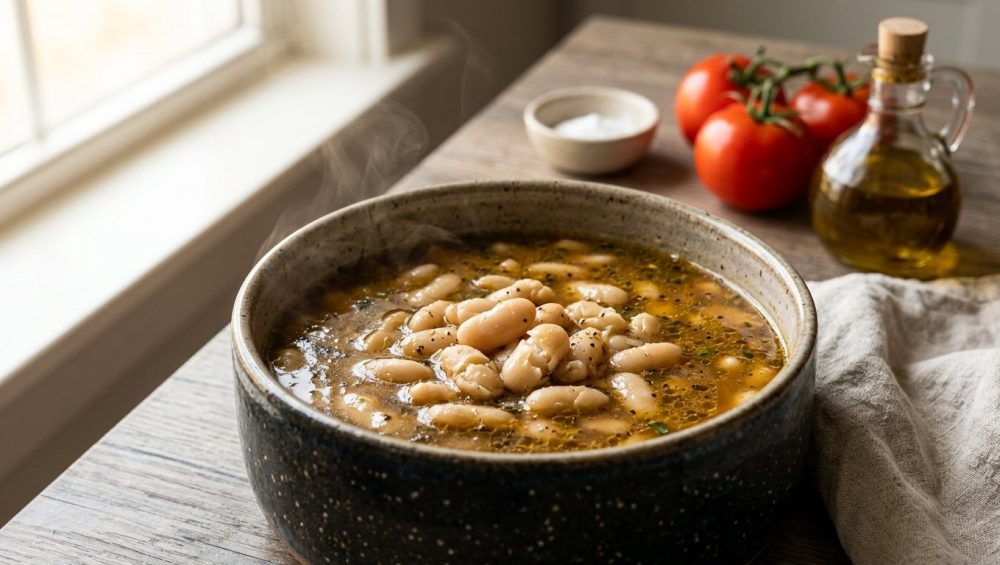
The frustration is a universal rite of passage for the home cook. Picture this: It’s Sunday afternoon. You’ve ambitiously decided to meal-prep like one of those hyper-organized culinary influencers. You’ve got a beautiful pot of dried beans simmering away on the stove. The kitchen smells like garlic, herbs, and rustic domestic bliss. Four hours go by. You scoop out a single, fragrant bean, blow on it delicately, pop it into your mouth, and bite down.
Crunch.
It’s like chewing on a piece of seasoned aquarium gravel. Frustrated, you add more water and let it boil for another two hours. Still crunchy. By the time 8:00 PM rolls around, you’re starving, defeated, and ordering a pizza, staring resentfully at a pot of legumes that have somehow defied the laws of thermodynamics.
If this sounds familiar, take a deep breath and pour yourself a glass of wine. You are not alone, and more importantly, it is not your fault. You don’t lack culinary talent, and you certainly don’t need a degree from Le Cordon Bleu to boil water. The reason your <a href="https://citchenware.com/blog/the-modern-recipe/why-your-beans-are-always-hard-stop-adding-tomatoes-too-early/">beans are always hard</a> usually comes down to basic, invisible kitchen chemistry.
Today, we are skipping the pretentious chef-speak and diving deep into the microscopic warfare happening inside your Dutch oven. We’re going to talk about cellular pectin, the sabotage of hard water, the hidden dangers of acidic ingredients, and the absolute magic of an alkaline soak. By the end of this masterclass, you will possess the foolproof, science-backed knowledge to produce perfectly creamy, melt-in-your-mouth beans every single time.
The 2026 Legume Renaissance
Before we get into the molecular structure of a pinto bean, let’s talk about why mastering this skill is so crucial right now. We are currently living in the golden age of the legume. According to recent market analysis from 2026, global volume sales of beans and pulses are actively outpacing meat sales in almost every region of the world. Between skyrocketing grocery prices, supply chain shocks, and a massive shift toward flexitarian diets, the humble bean has been elevated from a dusty pantry afterthought to the star of the modern dinner table.
But here’s the catch: while canned beans are convenient for a rushed Wednesday night, they simply cannot compete with the luxurious texture, rich broth, and profound flavor of beans cooked from scratch. Dried beans are exponentially cheaper, infinitely more delicious, and allow you to control the exact sodium levels and flavor profiles. If you are serious about <a href="https://citchenware.com/blog/the-modern-recipe/a-brutally-honest-guide-to-breaking-your-takeout-habit-and-conquering-the-kitchen/">breaking your takeout habit</a> and elevating your weekend cooking projects, conquering the dried bean is a mandatory rite of passage.
The Anatomy of a Stubborn Legume
To understand why beans refuse to soften, we have to look at how they are built. A dried bean is essentially a dormant seed, perfectly engineered by nature to survive harsh conditions, drought, and time until it is ready to sprout.
The Role of Pectin
The outer layer of the bean (the seed coat) and the inner cells (the cotyledon) are glued together by a complex carbohydrate called pectin. If you’ve ever made jam, you know pectin as the stuff that makes fruit juice gel and set. In a dried bean, pectin acts like microscopic mortar holding the cellular bricks together.
In order for a bean to transform from a rock-hard pebble into a creamy, tender bite, two things must happen:
- Water must penetrate the tough outer seed coat and hydrate the interior starches.
- The pectin holding the cells together must break down and dissolve.
If the pectin doesn’t dissolve, the cells remain rigidly locked together. You could boil those beans until the end of time, and they will still maintain their structural integrity. So, what prevents pectin from dissolving? I’m glad you asked. Enter the twin villains of the bean-cooking world: Calcium and Acid.
The Chemistry of Sabotage: Hard Water
Let’s start with the invisible enemy flowing right out of your kitchen faucet. If you live in an area with hard water, you are starting your cooking process at a massive disadvantage.
Hard water is water that contains high concentrations of dissolved minerals, primarily calcium and magnesium. While these minerals are perfectly safe to drink, they are absolute menaces in the kitchen. When you boil beans in hard water, the calcium and magnesium ions seek out the pectin molecules in the bean’s cell walls. They bind to the pectin, creating strong chemical cross-links.
Imagine the pectin as a chain-link fence. The calcium acts like heavy-duty padlocks snapping onto the links, reinforcing the fence and making it completely impenetrable. The longer you boil the beans in hard water, the more calcium binds to the pectin, fortifying the cellular walls until the bean is practically armored.
This is why <a href="https://citchenware.com/blog/the-modern-recipe/why-your-beans-fall-apart-stop-soaking-them-in-plain-water/">soaking them in plain water</a> overnight often yields incredibly disappointing results if your tap water is hard. You aren’t just hydrating the beans; you are slowly marinating them in a mineral bath that guarantees they will stay crunchy.
The Acid Trap: Tomatoes, Vinegar, and Wine
If hard water is the invisible enemy, acidic ingredients are the self-inflicted wound. This is the single most common rookie mistake I see home cooks make, and it breaks my heart every time.
You’re making a rustic Tuscan ribollita, a hearty chili, or a classic baked bean recipe. The recipe tells you to toss your dried beans, broth, onions, and a big can of crushed tomatoes into a pot and let it simmer. You do exactly what the recipe says, and hours later, your beans are still tough. Why?
The pH Problem
Pectin is highly sensitive to the pH of its environment. In order for pectin to break down and dissolve in hot water, the environment needs to be neutral or slightly alkaline.
Tomatoes, vinegar, wine, citrus juice, and even molasses are highly acidic. Tomatoes, for example, have a pH ranging from 4.3 to 4.9. When you introduce these acidic ingredients to the cooking liquid, you drastically lower the pH of the entire pot. In an acidic environment, the hemicellulose carbohydrate molecules and the pectin inside the bean’s cell walls become incredibly stable and refuse to break down.
When you add acid too early, you are essentially “setting” the exterior of the bean. The skin becomes tough, the interior remains dense, and no amount of boiling will reverse the process. This is the exact reason why <a href="https://citchenware.com/blog/the-art-of-the-kitchen/why-your-beans-stay-hard-the-hidden-trap-of-adding-tomatoes-too-early/">adding tomatoes too early</a> is a culinary death sentence for your legumes.
The Slow Cooker Disaster
This acidic reaction is also why so many dump-and-go slow cooker recipes fail spectacularly. Throwing raw beans, acidic tomatoes, and broth into a crockpot on “Low” for eight hours is a recipe for tragedy. The low temperature combined with the high acidity means the beans never reach the thermal threshold required to break down their fortified pectin. That is exactly why your <a href="https://citchenware.com/blog/kitchen-stories-solutions/why-your-slow-cooker-meals-turn-out-watery-and-how-to-fix-it/">turn out watery</a>, acidic, and full of crunchy shrapnel.
The Magic Bullet: The Alkaline Soak
Now that we understand the chemistry of why beans stay hard, let’s talk about how to manipulate that chemistry to our advantage. If acid and calcium are the villains, we need a hero. Enter Sodium Bicarbonate, commonly known as baking soda.
Turning Up the Base
If an acidic (low pH) environment strengthens pectin, it stands to reason that an alkaline (high pH) environment will weaken it. And science backs this up beautifully.
Adding a tiny amount of baking soda to your soaking water raises the pH, creating a slightly alkaline environment. This alkaline water penetrates the seed coat and aggressively attacks the pectin, rapidly hydrolyzing the cross-links that hold the cell walls together. Furthermore, the sodium ions in the baking soda help displace the calcium and magnesium ions in hard water, preventing them from locking down the bean’s structure.
The <a href="https://citchenware.com/blog/the-art-of-the-kitchen/stop-adding-sugar-to-tomato-sauce-the-secret-power-of-baking-soda/">secret power of baking soda</a> is so profound that controlled laboratory tests have shown that a 0.5% w/w sodium bicarbonate solution can accelerate water absorption by over 3 times and reduce stovetop cooking time by 25% to 40%. As a brilliant bonus, the alkaline soak also degrades up to 68% of the raffinose-family oligosaccharides—the complex sugars responsible for the infamous flatulence associated with beans. So yes, baking soda makes your beans softer, faster to cook, and significantly easier to digest.
The Salt Myth
For decades, culinary folklore dictated that you should never salt your beans until they are fully cooked, lest the salt make the skins tough. This is a complete and utter myth. In fact, the exact opposite is true.
Soaking your beans in a salty brine (sodium chloride) actually helps them soften. Just like the sodium in baking soda, the sodium ions in table salt swap places with the rigid calcium and magnesium ions in the bean skins. This ion exchange weakens the pectin network, allowing water to penetrate more easily.
The ultimate hack for perfect beans is a combination of both: a brine made of salt and a tiny pinch of baking soda.
Gear Talk: Ditch the Toxic Pots
Before we get to the exact step-by-step method, we need to have a serious conversation about your equipment. As a resourceful home cook who values health and efficiency, I have zero patience for cheap, toxic kitchenware.
If you are simmering beans for two to three hours, the vessel you use matters immensely. Acidic broths and long simmering times are the ultimate test of a pot’s integrity. If you are using a cheap, scratched non-stick pot from a big-box store, you are making a massive mistake. When those mystery chemical coatings heat up for extended periods, they can degrade, flake off, and leach toxic perfluoroalkyl and polyfluoroalkyl substances (PFAS) directly into your beautiful, organic beans.
I am a militant advocate for <a href="https://citchenware.com/blog/the-curators-corner/a-brutally-honest-masterclass-on-upgrading-your-cooking-skills-and-banishing-toxic-kitchen-gear/">banishing toxic kitchen gear</a> from your home. Stop poisoning your food just because a pan is allegedly easy to rinse out. You are actively <a href="https://citchenware.com/blog/the-art-of-the-kitchen/stop-ruining-your-nonstick-pans-why-cooking-spray-is-the-enemy/">ruining your nonstick pans</a> by subjecting them to long, heavy simmering anyway.
The Right Tools for the Job
For cooking beans, you need cookware with heavy thermal mass that distributes heat evenly and maintains a gentle, consistent simmer without scorching the bottom layer of legumes.
- Enameled Cast Iron: A high-quality enameled Dutch oven is the undisputed king of the bean pot. The heavy cast iron holds heat beautifully, while the glass-enamel coating is completely non-reactive, meaning it won’t leach metals or flavors into your food, even if you eventually add highly acidic tomatoes.
- High-Quality Stainless Steel: A heavy-bottomed, multi-clad stainless steel stockpot is your second-best option. It is durable, non-toxic, and safe for long simmers. (And if you ever use it for searing aromatics or meats before adding your beans, just remember to use the
<a href="https://citchenware.com/blog/the-art-of-the-kitchen/why-your-stainless-steel-pan-sticks-the-magic-of-the-water-drop-test/">water drop test</a>to ensure it’s properly preheated so nothing sticks). - The Pressure Cooker (Instant Pot): If you are prioritizing weekday efficiency because time is money, an electric pressure cooker is a phenomenal tool. The high-pressure environment forces water into the beans and raises the boiling point, breaking down pectin in a fraction of the time.
The Foolproof Masterclass: Step-by-Step Guide to Perfect Beans
We have covered the science, busted the myths, and upgraded your gear. Now, let’s put it all together into a rigorous, foolproof methodology. Follow these steps, and I guarantee you will produce the most luxurious, creamy, intact beans of your culinary life.
Step 1: The Sort and Rinse
Do not skip this. Dried beans are an agricultural product, and they are processed on massive sorting belts. It is incredibly common to find small stones, clumps of dirt, or shriveled, dead beans in the bag. Pour the beans onto a rimmed baking sheet, pick out any debris, and transfer the good beans to a colander for a thorough rinse under cold water.
Step 2: The Alkaline Brine Soak
The Ratio: 1 pound dried beans + 2 quarts water + 1.5 tablespoons kosher salt + 1/4 teaspoon baking soda.
Place your rinsed beans in a large bowl. Dissolve the salt and baking soda in the water, and pour it over the beans. Make sure the water covers the beans by at least three inches, as they will expand significantly.
Leave them on your counter to soak for 8 to 12 hours. If your kitchen is very hot, put them in the refrigerator to prevent them from fermenting.
A note on the baking soda: Do not exceed 1/4 teaspoon per pound of beans. Baking soda is highly alkaline, and if you use too much, it will saponify the fats in the beans, literally turning them into soap. A tiny pinch is all you need for the chemical reaction to take place.
Step 3: The Crucial Rinse
After the soak, your beans will look plump and slightly wrinkled. Dump them into a colander and rinse them thoroughly under cold running water. You want to wash away the soaking liquid, which now contains the dissolved flatulence-causing oligosaccharides, as well as the excess sodium and baking soda.
Step 4: The Simmer (Flavor Building)
Transfer your soaked, rinsed beans to your enameled Dutch oven. Cover them with fresh water or low-sodium chicken/vegetable broth by about two inches.
Now is the time to build your flavor canvas. Beans are sponges, and they will absorb whatever aromatics you throw at them. Add half an onion, a few smashed cloves of garlic, a bay leaf, and some black peppercorns.
Crucially, you must add fat. Beans contain almost zero natural fat, and fat is what carries flavor to your palate. A generous glug of high-quality olive oil, a rind of Parmesan cheese, or a smoked ham hock will transform the broth from watery to silky and rich.
Bring the pot to a rolling boil for exactly 10 minutes. This initial hard boil destroys a naturally occurring toxin called phytohaemagglutinin (particularly prevalent in kidney beans) that can cause severe gastric distress. After 10 minutes, drop the heat to the lowest possible setting, cover the pot with the lid slightly ajar, and let it barely simmer. A violent boil will smash the beans to pieces; a gentle simmer keeps them intact and creamy.
Step 5: The Acid Finish (Timing is Everything)
Check your beans after 45 minutes, though they may take up to 90 minutes depending on their age and size. You are looking for a texture that is completely tender, creamy all the way through, but still holding its shape.
Only when the beans have reached their absolutely perfect, tender final state do you introduce the acid. Now is the time to pour in your crushed tomatoes, a splash of red wine vinegar, or a squeeze of fresh lemon juice.
Once the acid is added, the pectin is locked in place. The beans will not soften any further. Let the pot simmer for another 15 minutes to allow the acidic flavors to meld with the starchy broth, taste for final seasoning (adding more salt if necessary), and remove from the heat.
Troubleshooting: Can You Save a Ruined Batch?
We’ve all been there. You didn’t read this article until it was too late. You skipped the soak, your tap water is hard enough to cut diamonds, you dumped a can of San Marzano tomatoes into the pot at hour one, and now your beans are crunchy little bullets of regret. Can they be saved?
The brutal, honest truth? Once the pectin has been firmly locked by acid and calcium, it is incredibly difficult to reverse the process. However, you have a few emergency options:
- The Baking Soda Hail Mary: If you haven’t added acid yet, but your hard water is keeping the beans tough after hours of simmering, stir 1/8 teaspoon of baking soda directly into the simmering pot. Be warned: this will cause the pot to foam aggressively, and if you add too much, your broth will taste metallic and soapy. But it can rapidly break down the stubborn pectin and save dinner.
- The Pressure Cooker Rescue: Transfer the stubborn beans and their liquid to an Instant Pot and blast them on high pressure for 20 minutes. The extreme heat and pressure can sometimes brute-force the pectin into submission, even in an acidic environment.
- The Pivot: If they are slightly underdone but edible, pull them off the stove, drain them, and toss them in a food processor with olive oil, garlic, tahini, and lemon juice. Congratulations, you just made a rustic, textured bean dip. Serve it with toasted pita and pretend it was your plan all along.
If you do happen to scorch the bottom of your stainless steel or bare cast iron pot during a rescue mission, do not throw the pot away. You simply <a href="https://citchenware.com/blog/the-curators-corner/stop-ruining-your-cast-iron-why-you-need-a-chainmail-scrubber/">need a chainmail scrubber</a> to effortlessly lift the burnt carbon off the metal without destroying the pan’s finish.
The Final Word
Cooking dried beans from scratch is not a dark art reserved for restaurant chefs. It is a fundamental, deeply rewarding culinary skill that relies entirely on a few basic rules of chemistry.
Respect the pectin. Neutralize your hard water with an alkaline brine. Ditch the toxic, peeling pots that ruin your food. And for the love of all things holy, keep your tomatoes far away from the pot until the very end.
Armed with this knowledge, you can confidently transform a two-dollar bag of dried legumes into a masterpiece of texture and flavor. So go forth, soak your beans, and show your kitchen who’s boss. You’ve got this.






