
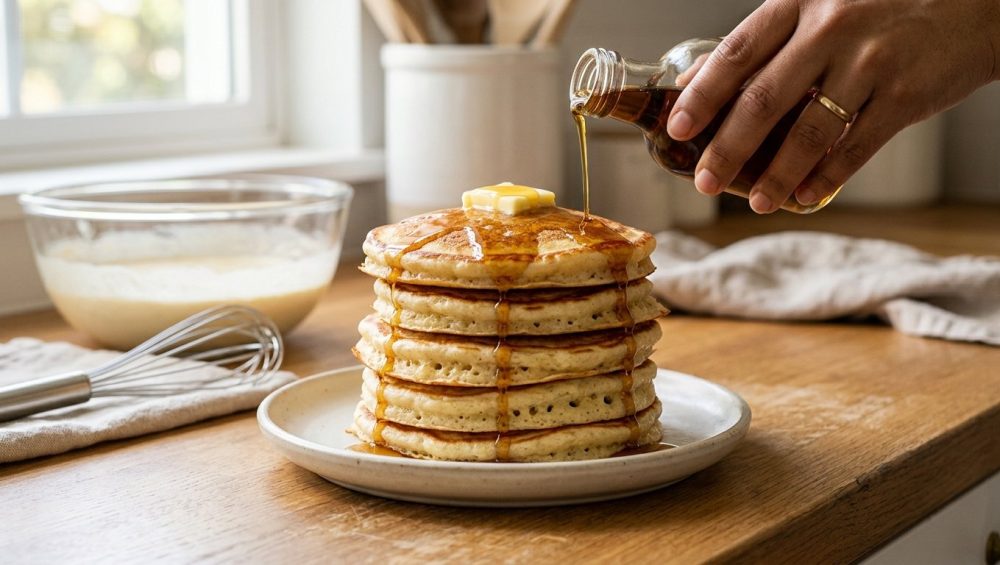
Listen, we have all been there. You wake up on a lazy Sunday morning, the coffee is brewing, and you decide you are going to treat yourself to a towering stack of golden, diner-style flapjacks. You whisk together your flour, milk, and eggs, pour the batter straight into the pan, and wait for the magic to happen. But instead of fluffy, sky-high clouds of carbohydrate bliss, you end up with flat, rubbery discs that require a steak knife to cut through and chew like a memory foam mattress.
You blame the recipe. You blame your stove. You might even blame the culinary gods. But the truth is much simpler, and it requires absolutely zero culinary degrees or pretentious chef-speak to fix. You simply did not give your batter time to rest.
As a home cook, I understand that during the workweek, time is money. When you are desperately trying to get out the door on a Tuesday morning, every second counts, and ditching your takeout habit means relying on ruthless efficiency. But the weekend is different. The weekend is your time to practice a little kitchen artistry, and that means respecting the basic chemistry of your ingredients. If you want professional-level results in a standard home kitchen, you have to let science do the heavy lifting. And in the case of pancakes, science demands a ten-minute timeout.
The Weekend Breakfast Trap: Why Your Flapjacks Bounce Back
Before we dive into the molecular biology of your breakfast, we need to address the crime scene that is the standard home pancake operation. Americans consume over 700 million servings of pancakes every single year, and a tragic percentage of those are dense, chewy, and thoroughly disappointing.
When you mix wet ingredients into dry ingredients, a cascade of chemical reactions begins immediately. If you immediately ladle that chaotic, highly reactive mixture onto a hot griddle, you are interrupting those processes before they have a chance to stabilize. The result is a batter that spreads too thin, cooks unevenly, and develops a tough, leathery exterior. Have you ever noticed that your pancakes burn on the outside but stay raw inside? That is the hallmark of an unrested, unhydrated batter hitting a hot pan.
The “first pancake is always a throwaway” rule is a myth perpetuated by impatient cooks. The reason your second and third batches always look and taste better is simply that the batter has finally had time to sit on the counter and rest while you were busy ruining the first batch. By intentionally building a resting period into your morning routine, every single pancake can be a masterpiece.
The Science of the Sit: What Happens When Batter Rests
We are going to banish the fluff and get straight to the facts. Resting your pancake batter for just 10 to 15 minutes triggers three distinct, crucial chemical processes that fundamentally alter the texture, lift, and flavor of your final dish. You do not need a laboratory to understand this; you just need to know how flour and baking powder behave when they get wet.
Flour Hydration: The Thirst of the Starches
Flour is a complex beast. It is packed with tightly coiled starches and proteins that are incredibly dry. When you first pour your milk, buttermilk, or water into the bowl, those dry particles do not instantly absorb the liquid. It takes time for the moisture to penetrate the starch granules.
If you cook the batter immediately, the free, unabsorbed liquid in the bowl simply turns to steam and evaporates on the griddle, leaving the unhydrated flour behind to form a dense, heavy puck. However, if you let the batter sit, the starches slowly act like microscopic sponges. They swell, expanding and absorbing the liquid. This hydration process naturally thickens the batter without requiring you to add extra flour. A thicker, fully hydrated batter holds its shape on the griddle, rising upward into a fluffy dome rather than spreading outward into a sad, thin crepe.
Of course, this assumes you are stop scooping your flour directly from the bag with a measuring cup, which packs it down and throws off your entire liquid-to-dry ratio. Use a kitchen scale, or at least spoon the flour into your cup and level it off. Accurate measurements combined with a proper resting period ensure optimal starch hydration.
Gluten Relaxation: Telling the Proteins to Chill Out
Here is where we tackle the rubbery texture. Wheat flour contains two specific proteins: glutenin and gliadin. When these proteins meet water and are subjected to mechanical action—like you aggressively attacking the bowl with a whisk—they link together to form a strong, elastic network called gluten.
Gluten is a miracle of nature when you are baking a chewy sourdough boule or a New York bagel. It provides structure and a satisfying, jaw-working chew. But in a pancake? Gluten is your absolute worst enemy. You want your pancakes to be tender, soft, and melt-in-your-mouth delicate.
When you mix the batter, you inevitably develop some gluten. It is unavoidable. But if you let the batter rest, those tight, stressed-out gluten strands begin to relax and soften. The protein network loosens its grip. This relaxation period is the ultimate secret to perfectly fluffy pancakes. Skipping this step means you are essentially throwing a tense, highly elastic dough onto the heat, where it will immediately seize up and become tough. Let the proteins chill out, and your jaw will thank you.
The Double-Acting Baking Powder Magic Trick
Most modern pancake recipes rely on baking powder for leavening. Specifically, they use double-acting baking powder, which is a brilliant piece of food engineering. As the name implies, it reacts and produces carbon dioxide gas bubbles in two distinct phases.
The first reaction happens the second the baking powder touches liquid. The second reaction happens when the baking powder is exposed to heat (i.e., when it hits your griddle). If you let your batter rest, that first reaction has time to fully execute. The batter will become noticeably bubbly and aerated in the bowl. Because the starches are simultaneously hydrating and thickening the batter, those gas bubbles get trapped in the matrix rather than escaping into the air.
When you finally scoop that aerated, thickened batter onto the hot pan, the heat triggers the second reaction. The trapped bubbles expand, and new bubbles form, pushing the pancake sky-high. If you rush the process, you miss out on the structural benefits of that crucial first rise.
The Anatomy of a Rubbery Pancake (A Post-Mortem)
To truly understand how to cook like a pro, we have to look at what goes wrong when we cook like amateurs. A rubbery pancake is not a mystery; it is the direct result of user error. Let’s dissect the two most common mistakes that ruin breakfast.
Overmixing: The Cardinal Sin of Breakfast
I see it all the time. A home cook pours the wet ingredients into the dry, grabs a whisk, and beats the mixture as if it owes them money. They are desperate to stir out the lumps because they have been conditioned to believe that all batters must be perfectly smooth.
This is the fastest way to ruin your morning. Overmixing is a fatal error for two reasons. First, it hyper-develops the gluten, creating that tough, chewy texture we just talked about. Second, it knocks all the air out of the batter, defeating the purpose of your leavening agents.
You want lumps. Lumps are your friends. When you mix pancake batter, you should use a gentle folding motion with a spatula, and you should stop the very second the last streak of dry flour disappears. The batter should look shaggy, ugly, and lumpy. During the ten-minute resting phase, those lumps of flour will naturally hydrate and dissolve on their own. Step away from the whisk.
The Heat Discrepancy: Thin Batter and Burnt Edges
When you skip the resting phase, your batter is too thin. You pour it into the pan, and it spreads out rapidly. Because the edges are thin, they cook incredibly fast, drying out and burning before the center of the pancake has even begun to set.
By the time you flip it, the outer ring is a brittle, scorched mess, and the middle is a dense, undercooked paste. A rested batter is viscous and holds its shape, creating a uniform thickness that allows the heat to penetrate evenly from edge to center.
How to Execute the Perfect Ten-Minute Rest
Implementing this technique requires zero extra effort, but it does require a slight adjustment to your workflow. Here is exactly how to pull it off without adding stress to your morning.
The Optimal Resting Environment
Once you have gently folded your batter together, just leave the bowl right there on the counter. Room temperature is the perfect environment for a standard 10 to 15-minute rest. You do not need to cover it with plastic wrap, and you absolutely should not put it in the refrigerator unless you are intentionally making an overnight batter (which alters the chemistry entirely).
Do not stir the batter after it has rested. I repeat: do not stir it. Stirring will deflate all those beautiful, trapped gas bubbles you just spent ten minutes cultivating. When it is time to cook, use a ladle or a measuring cup to gently scoop the batter directly from the bowl to the pan.
What to Do While You Wait (Because Time is Money)
I know what you are thinking: “I am hungry now. I don’t want to stand around staring at a bowl of lumpy liquid for ten minutes.”
You shouldn’t be standing around. This is where kitchen efficiency comes into play. Use this ten-minute window to set yourself up for success. This is the exact amount of time it takes to properly preheat your skillet over medium-low heat to ensure an even cooking surface. It is the perfect window to chop some fresh fruit, fry up a side of bacon, brew a fresh pot of coffee, or use your trusty bench scraper to quickly clear the flour dust off your countertops. By the time your prep work is done, your batter will be perfectly hydrated, relaxed, and ready to soar.
The “No-Go” Gear: Don’t Let Toxic Pans Ruin Good Science
Now, we need to have a serious conversation about your equipment. You can mix the perfect batter, rest it for exactly twelve minutes, and scoop it with the grace of a Michelin-starred chef—but if you drop it into a cheap, toxic, scratched-up pan, you are entirely wasting your time.
Ditching the Mystery Metal and Peeling Teflon
I have a strict, uncompromising rule in my kitchen: we do not cook on garbage. I actively despise cheap non-stick cookware. You know exactly the pans I am talking about. They are lightweight, they warp the second they get hot, and their dark chemical coatings inevitably begin to flake off into your food within six months of purchase.
Teflon (PTFE) and other “forever chemical” (PFAS) coatings are not just terrible for achieving a proper, golden-brown sear on your food; they are an environmental and health disaster. When cheap non-stick pans are heated past a certain temperature, they can off-gas toxic fumes. When they scratch, you end up eating microscopic flakes of mystery chemicals. It is time to banish toxic kitchen gear from your home once and for all.
Furthermore, you should never use aerosolized cooking sprays on non-stick surfaces, as the soy lecithin in the spray polymerizes at low temperatures and creates a sticky, impossible-to-remove residue. If you want a clean release, cooking spray is the enemy. Use real butter or a high-quality neutral oil. And while we are on the subject of bad gear, throw away those flimsy, brightly colored silicone turners that melt on the edges and taste like cheap soap. Invest in a proper, thin-edged stainless steel or high-heat flexible spatula that can slide cleanly under a delicate pancake without tearing it to shreds.
Safe, High-Quality Alternatives for Perfect Searing
If you want to cook like an expert, you need tools that offer real value, durability, and thermal mass. For pancakes, nothing beats the heat retention of a heavy cast iron skillet, an enameled cast iron griddle, or a thick carbon steel pan.
These materials take a few minutes to heat up—which is perfectly fine, since your batter is resting anyway—but once they are hot, they hold their temperature beautifully. This means when you drop a ladle of cold batter onto the surface, the pan’s temperature doesn’t plummet, ensuring an immediate, beautiful, golden-brown crust.
Yes, cast iron and carbon steel require a bit of maintenance. You have to understand the science of seasoning your carbon steel to build up a natural, non-toxic, non-stick layer of polymerized oil. But once you do, that pan will outlive you, it will never leach forever chemicals into your breakfast, and it will give your pancakes a perfectly crispy, buttery edge that a cheap Teflon pan could never dream of achieving.
Frequently Asked Questions About Pancake Batter
Even with the science laid out, the home kitchen is a place of variables. Here are the answers to the most common questions I get from frustrated weekend hobbyists who are trying to perfect their breakfast game.
Can I Rest the Batter Overnight?
Yes, but with a major caveat. If you mix a standard pancake batter containing double-acting baking powder and leave it in the fridge overnight, the first chemical reaction (the one triggered by moisture) will completely exhaust itself. The bubbles will rise, pop, and disappear. When you cook the batter the next morning, you will still get some lift from the heat-activated second reaction, but the pancakes will be noticeably denser than if you had only rested the batter for 15 minutes.
If you truly want to prep ahead, whisk your dry ingredients in one bowl, and mix your wet ingredients in a separate container. Store them separately overnight, and simply combine them in the morning. Ten minutes later, you are ready to cook.
Does This Apply to Gluten-Free or Vegan Pancakes?
Absolutely. In fact, resting is even more critical for gluten-free baking. Gluten-free flours, particularly rice flour, almond flour, and potato starch, are notoriously gritty and take significantly longer to hydrate than standard wheat flour. If you do not let a gluten-free batter rest for at least 15 to 30 minutes, your pancakes will have a sandy, unpleasant texture.
For vegan batters relying on plant milks and flax eggs, the resting period gives the flaxseed meal time to gel and bind the ingredients together, preventing the pancakes from crumbling when you try to flip them.
What If My Batter Gets Too Thick?
Sometimes, particularly if you are using a highly absorbent brand of flour or a very thick buttermilk, the 10-minute rest will turn your batter into something resembling wet cement. Do not panic. This just means your starches did their job exceptionally well.
If the batter is too thick to gently pour or scoop, simply add a splash of milk—one tablespoon at a time—and fold it in with extreme care until you reach a thick but pourable consistency. Do not aggressively whisk it, or you will undo all the gluten relaxation you just waited for.
The Final Flip: Transforming Your Weekend Breakfast Routine
Cooking is not magic. It is just applied chemistry with immediate, edible results. You do not need a fancy culinary degree, an expensive French stove, or a pantry full of obscure ingredients to make mind-blowing food in your own home. You just need to understand the “why” behind the instructions.
By giving your pancake batter a simple 10 to 15-minute rest, you are allowing the flour to fully hydrate into a cohesive structure, giving the overworked gluten strands time to soften, and providing your leavening agents the perfect environment to trap air. It is a zero-effort technique that instantly transforms dense, rubbery flapjacks into the tender, fluffy, diner-style stacks of your dreams.
So this weekend, when you mix up your batter, step away from the bowl. Clean your workstation, heat up your high-quality, non-toxic skillet, and pour yourself a cup of coffee. Let the science do the work. Your patience will be rewarded with the best breakfast you have ever made.






