
Listen, we have all been there. You have spent the better part of your afternoon meticulously finely chopping Napa cabbage, grinding pork shoulder, and perfectly balancing a mixture of soy sauce, sesame oil, and ginger. You are ready for the main event. You take a dumpling wrapper, place a generous spoonful of your gorgeous filling in the center, and confidently fold it over to crimp the edges.
And then, disaster strikes.
The wrapper cracks. The seam splits. The filling oozes out like a compromised life raft, and your dream of a pristine, restaurant-quality potsticker is instantly shattered. If you want to [survive the kitchen] without throwing your rolling pin through a window, you need to understand exactly why this happens.
The culprit isn’t your folding technique, and it certainly isn’t a lack of culinary talent. The problem is the structural integrity of your dough. If you are using store-bought wrappers that have been sitting on a refrigerated shelf for two weeks, they are dehydrated and brittle. If you are making your dough from scratch and it is snapping back, tearing, or refusing to seal, you are fundamentally misunderstanding the chemistry of wheat flour.
Welcome to the masterclass. Today, we are leaving the pretentious chef-speak at the door and diving deep into the microscopic world of your mixing bowl. We are going to demystify the absolute magic of hot water dough, explore the thermodynamics of starch gelatinization, and ensure you never have to deal with an exploding dumpling ever again.
The Zen of the Weekend Dumpling Project
I am a staunch advocate for the home cook. I firmly believe that professional-level results are entirely achievable in a standard, everyday kitchen without a culinary degree. During the week, my cooking philosophy is ruthlessly pragmatic. While I am usually all about efficiency and shortcuts to avoid [weeknight cooking anxiety], the weekend is a completely different story.
The weekend is for elaborate projects. It is for pouring a glass of wine, turning on some music, and engaging in the meditative, rhythmic process of crafting something entirely from scratch. Making dumpling dough is one of those projects. It requires exactly three ingredients: flour, water, and a pinch of salt. Yet, the transformation of these humble pantry staples into a silky, translucent, perfectly chewy wrapper is nothing short of alchemy.
Store-bought wrappers are manufactured for shelf stability, not for texture. They are heavily dusted in cornstarch to prevent sticking, which dries them out and makes them incredibly difficult to seal. Homemade dough, on the other hand, is a living, breathing matrix. When you control the temperature of the water, you control the molecular structure of the wrapper.
The Chemistry of Flour: Proteins and Starches
To understand why your wrappers tear, we need to look at what flour actually is. All-purpose wheat flour is composed primarily of two things: proteins and complex carbohydrates (starches).
The Protein Network: Glutenin and Gliadin
When wheat flour comes into contact with liquid, two proteins—glutenin and gliadin—hydrate and link together to form a network called gluten. Glutenin provides elasticity (the ability of the dough to snap back into place), while gliadin provides extensibility (the ability of the dough to stretch out).
In bread baking, you want a massively strong gluten network. You want that dough to be highly elastic so it can trap the carbon dioxide gases produced by yeast and rise into a beautifully airy loaf. But in dumpling making, a strong, highly elastic gluten network is your absolute worst enemy. If your dough is too elastic, it will fight you every time you try to roll it out. It will shrink back into a thick puck, and when you try to stretch it around your filling, the tension will cause the wrapper to snap and tear.
The Carbohydrates: Amylose and Amylopectin
The other major component of flour is starch, which comes in two distinct molecular shapes: amylose and amylopectin. Amylose is a linear, straight-chain molecule. Amylopectin is a highly branched, bushy molecule. In their raw, dry state, these starches are tightly packed into hard little microscopic granules.
When you mix flour with cold water, these starch granules remain relatively dormant. They absorb a little bit of moisture, but they don’t fundamentally change their structure. Because the starches are passive, the proteins are free to greedily absorb the water, form a dense gluten network, and turn your dough into a rubbery, unyielding nightmare.
Starch Gelatinization: The Secret Power of Boiling Water
This is where the magic happens. If you want a dumpling wrapper that is incredibly soft, highly pliable, and capable of stretching around a generous mound of filling without tearing, you must change the rules of engagement. You do this by introducing boiling water.
When you pour boiling water (at least 95°C/200°F) directly into your flour, a violent and beautiful chemical reaction occurs.
First, the intense heat instantly denatures (cooks) a significant portion of the glutenin and gliadin proteins. By scalding the proteins before they have a chance to hydrate and link up, you effectively cripple the dough’s ability to form a strong, elastic gluten network. You are intentionally sabotaging the elasticity so the dough won’t shrink back when you roll it.
Second, the boiling water triggers a process called starch gelatinization. The threshold for wheat starch gelatinization occurs between 60°C and 75°C (140°F to 167°F). When the boiling water hits the flour, the heat breaks down the intermolecular hydrogen bonds holding the starch granules together.
The granules swell massively. The highly branched amylopectin molecules act like microscopic sponges, hoarding water and expanding to many times their original size. As they swell to their absolute limit, they burst, releasing a viscous, sticky gel into the dough.
This starchy gel is the secret to perfect dumpling wrappers. It binds the dough together, providing incredible extensibility (stretchiness) without the rubbery snap-back of gluten. It also traps moisture within the matrix, ensuring your wrappers stay hydrated, soft, and pliable while you take your time folding them.
Cold Water vs. Hot Water Dough: When to Use Which
Not all dumplings are created equal, and therefore, not all dumplings require the same dough. Understanding the thermal kinetics of your cooking method dictates the temperature of your water.
Cold Water Dough (Shui Jiao)
If you are making traditional boiled dumplings (Shui Jiao), you actually want a cold water dough. When dumplings are dropped into a violently boiling pot of water, they are subjected to intense turbulence and mechanical stress. A delicate, highly gelatinized hot water dough would turn to mush and disintegrate in the boiling water.
For boiled dumplings, you mix the flour with cold or room-temperature water. This allows a moderate gluten network to form, providing a sturdy, durable “jacket” that can survive the boiling process while retaining a satisfying, toothsome chew.
Hot Water Dough (Guo Tie and Zheng Jiao)
If you are making pan-fried potstickers (Guo Tie) or steamed dumplings (Zheng Jiao), you must use hot water dough. These cooking methods are much gentler on the exterior of the dumpling. Furthermore, potstickers are typically seared on the bottom to create a crispy crust.
Because hot water dough has already undergone partial starch gelatinization, it fries up infinitely crispier than cold water dough. Gelatinized starches dehydrate rapidly when exposed to the conductive heat of a hot pan, creating that shattered-glass, golden-brown crust that makes a potsticker so irresistible. Simultaneously, the upper portion of the wrapper, which cooks gently in steam, remains extraordinarily tender and translucent.
The Blueprint: Hydration Ratios and Measurements
Baking and pastry might be a science, but dumpling dough is outright structural engineering. If your hydration ratio is off, your dough will either be a sticky, unworkable paste or a dry, crumbly mess that cracks at the seams.
The optimal hydration ratio for hot water dumpling dough is generally between 45% and 55% by weight. This means for every 100 grams of flour, you need 45 to 55 grams of boiling water.
Notice that I said grams. Stop measuring flour by volume. A cup of flour can weigh anywhere from 120 grams to 150 grams depending on how densely you pack it. If you aren’t using a [digital kitchen scale], you are setting yourself up for failure before you even turn on the stove.
The Standard Recipe
- 300g All-Purpose Flour (unbleached, with a moderate protein content of around 10-11%)
- 150g to 165g Boiling Water (straight from the kettle)
- A generous pinch of kosher salt (salt strengthens the dough slightly and adds essential flavor)
Depending on the ambient humidity in your kitchen and the specific brand of flour you are using, you may need to adjust the water slightly. Start with 150g (50% hydration). If the dough is aggressively resisting coming together, add water a few drops at a time until it forms a cohesive shaggy mass.
Essential Non-Toxic Gear for Dumpling Supremacy
I have a strict “no-go” rule in my kitchen: I absolutely despise cheap, toxic kitchenware. If you are going to spend your precious weekend crafting beautiful, artisanal dumplings from scratch, do not ruin them by cooking them on mystery metals or peeling non-stick coatings.
Ditch the [aerosol cooking sprays] that leave a polymerized sticky residue on everything, and throw away that scratched Teflon skillet that is actively leaching forever chemicals into your dinner.
For pan-frying perfect potstickers, a beautifully seasoned [carbon steel wok] is your best friend here. Carbon steel provides the intense, even heat retention of cast iron but is significantly lighter and more responsive. When properly seasoned, it is naturally non-stick and completely non-toxic. A thick-bottomed stainless steel skillet is also an excellent choice, provided you know how to manage your heat properly.
For steaming, invest in a traditional multi-tiered bamboo steamer. Bamboo naturally absorbs excess condensation, preventing water droplets from raining down and turning your delicate wrappers into soggy mush.
The Filling: Moisture Management and Prep
Before we mix the dough, we need to talk about the filling. A torn wrapper isn’t always the dough’s fault; often, it is the result of a poorly constructed filling.
Moisture is the enemy of a sealed dumpling. If your filling is leaking water, that liquid will seep into the raw dough, dissolving the starches from the inside out and causing the wrapper to burst the moment it hits the heat.
If you are using water-heavy vegetables like Napa cabbage, zucchini, or bok choy, you must draw the moisture out first. Finely mince your vegetables, toss them with a generous teaspoon of salt, and let them sit in a colander for 20 minutes. The salt will draw out the water via osmosis. After 20 minutes, wrap the vegetables in a clean kitchen towel and wring them out with the strength of a thousand suns. You want them bone dry before mixing them with your meat.
Speaking of mincing, let’s talk about knife skills. Please, avoid cheap [bamboo cutting boards] that splinter, warp, and harbor microscopic bacteria in their deep grooves.
Not only are they unhygienic, but they are also incredibly hard on your steel. To cleanly mince your pork and vegetables without crushing them into a watery pulp, you need a razor-sharp blade. If you are struggling to cut cleanly, your board is likely the culprit holding you back.
When mixing your filling (whether it’s ground pork, chicken, or a vegan mushroom blend), you must stir it vigorously in one direction only. This aligns the myosin proteins in the meat, emulsifying the fat and liquid into a sticky, cohesive paste. A well-mixed filling will hold together in a tight little meatball, making it infinitely easier to wrap without stray pieces of cabbage compromising the seal of your dough.
The Masterclass: Step-by-Step Hot Water Dough
Now that you understand the science, it is time to execute. Clear your counter, grab a large mixing bowl, and let’s build this dough.
Step 1: The Pour and Stir
Place your 300g of flour and a pinch of salt into a large mixing bowl. Bring your water to a rolling boil. Place your bowl on your digital scale and tare it to zero. Slowly pour exactly 150g of boiling water over the flour.
Do not stick your hands in the bowl. You will burn yourself, and I will not be held responsible. Instead, immediately take a pair of wooden chopsticks (or a sturdy wooden spoon) and stir the mixture vigorously. You want to distribute the scalding water as quickly as possible so it gelatinizes the starches evenly.
Step 2: The Shaggy Mass
Keep stirring until the mixture resembles a shaggy, clumpy mess of hydrated dough flakes and dry flour bits. It will look terrible. You will think you have ruined it. You haven’t.
At this point, once the dough is cool enough to handle, use your hands to press the shaggy flakes together. Squeeze them firmly. The goal here is just to force the dry flour to absorb the remaining moisture. Form it into a rough, ugly ball.
Step 3: The Rest (Crucial Step)
Do not start aggressively kneading yet. Cover the bowl with a damp kitchen towel or a tightly sealed lid and walk away for 20 minutes.
This resting phase is essential. It allows the flour to fully hydrate and the moisture to distribute evenly throughout the matrix. More importantly, it gives the newly formed, scalded protein structures time to relax. If you try to knead it immediately, you will be fighting the dough, and the dough will win.
Step 4: The Knead
After 20 minutes, turn the rough dough out onto a clean, un-floured work surface. Now you knead. Use the heel of your hand to push the dough away from you, fold it back over itself, give it a quarter turn, and repeat.
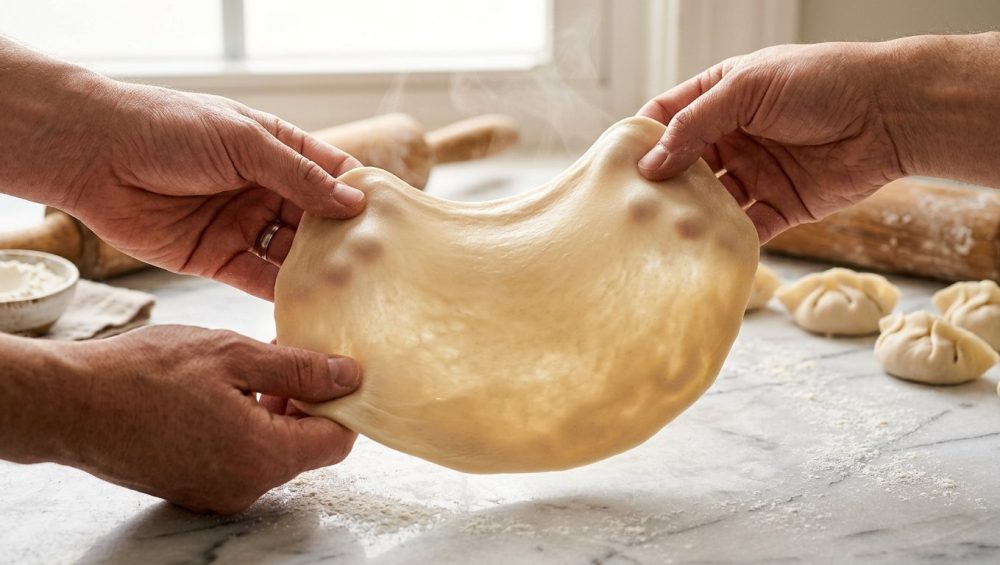
Because you used hot water, the dough should feel incredibly soft, warm, and supple—almost like Play-Doh. Knead for about 5 to 8 minutes until the surface of the dough is completely smooth and elastic. If the dough is sticking to your hands or the counter, it is too highly hydrated. Resist the urge to dump handfuls of raw flour onto the counter, as this will throw off your hydration ratio. Instead, lightly dust the surface with just enough flour to prevent sticking.
Step 5: The Final Relaxation
Once your dough ball is perfectly smooth, place it back in the bowl, cover it tightly, and let it rest at room temperature for at least 1 hour. You can let it rest for up to 3 hours. This extended rest period completely relaxes whatever minimal gluten network formed during kneading, ensuring maximum extensibility when you roll out your wrappers.
Rolling Like a Pro: The “UFO” Technique
After the dough has rested, poke it with your finger. It should feel incredibly soft and leave an indentation that springs back very slowly.
To divide the dough evenly, a [stainless steel bench scraper] is non-negotiable for clean cuts without tearing the gluten. Keep the half you aren’t using covered so it doesn’t dry out. Roll the working half into a long, even cylinder, about an inch in diameter. Cut the cylinder into equal pieces, about 10 to 12 grams each.
Dust the pieces lightly with flour and press them flat with the palm of your hand into little discs.
Now comes the rolling technique. If you take a rolling pin and just flatten the disc evenly in all directions, you are doing it wrong. A perfectly rolled dumpling wrapper must be thick in the center and paper-thin on the edges. It should look like a UFO.
Why? Because the center of the wrapper has to support the weight and moisture of the filling. If the center is too thin, the dumpling will tear and burst during cooking. The edges, however, are going to be folded and pleated together. If the edges are thick, pleating them will result in a dense, doughy, undercooked knot of flour at the top of your dumpling.
To achieve the UFO shape, hold the top edge of the dough disc with your non-dominant hand. Hold a small, wooden Asian-style rolling pin (a dowel, not the massive heavy ones with handles) in your dominant hand. Roll the pin forward halfway across the dough, then roll it back. Rotate the dough 45 degrees with your non-dominant hand. Roll halfway forward, roll back, rotate.
Keep up this rhythm—roll, back, rotate, roll, back, rotate. You are only ever rolling the outer perimeter of the dough, leaving the center untouched and thick. It takes practice, but once you find the rhythm, you will be churning out perfect wrappers in seconds.
The Art of the Fold: Pleating Without Tearing
You have your perfectly engineered hot water dough wrappers. Now it is time to fill and fold.
The biggest rookie mistake is overfilling. Greed is the enemy of a beautifully pleated dumpling. Place about one tablespoon of your tightly mixed filling directly in the thick center of the wrapper.
Because you are using fresh, homemade hot water dough, you do not need to wet the edges with water to seal them. The dough is naturally tacky and hydrated enough to stick to itself. (If you are working slowly and the edges have dried out, you can dab a microscopic amount of water on the rim, but avoid creating a slippery puddle).
Fold the wrapper in half over the filling, creating a half-moon shape. Pinch the very top center together to anchor it.
Now, make your pleats. Hold the dumpling in your left hand. Use your right thumb and index finger to grab a small section of the front edge of the dough, fold it toward the center anchor point, and press it firmly against the back edge of the dough to seal it. Repeat this pleating motion down one side, then switch and do the other side.
The pleats aren’t just for aesthetics. They act as expansion joints. As the filling cooks and releases steam, the pleated wrapper expands like an accordion, accommodating the pressure without tearing the dough.
Make sure you press the seams firmly. Any tiny gap will allow steam to escape and water to enter, ruining the dumpling.
Thermodynamics of Cooking: Steam-Frying Potstickers
You have crafted the perfect dumpling. Now, let’s cook it with the respect it deserves. The classic potsticker method (steam-frying) is a masterclass in applied thermodynamics.
Heat a heavy-bottomed skillet over medium-high heat. If you are using stainless steel, make sure the pan is properly preheated before adding oil so your food doesn’t fuse to the metal. If you don’t know how to do this, look up the [water drop test] to ensure your pan is at the exact right temperature to prevent sticking.
Add a tablespoon of high-heat oil (like peanut or avocado oil). Arrange the dumplings in the pan, flat side down. Let them sizzle undisturbed for 2 to 3 minutes until the bottoms are deeply golden brown and crispy. This is the Maillard reaction at work, transforming the gelatinized starches into a caramelized crust.
Once the bottoms are brown, carefully pour about 1/3 cup of water into the hot pan. It will immediately violently hiss and spit. Instantly cover the pan with a tight-fitting lid.
The trapped water turns to steam, circulating around the dumplings and gently cooking the top half of the wrappers and the raw filling inside. Because you used hot water dough, the wrappers will become incredibly tender and translucent in the steam without turning to mush.
Let them steam for about 5 to 6 minutes, or until the water has completely evaporated. Listen to the pan. When the bubbling sound of boiling water transitions back to a sharp, crackling sizzle, the water is gone, and the dumplings are frying in the residual oil again. Let them fry for one more minute to re-crisp the bottoms, then remove them from the heat.
Troubleshooting Dumpling Disasters
Even with the best intentions, things can go sideways. Here is how to diagnose and fix common hot water dough problems.
The Dough is Too Sticky to Roll
If your dough is sticking to everything, your hydration ratio was too high, or you didn’t let it rest long enough. Flour takes time to absorb moisture. If it is still sticky after the mandatory one-hour rest, lightly dust your work surface and the rolling pin with cornstarch (not flour). Cornstarch prevents sticking without incorporating more gluten into the dough.
The Dough is Dry and Cracking
If the edges of your wrappers are cracking when you try to pleat them, the dough is under-hydrated, or it has dried out from exposure to the air. Always keep your resting dough and your finished wrappers covered with a damp towel or plastic wrap. If the dough is fundamentally too dry, wet your hands, knead the moisture into the dough, and let it rest for another 30 minutes.
The Wrappers Keep Shrinking Back
If you roll out a perfect circle, and it instantly shrinks back into an oval, your gluten network is too tight. You either used cold water (which failed to denature the proteins), you over-kneaded the dough, or you didn’t let it rest long enough. The only fix here is time. Cover the dough and let it sit for another hour to relax the proteins.
The Final Flourish: The Dipping Sauce
You did not spend hours meticulously crafting hot water dough from scratch just to dip your masterpiece into a pool of straight, salty soy sauce. A proper dipping sauce relies on balance: salty, sour, spicy, and aromatic.
Combine equal parts high-quality soy sauce and Chinese black vinegar (Chinkiang vinegar). The dark, malty acidity of the vinegar cuts through the rich, fatty pork filling perfectly. Add a dash of toasted sesame oil, some finely julienned fresh ginger, and a generous spoonful of homemade chili crisp.
If you are making your own chili oil, remember to elevate the flavors by [blooming them in oil] over gentle heat rather than just dumping raw spice flakes into a bowl. The hot oil extracts the fat-soluble flavor compounds from the chilies and aromatics, creating a deeply complex, fiery condiment that takes your dumplings to the next level.
Embrace the Fold
Making dumplings from scratch is not a chore; it is a culinary event. It is a tactile, rewarding process that connects you to hundreds of years of culinary tradition. Yes, it takes time. Yes, your first few pleats will probably look like mangled accordions.
But when you finally pull that lid off the skillet, revealing a pan full of perfectly plump, translucent potstickers with shattered-glass crispy bottoms, you will understand exactly why we go through the effort.
You now possess the scientific knowledge of starch gelatinization, the precise ratios of hot water dough, and the mechanical techniques to roll and fold like a seasoned pro. You have banished the brittle, tearing wrappers of the past.
So pour that glass of wine, clear off your counter, and get your hands in the flour. Your perfect dumpling awaits. You’ve totally got this.






