
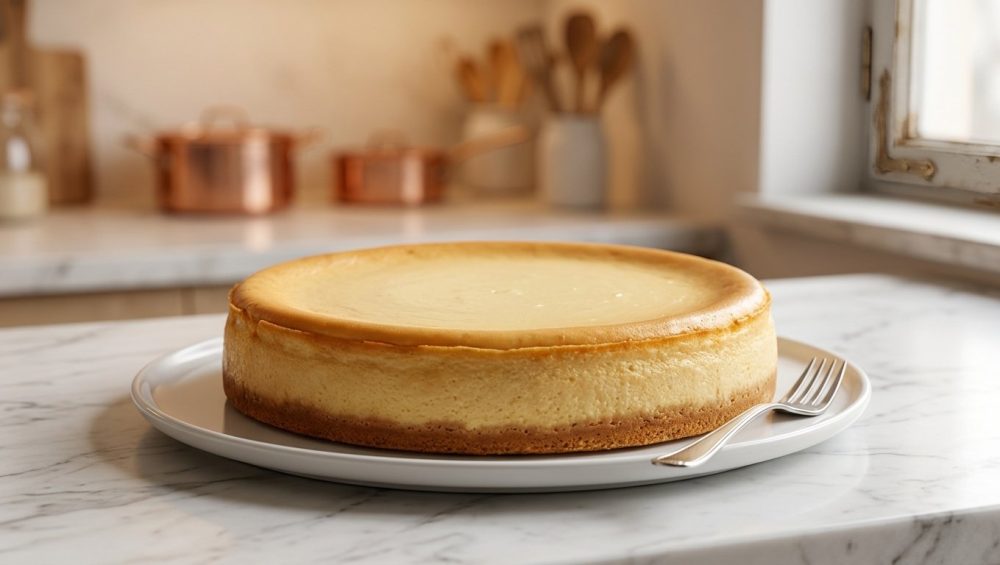
Listen up, weekend warriors. If you are reading this, I can safely assume you have recently stared into the depths of your oven, only to find that your meticulously crafted, expensive-ingredient-laden cheesecake has split down the middle like the San Andreas Fault. I know the feeling. You spent an hour carefully pressing graham cracker crumbs into a pan, you bought the good cream cheese, and now you are frantically Googling how to make a cherry compote thick enough to hide a canyon.
Stop hiding your mistakes under a pound of sour cream or fruit. You do not need a pastry degree from Le Cordon Bleu to bake a flawless, bakery-quality cheesecake. You just need to respect the science of the ingredients and stop treating your delicate desserts like a frozen pizza. A perfectly smooth, edge-to-edge creamy cheesecake is completely achievable in a standard home kitchen, provided you understand the absolute magic of a water bath (or a bain-marie, if you want to sound pretentious at your next dinner party).
Today, we are stripping away the fluff and diving deep into the culinary thermodynamics, protein chemistry, and foolproof techniques that will ensure you never bake a cracked cheesecake again. Grab a coffee, take notes, and let’s get to work.
The Anatomy of a Cheesecake Disaster (Why It Cracks)
To fix the problem, you have to understand the crime scene. A cheesecake is a liar. It is not actually a cake at all; it is a baked custard. It does not rely on flour or gluten to hold its shape. Instead, it relies entirely on a highly sensitive, microscopic network of egg proteins. When you subject those proteins to the dry, aggressive heat of a standard oven, you are setting yourself up for failure.
The Drama of Egg Proteins
When you mix cream cheese, sugar, and eggs, you are creating a delicate emulsion. Eggs are the structural engineers of your dessert. Egg proteins are made up of long chains of amino acids that are tightly curled up. Some of these amino acids are hydrophilic (they love water) and some are hydrophobic (they fear water).
When you apply heat, these protein chains begin to vibrate and uncoil—a process called denaturation. As they uncoil, they bump into each other and form new chemical bonds (specifically, disulfide bonds), creating a three-dimensional web that traps water and fat. This is called coagulation, and it is what transforms your liquid batter into a sliceable, solid dessert.
Here is the catch: egg proteins are incredibly dramatic. Egg whites begin to set at around 140°F (60°C), and the yolks follow closely at 149°F (65°C). By the time the internal temperature reaches 158°F (70°C), the proteins are fully coagulated. If you push the temperature too high, those protein bonds tighten violently. They squeeze out all the moisture they were supposed to hold (a tragedy known as syneresis), leaving you with a grainy, curdled texture. Just like when your egg whites won’t whip because of a speck of fat, cheesecake proteins will completely fail you if they are pushed past their thermal limits. The tightening of this protein network physically shrinks the batter, and because the edges of the cake are usually stuck to the hot metal pan, the tension causes the center of the cake to rip wide open.
The Thermodynamics of a Dry Oven
Your home oven is a chaotic, aggressive environment. When you set it to 325°F, it does not gently hum at that exact temperature. It blasts intense radiant heat, overshoots the target, turns off, drops down, and blasts again. Because ovens are notorious liars, you absolutely need a simple oven thermometer to know what is actually happening in there.
If you put a springform pan directly onto an oven rack, the metal heats up rapidly. The outer edges of your cheesecake will reach that critical 158°F (70°C) coagulation point long before the center even begins to set. By the time the center of your cake is done, the outer two inches are severely overcooked, dry, and rubbery. This uneven baking creates structural stress. The overcooked edges contract and pull away from the undercooked center, resulting in a massive surface fissure.
The Evaporation Crisis
Ovens are fundamentally dry. As the cheesecake bakes in a dry environment, the moisture on the exposed top surface evaporates rapidly. This causes a dry crust to form on the top of the batter before the cake has finished rising and setting. As the batter underneath continues to heat and expand, it pushes against this premature crust, cracking it like a dry riverbed. You need humidity to keep the surface elastic, and a dry oven simply cannot provide it.
Enter the Water Bath (Bain-Marie for the Unpretentious)
The solution to all of this protein and thermodynamic chaos is painfully simple: water. A water bath is the ultimate insurance policy for delicate custards. It is a foolproof method that forces your oven to behave, ensuring a perfectly smooth, edge-to-edge creamy result.
What Exactly is a Water Bath?
A water bath involves wrapping your springform pan to make it watertight, placing it inside a larger, high-sided roasting pan, and filling the outer pan with boiling water until it reaches about an inch or two up the sides of the cheesecake pan.
This setup acts as a thermal buffer. The hot water surrounds the cheesecake, intercepting the harsh, radiant heat of the oven and converting it into gentle, conductive heat. If your cakes are too dense, it is usually a chemical leavening or flour measurement issue. But with a cheesecake, density and texture are entirely dictated by how gently the heat is applied to the eggs.
The Science of Humidity and Temperature Control
Water has an incredibly high specific heat capacity. This means it requires a massive amount of thermal energy to raise its temperature. When you place your cheesecake in a water bath, the oven’s heat must first work to heat the water before it can even touch the cake pan. This slows down the entire baking process, allowing the center of the cheesecake to slowly catch up to the temperature of the edges.
Furthermore, as the water in the roasting pan heats up, it produces steam. This steam fills the oven cavity, creating a highly humid environment. This blanket of moisture settles over the top of the cheesecake, preventing the surface from drying out and forming that dreaded premature crust. The surface remains soft and elastic, allowing the cake to gently expand and contract without tearing.
Why 212°F (100°C) is the Magic Number
Here is the most brilliant part of the water bath: physics dictates that liquid water at standard atmospheric pressure cannot exceed 212°F (100°C). No matter how hot your oven gets—whether it is 325°F or a malfunctioning 400°F—the water surrounding your cheesecake will never get hotter than 212°F. It will simply boil and turn into steam.
This means the outside of your springform pan is physically capped at 212°F. Because egg proteins curdle and tighten violently at high temperatures, capping the ambient heat around the pan ensures that the edges of your cheesecake bake at a slow, gentle pace. The edges will not overcook before the center finishes, eliminating the structural tension that causes cracking.
The Toxic Gear Warning (Don’t Ruin Your Cake with Garbage Pans)
Before we get into the mechanics of wrapping your pan, we need to have a serious talk about your equipment. I have zero patience for cheap, toxic kitchenware that actively sabotages your food.
Ditching the Peeling Non-Stick Springform
If you are using a five-dollar springform pan from a discount bin, throw it in the trash immediately. Cheap springform pans are notorious for warping under heat. It is the exact same reason your baking sheets keep warping: thin, low-quality metal cannot handle thermal expansion. When a cheap springform warps, the bottom seal breaks, and no amount of aluminum foil will save your crust from becoming a soggy, waterlogged disaster.
Worse, these cheap pans are often coated in mystery non-stick chemicals that begin to flake and peel after a few uses. You do not want toxic polymer flakes in your graham cracker crust. Invest in a heavy-gauge, anodized aluminum springform pan. Anodized aluminum does not rust, it conducts heat beautifully, and it has no toxic coatings to peel off into your food. Fat Daddio’s makes excellent, seamless bottom pans that are built like tanks.
Safe, Heavy-Duty Alternatives
For the outer water bath pan, you need something large, deep, and structurally sound. A heavy stainless steel roasting pan is ideal. Do not use a flimsy disposable aluminum foil tray; they are dangerous to move when filled with boiling water. Also, be incredibly careful if you choose to use glass. Unless it is high-quality, thermal-shock-resistant borosilicate glass, the temperature difference between the boiling water and the oven heat can cause catastrophic failure, and you will end up with a glass baking dish shattered across your kitchen floor. Stick to heavy metal roasting pans.
Foolproof Preparation: Waterproofing Your Springform Pan
The single biggest fear home cooks have about the water bath is the dreaded leak. Springform pans are designed to release, which means they are inherently not watertight. If water breaches the pan, your crust turns to mush. Here is how to build an impenetrable fortress around your dessert.
The Classic Foil Wrap (And Why It Often Fails)
The traditional method is wrapping the outside of the springform pan in aluminum foil. However, most people screw this up by using standard 12-inch foil. If you overlap two sheets of standard foil, you create a seam. Water is insidious; it will find that seam, travel up through capillary action, and ruin your day.
If you use foil, you must buy 18-inch heavy-duty aluminum foil. Place the pan in the center of a single, seamless sheet, and pull the sides up tightly around the pan. I recommend doing a double layer of 18-inch foil just to be safe. Press it flush against the metal so you do not create air pockets that can insulate the cake unevenly.
The Slow-Cooker Liner Hack
If you are tired of playing Russian roulette with foil, use a slow-cooker liner. These plastic bags are specifically designed to withstand high heat (usually up to 400°F). Place your springform pan inside the liner, gather the excess plastic at the top, and tie it off with kitchen twine or simply roll it down the sides. Wrap a single layer of foil around the outside of the plastic just to keep it snug against the pan. It is 100% waterproof.
The Silicone Pan Protector
For the frequent weekend baker, I highly recommend buying a silicone cheesecake water bath sleeve. These are pre-molded, heavy-duty food-grade silicone jackets that perfectly hug a 9-inch springform pan. You just drop your pan into the sleeve and place it in the water. No foil, no single-use plastics, and zero chance of a leak. It is a brilliant, inexpensive investment that pays for itself in saved sanity.
The “Pan Inside a Pan” Method
If you refuse to buy extra gear, use the pan-in-a-pan trick. Place your 9-inch springform pan inside a solid 10-inch round cake pan. Then, place the 10-inch pan into the larger roasting pan filled with water. The solid 10-inch pan acts as a completely impenetrable hull. Unlike a fruit pie where overworked dough is why your pie crust is always tough, a cheesecake crust is just butter and crumbs. It has no structural integrity to fight off water, so keeping it bone-dry is your only priority.
Step-by-Step Execution: The Perfect Water Bath
You have the right pan, you have waterproofed it like a submarine, and your batter is ready. Here is exactly how to execute the bake.
Preheating and Pre-Boiling
Never use cold water for a water bath. If you pour cold tap water into the roasting pan, your oven will waste the first 30 minutes of baking time just trying to heat the water. This throws off your baking time completely and can ruin the texture of the custard.
Put a kettle of water on the stove to boil while you are assembling the cake. Place your empty roasting pan on the middle rack of your preheated oven.
The Delicate Transfer
Place your waterproofed springform pan into the empty roasting pan on the oven rack. Then, carefully pour the boiling water from your kettle into the roasting pan. Aim for the corner of the roasting pan so you do not accidentally splash water onto the top of your cheesecake. Fill it until the water reaches about 1 inch up the side of the springform pan. Pushing the rack back into the oven slowly is crucial here—do not slosh boiling water onto yourself or your crust.
Baking Time and The “Jiggle Test”
Bake the cheesecake according to your recipe (usually around 325°F). Do not open the oven door for the first hour. Drafts and sudden temperature drops are the enemy.
A blast of high heat is the absolute enemy of a custard, which is why we rely on low, slow, and steady temperatures. To know when the cheesecake is done, do not stick a knife or a toothpick into it. You will create a structural weakness that will turn into a crack as it cools. Instead, use the “jiggle test.”
Gently tap the side of the pan with a wooden spoon. The outer two inches of the cheesecake should look puffed and fully set. The inner 2 to 3 inches should still have a slight, gelatinous wobble to it. It should not look like liquid milk, but it should jiggle like set Jell-O. If you have a digital instant-read thermometer, the dead center should read exactly 150°F (65°C). Once it hits this stage, turn the oven off immediately.
The Cool Down: Preventing Post-Bake Thermal Shock
You have successfully baked a crack-free cheesecake. Do not ruin it now. The cool-down phase is where impatient bakers destroy their hard work.
The Oven Door Crack Technique
If you pull a 150°F cheesecake out of a hot oven and slam it onto a cold granite countertop in a 68°F air-conditioned kitchen, it is going to go into thermal shock. The rapid temperature drop causes the egg proteins and the fat to contract violently. This rapid contraction is exactly why your cake sinks in the middle when you rush the cooling process on delicate bakes.
Instead, turn the oven off, leave the cheesecake sitting in the water bath, and prop the oven door open about an inch (you can use the handle of a wooden spoon to hold it ajar). Leave the cake in the slowly cooling oven for exactly one hour. This allows the cheesecake to gently step down in temperature, finishing the cooking process via residual heat while slowly relaxing the protein structure.
The Fridge Transition
After an hour in the cracked oven, carefully remove the roasting pan. Take the springform pan out of the water bath and remove the foil or silicone sleeve. Place the cheesecake on a wire cooling rack on the counter until it is completely cool to the touch (usually another 1 to 2 hours).
Before you put it in the fridge, run a very thin, flexible paring knife around the very edge of the pan. As the cheesecake chills, it will shrink slightly. If the edges are glued to the side of the pan, the center will tear as it shrinks. Freeing the edges allows the entire cake to contract uniformly. Cover it tightly with plastic wrap and chill it for a minimum of 6 hours, but preferably overnight. The fat in the cream cheese and butter needs this time to fully solidify and develop that dense, sliceable texture.
Troubleshooting Common Cheesecake Catastrophes
Even with a water bath, things can occasionally go sideways if you ignore basic culinary rules. Here is how to diagnose your failures.
The Sunken Center
If your cheesecake puffed up like a soufflé in the oven and then collapsed into a crater as it cooled, you overmixed the batter. When you aggressively whip cream cheese and eggs on high speed, you incorporate millions of tiny air bubbles. In the oven, those air bubbles heat up and expand, lifting the cake. When the cake cools, the air contracts, and the heavy cream cheese structure collapses under its own weight.
Always mix your batter on the lowest possible speed. You are blending, not whipping. Add the eggs last, and mix only until the yellow streaks disappear.
The Soggy Crust
If you cut into your cake and water pours out of the graham cracker crust, your waterproofing failed. Next time, use the slow-cooker liner or the silicone sleeve. To salvage a soggy crust, you can carefully scrape the wet crumbs off the bottom of the chilled slices before serving, and press some fresh, toasted graham cracker crumbs onto the bottom. It is a messy patch job, but it saves the dessert.
The Grainy Texture
If your cheesecake feels like wet sand instead of velvet, you either overbaked it (causing the proteins to curdle) or you used cold ingredients. Cream cheese and eggs must be completely at room temperature before mixing. If you try to blend cold cream cheese, it will remain lumpy. If you add cold eggs to room-temperature batter, it will shock the fat and cause the mixture to break. Just like you need to stop scooping your flour to get accurate measurements in regular baking, you need to respect ingredient temperatures for custards. There are no shortcuts.
You Are Now a Cheesecake Master
Baking is not magic; it is edible chemistry. Whether you are figuring out why your cookies spread or why your cheesecake splits, the answer always lies in understanding how your ingredients react to heat.
By utilizing a proper water bath, you are taking control of your oven’s erratic environment. You are protecting those delicate egg proteins, maintaining surface humidity, and allowing the custard to set in a state of thermal zen. Ditch the cheap gear, wrap your pan properly, respect the jiggle test, and let it cool slowly. Do this, and you will consistently pull flawless, smooth, bakery-tier cheesecakes out of your home oven. Now get out of here and go bake something spectacular.






