
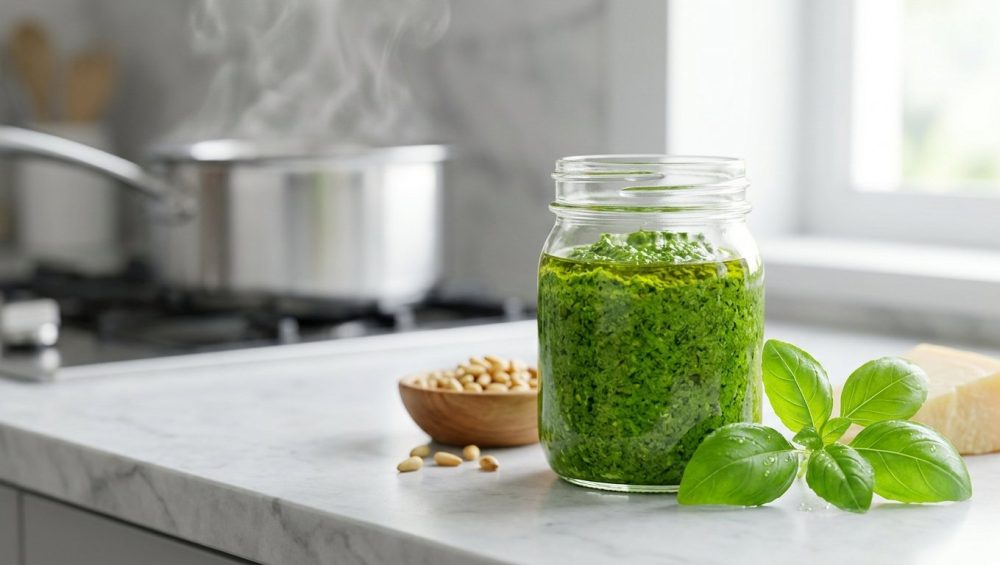
You just dropped a small fortune on a massive bouquet of fresh basil, toasted your pine nuts to a perfect golden brown, and grated a block of Parmigiano-Reggiano that costs more than your monthly streaming subscriptions. You whip up a beautiful, vibrant, emerald-green pesto. It looks like a culinary masterpiece. You feel like an absolute kitchen goddess. You pack the leftovers in a container, put it in the fridge, and wake up the next day to find… a container of muddy, oxidized, army-green swamp sludge.
It tastes fine, but it looks like something you’d scrape off the bottom of a lawnmower.
Look, we eat with our eyes first. As a weekend culinary hobbyist, you deserve food that looks as spectacular as it tastes, without needing a degree from Le Cordon Bleu. You do not have to accept brown pesto as an inevitable fact of life. There is a ridiculously simple, science-backed trick that takes exactly ten seconds and will lock in that vibrant, bright green color for days. It is not a pretentious chef secret; it is basic thermodynamics and biology. We are talking about the quick boil—a rapid blanching technique that deactivates the enzymes responsible for ruining your sauce’s aesthetic.
Let’s break down the science of why your basil betrays you, how to stop it in its tracks, and how to build a masterclass-level pesto that stays brilliantly green from Monday’s pasta dinner to Friday’s sandwich spread.
The Science of the Swamp: Why Your Basil Betrays You
To defeat the enemy, you must first understand the enemy. In this case, the enemy is an enzyme called polyphenol oxidase [1] (or PPO, if we are keeping things casual).
Basil leaves are delicate little biological factories. Inside their cellular walls, they hold a treasure trove of aromatic compounds, essential oils, and polyphenols. Polyphenols are naturally occurring antioxidants that give basil its complex flavor profile. As long as the basil leaf is intact, these polyphenols and the PPO enzymes are kept in separate compartments within the plant cells. They are roommates who never interact.
But the moment you take a knife to that basil, or worse, throw it into the spinning blades of a food processor, you are essentially launching a microscopic wrecking ball into those cellular walls. The compartments rupture. The PPO enzymes are suddenly introduced to the polyphenols.
When PPO meets polyphenols in the presence of oxygen, it acts as a catalyst for a chemical reaction known as enzymatic browning [1]. The PPO oxidizes the polyphenols, converting them into compounds called o-quinones. These o-quinones are highly reactive and quickly link together to form large polymers. What color are these polymers? Brown. Black. Muddy. The exact same reaction is what causes a sliced apple to turn brown on your kitchen counter or an avocado to look terribly sad ten minutes after you mash it.
If you have ever been frustrated by this and found yourself researching why your pesto turns bitter after a few days, oxidation is often the culprit alongside the browning. The longer those bruised leaves sit exposed to the air, the more the enzymes go to work, degrading both the visual appeal and the fresh, sweet flavor of the herb.
Now, some traditionalists will tell you that the only way to prevent this is to avoid the food processor entirely. They will claim that using a traditional granite mortar and pestle is the only acceptable method because crushing the leaves gently along the stone walls doesn’t shear the cells as violently as a spinning metal blade. And sure, if you have the forearm strength of a nineteenth-century blacksmith and forty-five minutes to spare on a Tuesday night, go for it. But time is money. We need a modern, efficient fix that lets us use our kitchen appliances without sacrificing the color.
The Magic 10-Second Dunk: Thermal Deactivation Explained
If oxygen and polyphenol oxidase are the villains of this story, heat is the superhero. But not just any heat—highly controlled, incredibly brief heat.
Enzymes are proteins. Like all proteins, they have a specific, complex three-dimensional structure that allows them to do their job. If you change their environment drastically—specifically by applying high heat—that structure unravels. The protein denatures. Once polyphenol oxidase is denatured, it is permanently deactivated [1, 2]. It can no longer catalyze the reaction that turns your beautiful green basil into brown sludge.
This is where the magic of the 10-second boil comes in. By dunking your fresh basil leaves into a pot of rapidly boiling water (212°F or 100°C) for exactly ten to fifteen seconds, you instantly denature the PPO enzymes on the surface and just inside the outer cellular layers of the leaf [2, 3].
But wait, you ask, won’t boiling the basil cook it and ruin that fresh, peppery, anise-like flavor?
That is the genius of the 10-second limit. Ten seconds is just long enough to assassinate the enzymes, but short enough that the internal volatile oils—the compounds that actually make basil taste like basil—remain largely intact [2, 4]. If you leave the basil in the boiling water for thirty seconds or a minute, congratulations, you have made basil tea and ruined your pesto. Precision is everything here.
Immediately following this brief thermal shock, you must halt the cooking process instantly. This is done via an ice bath. Plunging the blanched basil into a bowl of freezing cold water drops the temperature of the leaves in milliseconds. This process, known as shocking, locks in the bright green chlorophyll [2, 4]. Chlorophyll is notoriously unstable and sensitive to prolonged heat. The rapid transition from boiling to freezing ensures the chlorophyll stays vibrant and intact, giving you a pesto that looks practically neon green.
This quick blanching method is the ultimate insurance policy for your sauce. It is a foolproof way to guarantee that your weekend meal prep doesn’t look completely unappetizing by Wednesday, long before your fresh herbs turn to slime in the crisper drawer.
The Gear: Why Your Cookware Matters for the Boil
Before we get into the exact step-by-step methodology, we need to have a serious conversation about the equipment you are using to boil your water. I have zero patience for pretentious chef-speak, but I have even less patience for cheap, toxic kitchenware that actively leaches mystery chemicals into your food.
If you are boiling water in a scratched, peeling non-stick pot from a discount big-box store, throw it in the trash right now. I am dead serious. Heating degraded Teflon or mystery-metal non-stick coatings to a rolling boil is a fantastic way to introduce perfluorinated chemicals (PFAS) into your meals. We are trying to make a beautiful, fresh, vibrant herb sauce, not a chemical cocktail. You should actively avoid ruining your nonstick pans by using them for high-heat boiling tasks anyway; they are meant for gentle egg cooking, not rapid thermal shocks.
For this technique, you need a high-quality, heavy-bottomed stainless steel saucepan or an enameled cast-iron Dutch oven. Stainless steel is non-reactive, non-toxic, and indestructible. It will not impart any metallic off-flavors to your delicate basil leaves.
You will also need a spider skimmer or a fine-mesh stainless steel strainer. When you only have ten seconds to get the basil out of the boiling water, you cannot be fishing around with a tiny fork or a pair of clumsy silicone tongs. A wide spider skimmer allows you to scoop up the entire batch of basil in one swift motion and plunge it directly into the ice bath.
Lastly, ensure your ice bath is prepped in a large glass or stainless steel mixing bowl. Have your tools ready before the water even boils. This technique requires speed. If you are scrambling to find ice while your basil is boiling, you are going to end up with overcooked, flavorless mush.
The Step-by-Step Masterclass to Forever-Green Pesto
Alright, let’s get down to business. This is the exact, foolproof protocol for executing the quick boil method. Follow these steps meticulously, and you will be rewarded with a sauce so vibrantly green it practically glows in the dark.
Step 1: The Prep and the Ice Bath
First, separate your basil leaves from the tough stems. You want about two to three packed cups of fresh basil leaves. Wash them gently to remove any dirt or grit.
Next, set up your shocking station. Fill a large bowl halfway with cold water and dump in two generous handfuls of ice cubes. Place this bowl right next to your stove. You want the transit time from the boiling pot to the ice bath to be less than two seconds.
Step 2: The Rolling Boil
Fill your non-toxic stainless steel pot with water and bring it to a vigorous, rolling boil. Do not just wait for a few lazy bubbles; you want aggressive, turbulent water. Add a generous pinch of kosher salt to the water. The salt slightly raises the boiling point and helps season the exterior of the leaves, but more importantly, it helps preserve the integrity of the cellular walls during the brief blanch.
Step 3: The 10-Second Dunk
Drop all your basil leaves into the boiling water at once. Immediately push them down with your spider skimmer so they are fully submerged.
Start counting. One, one-thousand. Two, one-thousand. Do not walk away. Do not check your phone. Watch the leaves. You will see them instantly turn a shockingly bright, vivid green. At exactly the ten-second mark (and absolutely no longer than fifteen seconds), scoop every single leaf out of the water [2].
Step 4: The Ice Shock
Plunge the skimmer full of basil directly into the ice bath. Swirl it around gently to ensure the freezing water touches every leaf. Leave the basil in the ice bath for about thirty seconds until it is completely cold to the touch. The cooking process is now permanently halted, and the PPO enzymes are dead. Your green color is locked in.
Step 5: The Crucial Squeeze
This is the step where most rookies fail. If you take wet, soggy basil and throw it into a food processor, you are going to end up with a watery, diluted pesto that lacks body and flavor. Excess water will also prevent the olive oil from emulsifying properly, leading to a sauce that splits and separates. You definitely want to avoid a situation where your pasta sauce slips off your perfectly cooked linguine because the pesto was essentially a watery vinaigrette.
Remove the basil from the ice bath and gently squeeze it in your hands to remove the bulk of the water. Then, lay the basil out on a clean, lint-free kitchen towel or a double layer of heavy-duty paper towels. Roll the towel up tightly and wring it out. You want that basil to be as bone-dry as physically possible. It will look like a compressed, dark green puck when you are done. That is perfectly fine; you are about to obliterate it in the food processor anyway.
The Bitter Olive Oil Trap: Why High-Shear Blending is Risky
Now that we have perfectly blanched, dry, neon-green basil, we need to talk about the actual blending process. Because if you just dump all your ingredients into the food processor and hold down the “On” button for three minutes, you are going to ruin your pesto in a completely different way: you will make it unbearably bitter.
Extra virgin olive oil (EVOO) is packed with its own polyphenols [5]. These are different from the ones in basil; these are the compounds that give high-quality olive oil its signature peppery, robust kick at the back of your throat. In their natural state within the oil, these bitter polyphenols are coated and encapsulated by fatty acids, which mask their harshness and keep the flavor balanced [6].
A food processor or a high-speed blender utilizes high-shear force. When you pour olive oil into a spinning food processor, the metal blades whip the oil into millions of microscopic droplets. This violent shearing action violently strips the protective fatty acids away from the polyphenols, ejecting them directly into the emulsion [6]. The smaller the droplets get, the more bitter compounds are exposed to your taste buds [6].
This is a well-documented culinary phenomenon. High-shear blending of extra virgin olive oil creates a harsh, metallic, intensely bitter flavor that can easily ruin an entire batch of pesto [6].
So, how do we get around this while still prioritizing the time-saving efficiency of our kitchen appliances?
The solution is sequencing. You use the food processor to do the heavy lifting of breaking down the solid ingredients, and you incorporate the olive oil gently at the very end.
First, pulse your garlic and toasted pine nuts in the food processor until they are finely minced. Then, add your blanched, dried basil puck and pulse it repeatedly until the leaves are finely chopped. Do not run the machine continuously; use short, controlled pulses to avoid creating excess heat via friction.
Once the basil, nuts, and garlic are finely chopped, transfer the mixture to a mixing bowl. Now, switch to a whisk or a silicone spatula. Pour your high-quality extra virgin olive oil into the bowl manually, gently folding and stirring it into the basil mixture. Finally, fold in your freshly grated cheese. By keeping the olive oil away from the spinning metal blades, you preserve its smooth, buttery profile and completely avoid the bitter polyphenol trap.
Ingredient Deep Dive for Absolute Perfection
A technique is only as good as the materials you apply it to. You can blanch your basil flawlessly, but if your supporting ingredients are subpar, your pesto will be mediocre. Let’s break down the non-negotiables for a masterclass sauce.
The Garlic
Raw garlic is pungent, aggressive, and can easily overpower the delicate floral notes of the basil. If you are tired of wondering why your garlic always burns your palate with that harsh, spicy bite, there is a trick: acid maceration.
Before you begin anything else, mince your garlic clove (do not use a garlic press, they crush the alliinase enzymes too violently and create bitterness). Place the minced garlic in a small bowl and add a teaspoon of fresh lemon juice. Let it sit for ten minutes. The acid in the lemon juice neutralizes the alliinase enzyme, mellowing the garlic’s harsh bite while leaving the sweet, aromatic garlic flavor intact.
The Pine Nuts (Pignoli)
Raw pine nuts taste like soft, slightly resinous paste. To unlock their rich, buttery, nutty flavor, you must toast them. Toasting brings the natural oils to the surface and triggers the Maillard reaction, developing complex flavor compounds.
Place the pine nuts in a dry stainless steel or carbon steel skillet over medium-low heat. Toss them constantly for about three to five minutes until they are golden brown and fragrant. Do not walk away; pine nuts go from perfectly toasted to burnt ash in about twelve seconds. The transformation in flavor is staggering, much like how blooming them in oil completely revitalizes stale, dried spices in a curry.
The Cheese
I am going to be brutally honest here: if you are using cheese that comes out of a plastic shaker can, or pre-shredded cheese from a plastic bag, you are committing a culinary crime against your pesto.
Pre-shredded cheeses are coated in anti-caking agents like cellulose or potato starch to prevent them from clumping in the bag. These powders prevent the cheese from melting smoothly and give it a gritty, sandy texture. If you want a luxurious, silky sauce, you absolutely must stop buying pre-shredded cheese and invest in a block of the real stuff.
For traditional pesto Genovese, you want a hard, aged Italian cheese. Parmigiano-Reggiano is the gold standard, offering deep, umami-rich, nutty notes. Pecorino Romano is a fantastic alternative or addition, bringing a sharper, saltier, more sheep’s-milk tang to the party. Buy a wedge, grab your microplane or box grater, and grate it fresh right before folding it into the sauce.
The Olive Oil
Pesto is an emulsion where olive oil makes up a massive percentage of the final volume. If your olive oil tastes like dusty cardboard, your pesto will taste like dusty cardboard.
Use a high-quality, cold-pressed Extra Virgin Olive Oil. And please, ensure it has been stored correctly. Light and heat are the enemies of olive oil, causing the delicate fats to oxidize and go rancid [7]. You must stop ruining your olive oil by keeping it in a clear glass bottle right next to your hot stove. Store it in a cool, dark pantry in an opaque container to protect its integrity.
Storage Strategies for the Long Haul
So, you’ve executed the quick boil, you’ve gently folded in your oil to avoid bitterness, and you’ve used top-tier ingredients. You now have a bowl of the most magnificent, brilliant green pesto you have ever seen. How do you keep it that way for the rest of the week?
Even with the PPO enzymes deactivated by blanching, prolonged exposure to oxygen will eventually dull the flavors and slightly mute the color over several days in the fridge. To maximize shelf life, you need an oxygen barrier.
When you transfer your leftover pesto into a storage container, smooth the top surface with the back of a spoon so it is completely flat. Then, gently pour a thin, quarter-inch layer of extra virgin olive oil directly over the top [4]. This creates an airtight lipid seal that prevents oxygen from reaching the basil underneath. When you are ready to use the pesto again, you can simply stir that layer of oil right into the sauce.
If you are a meal-prepping champion and want to make a massive batch to last for months, freezing is your best friend. The blanched pesto freezes beautifully. Spoon the pesto into silicone ice cube trays and freeze them solid [4]. Once frozen, pop the vibrant green cubes out and transfer them to a heavy-duty freezer bag.
A quick word of warning on storage containers: pesto is incredibly rich in both oil and bright natural pigments (chlorophyll). If you store it in cheap plastic Tupperware, the oils will bind with the plastic, and the pigments will dye the container. It is the exact same chemical nightmare you face when your plastic containers stain orange after storing leftover tomato sauce or chili. To avoid this, always store your pesto in glass mason jars or high-quality glass food storage containers with airtight locking lids. Glass is non-porous, won’t absorb odors, and washes perfectly clean every time.
The Lemon Juice Myth: Why Acid is a Flawed Fix
Before we wrap up, I need to address a common piece of internet cooking advice that drives me absolutely up the wall. If you search for ways to keep pesto green, you will inevitably find dozens of blogs telling you to just “add a heavy squeeze of lemon juice.”
Let me be clear: while a tiny splash of lemon juice can brighten the flavor of a finished dish, using heavy amounts of citric acid as a primary anti-browning agent is a deeply flawed strategy for pesto.
Yes, lowering the pH of the environment (making it more acidic) does temporarily slow down the activity of the polyphenol oxidase enzymes [1]. But it comes with two massive drawbacks.
First, traditional pesto Genovese is not supposed to taste like a lemon vinaigrette. It is supposed to be rich, savory, nutty, and herbal. Flooding it with lemon juice fundamentally alters the flavor profile, masking the delicate sweetness of the basil and the buttery notes of the pine nuts.
Second, and more importantly for our visual aesthetic, acid is actually the enemy of chlorophyll over time. Have you ever dressed a beautiful green salad with a heavy vinaigrette and left it sitting for an hour? The vibrant green leaves turn a sad, sickly olive-drab color. This happens because the hydrogen ions in the acid displace the magnesium ion at the center of the chlorophyll molecule, converting it into a compound called pheophytin. Pheophytin is notoriously dull and olive-brown.
So, by adding heavy lemon juice, you might temporarily stop the enzymatic browning, but you are actively triggering a chemical degradation of the chlorophyll itself. You are trading one type of brown sludge for another.
Skip the lemon juice hack. Stick to the thermodynamics. The 10-second boil is the only scientifically sound method to preserve both the authentic flavor and the brilliant color of the basil.
Final Thoughts from the Kitchen
You don’t need to be a Michelin-starred chef to execute professional-level techniques in your home kitchen. You just need to understand a little bit of the science behind your food and have the confidence to apply it.
Yes, boiling your basil adds exactly one extra pot to your dishwashing load. But for the sake of vibrant, emerald-green pesto that stays beautiful in your fridge for days, it is an incredibly small price to pay. Say goodbye to the muddy swamp sludge and hello to a sauce that looks as bright, fresh, and spectacular as it tastes. Now go toast those pine nuts, grate that real cheese, and show that basil who is boss. You’ve got this.






