The Heartbreak of the Flat Cookie Puddle
Picture this: It is a beautiful Saturday afternoon. You have finally carved out a few precious hours of free time between running errands and pretending to fold your laundry. You decide to treat yourself and your family to a batch of homemade chocolate chip cookies. You do everything right. You buy the expensive, high-quality vanilla extract. You splurge on the artisanal chocolate discs. You carefully measure your flour, mix your dough, and slide your baking sheet into the oven, already anticipating that glorious, bakery-worthy aroma.
You set your timer for twelve minutes. You pour yourself a glass of wine. You wait.
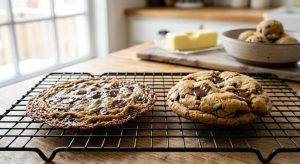
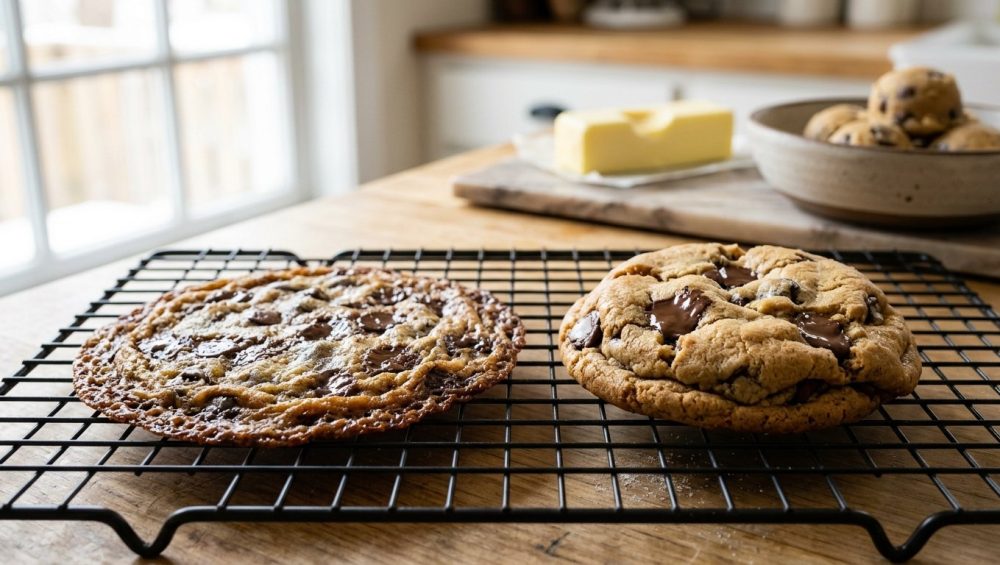
But when that timer goes off and you eagerly open the oven door, you are not greeted by thick, chewy, perfectly domed cookies. Instead, you are staring at a baking sheet covered in a single, fused, greasy mega-cookie. The edges are burnt, the centers are raw, and the dough has spread so thin it looks like a topographic map of despair. It is a devastating culinary moment when your cookies spread into giant puddles, and if you are like most home bakers, your first instinct is to blame the recipe.
I am here to deliver some tough love, my friends: It is not the recipe’s fault. It is yours. More specifically, it is your butter.
As a home cook who has set off the smoke detector more times than I care to admit, I have made every baking mistake in the book so that you do not have to. And the single most common, most destructive, and most easily avoidable mistake that weekend bakers make is completely botching their butter temperature. We treat butter like it is just another ingredient to be casually tossed into the mixer, completely ignoring the fact that it is the foundational structural pillar of our baked goods.
Baking is not cooking; it is edible chemistry. You cannot just wing it, eyeball it, or hope for the best. If you want professional-level, mind-blowing cookies without needing a pastry degree, you have to respect the science of fat. Today, we are going to tear down the myths, banish the bad habits, and master the exact thermodynamics of butter so you never have to scrape a flat, greasy cookie off a baking pan ever again.
The Great “Room Temperature” Butter Lie
If there is one phrase in the culinary world that I absolutely loathe, it is “room temperature butter.” It is the biggest scam in modern recipe writing, and it is actively sabotaging your desserts.
Think about it logically for a second. What does “room temperature” actually mean? If you live in a drafty farmhouse in Maine in the dead of January, your room temperature might be 62°F. If you are baking in a sweltering, un-air-conditioned apartment in Florida in July, your room temperature could easily be 82°F. Those two temperatures will yield two entirely different chemical reactions in your mixing bowl.
When professional pastry chefs and recipe developers write “room temperature,” they are referring to a very specific, scientifically ideal temperature range: 65°F to 67°F.
At 65°F, butter is in a magical state of matter. It is solid enough to hold its shape, but plastic and pliable enough to be manipulated. If your butter hits 72°F—which is the actual temperature of most modern, climate-controlled homes—it is already too warm for proper cookie baking. At 75°F, it is a disaster waiting to happen. Just as you rely on the magic of a digital scale to accurately measure your flour, you need to start being incredibly precise about the thermal state of your fats.
The Squeeze Test: How to Tell When Butter is Ready
If you do not want to stick an instant-read thermometer directly into your stick of butter (though I highly recommend you do), you need to learn how to evaluate its temperature using your senses.
The Squeeze Test is your best friend. Take your index finger and gently press it into the top of the stick of butter.
- Too Cold: If your finger meets hard resistance and the butter cracks or splinters, it is too cold. It will not aerate, and you will end up with dense, heavy dough lumps.
- Too Warm: If your finger slides right through the butter with zero resistance, leaving a greasy, shiny smear on your skin, it is dead to us. The butter is too warm. It has lost its structural integrity.
- Perfect: If your finger leaves a slight, clean indentation—like pressing into a firm memory foam mattress—and the butter feels slightly cool to the touch without looking greasy, you have hit the 65°F sweet spot.
When you leave butter sitting on the counter right next to your preheating oven for three hours, it is not “softened.” It is melted on a molecular level, even if it hasn’t turned into a liquid puddle yet.
The Science of the Creaming Method (And Why Warm Butter Ruins It)
To understand why warm butter ruins your cookies, we have to talk about what is actually happening in your stand mixer when you combine butter and sugar. This process is called the “creaming method,” and it is widely misunderstood.
Most home bakers think that creaming butter and sugar is just a way to blend two ingredients together so the cookie tastes sweet. Wrong. Creaming is a mechanical process of aeration.
Sugar is a crystalline structure. On a microscopic level, sugar crystals are sharp, jagged little rocks. When you turn on your mixer, those sharp sugar crystals are violently smashed into the butter. If the butter is at that perfect 65°F, it is pliable enough to yield to the sugar, but firm enough to hold its shape. As the sugar crystals slice through the fat, they carve out millions of microscopic air pockets. (As a side note, if your brown sugar turns to stone from improper storage, those clumps will fail to aerate the butter, severely compromising your dough’s structure).
Aeration: Building Your Cookie’s Skeleton
Those millions of microscopic air pockets are the invisible skeleton of your cookie. When you eventually put the dough into the hot oven, the chemical leaveners (baking soda or baking powder) react, and the trapped moisture in the dough turns into steam. That steam rushes into the microscopic air pockets you created during creaming, causing them to expand like tiny hot air balloons. This is what gives a cookie its lift, its thickness, and its delightfully chewy texture.
Now, what happens if your butter is 75°F when you start creaming?
Warm butter has lost its plasticity. It is too soft to trap air. When the sugar crystals slice into warm butter, the fat just collapses back in on itself, like trying to blow a bubble in water. No air is trapped. No skeleton is built. Without those air pockets, there is nothing for the steam to expand into during baking. The dough has no structural integrity, so the moment it hits the heat of the oven, it simply surrenders to gravity and spreads outward into a flat, depressing puddle.
Furthermore, over-creaming warm butter is a fatal error. If you let the mixer run too long on soft butter, the friction of the paddle attachment will heat the butter even further, causing it to come completely out of emulsion.
Emulsions: Oil and Water (and Sugar) Do Mix
Let’s get a little nerdy about food chemistry. Commercial American butter is generally composed of about 80% butterfat, 15% to 18% water, and a small percentage of milk solids. Butter is an emulsion, meaning it is a stable suspension of water droplets trapped within a network of solid fat.
When you make cookie dough, you are adding eggs to this mixture. Eggs are mostly water. So, you are asking a bowl full of fat to seamlessly absorb a bunch of extra water. If your butter is at the correct, cool temperature, it can handle this task, creating a smooth, cohesive, homogenous dough.
If your butter is too warm, the emulsion breaks. The fat separates from the water, resulting in a curdled, greasy, split mess. When an emulsion breaks in the mixing bowl, it cannot hold the flour properly. The fat will literally leak out of the dough while it bakes, leaving you with cookies that are sitting in a pool of their own grease, with a fried, unpleasantly crispy texture.
What Actually Happens in the Oven When Your Butter is Too Warm
Let’s follow your poorly-mixed, warm-butter dough into the oven to watch the tragedy unfold in real-time. Baking is a race between two opposing forces: the melting of the fats and the setting of the structure.
When you place a baking sheet into a preheated 350°F oven, radiant and convective heat immediately begins attacking the dough. The butter inside the dough is a complex mixture of triglycerides, which have a melting point that generally hovers between 90°F and 98°F.
If you started with butter that was already 75°F or 80°F, it only takes a few seconds in the oven for that butter to hit its melting point and turn completely liquid. However, the proteins in the eggs and the starches in the flour do not begin to coagulate, gelatinize, and set into a firm structure until they reach much higher temperatures (usually around 140°F to 160°F).
Because your butter melted so rapidly, the fat liquefies and flows outward long before the flour and eggs have had a chance to build a wall to contain it. The cookie spreads aggressively.
Conversely, if you start with cool butter (and chilled dough), the fat takes much longer to reach its 90°F melting point. By the time the butter finally liquefies, the outer edges of the cookie have already started to heat up, the egg proteins are coagulating, and the flour starches are setting. The structure forms a physical barrier that prevents the fat from escaping, forcing the cookie to bake upward rather than outward.
This is why oven temperature accuracy is critical. If your oven runs cold, the setting of the structure is delayed, giving the butter more time to melt and spread. You absolutely need a simple oven thermometer to verify that 350°F is actually 350°F, because relying on the digital display of a ten-year-old appliance is a fool’s errand.
The Chilling Truth: Why Resting Your Dough is Non-Negotiable
If you have realized that your butter was too warm during mixing, you might think you can just toss the bowl in the fridge for ten minutes to fix it. While chilling the dough is absolutely mandatory for perfect cookies, it does not magically undo the damage of collapsed air pockets. However, chilling dough is the ultimate secret weapon of the professional pastry chef, and it involves a lot more than just making the butter cold again.
When recipes tell you to chill your dough, they are not just trying to annoy you and delay your gratification. They are giving the dough time to hydrate and mature.
When you first mix flour into your wet ingredients, the dough is essentially a wet, sticky mess. Flour is packed with starches and proteins that need time to physically absorb the moisture from the eggs and the water content of the butter. If you bake the dough immediately, that unabsorbed moisture turns into steam too quickly, and the loose dough spreads.
Giving the dough time to rest allows the flour to act like a sponge, soaking up the free liquids. The dough becomes significantly firmer, drier, and more cohesive. This hydration process is a massive factor in structure retention. Knowing how resting your dough changes everything is the defining line between an amateur weekend baker and a true kitchen artist.
30 Minutes vs. 24 Hours: A Time Breakdown
The length of time you chill your dough drastically alters the final product. Here is the exact scientific breakdown of what happens in your refrigerator:
- 30 Minutes to 1 Hour: This is the bare minimum. At this stage, the thermal temperature of the butter has dropped back down, solidifying the fats so they won’t melt instantly in the oven. The flour has begun to hydrate, slightly reducing the spread. You will get a decent, perfectly acceptable cookie.
- 2 to 4 Hours: The flour is now fully hydrated. The dough is noticeably stiffer and less sticky. The cookies will bake up significantly thicker, with a more pronounced chew in the center and a better structural dome.
- 24 to 72 Hours: This is where the real culinary magic happens. As the dough sits for an extended period, naturally occurring enzymes in the flour and egg yolks begin to break down the complex carbohydrates (starches) into their component simple sugars, specifically fructose and glucose.
Why do we care about simple sugars? Because simple sugars caramelize and undergo the Maillard reaction much faster and more aggressively than complex starches. A cookie dough that has rested for 48 hours will bake up with a deeply rich, toffee-like, butterscotch flavor profile that a freshly mixed dough simply cannot replicate. It will also develop stunningly beautiful, deeply browned, crispy edges while maintaining a soft, molten center.
If you are going to go through the effort of buying high-end chocolate bars to chop by hand—and side note, if your kitchen knives go dull you will crush the chocolate rather than cleanly slicing it into those gorgeous, melty shards—you owe it to those expensive ingredients to let the dough rest for at least 24 hours.
A Brutally Honest Look at Your Baking Gear
I can teach you all the thermal dynamics and hydration science in the world, but if you are putting your perfectly temperature-controlled, 48-hour-rested cookie dough onto garbage equipment, you are still going to fail.
As your sassy sous-chef, I have a strict “no-go” rule on toxic, cheap, gimmick kitchenware. I have zero patience for equipment that actively fights against the home cook. Your baking sheet is not just a tray; it is a thermal conductive tool that transfers heat from the oven air to the bottom of your cookie.
If you are using thin, flimsy baking sheets from a discount bin, they are going to heat up unevenly, create hot spots, and scorch the bottoms of your cookies before the centers even have a chance to warm up. Worse, thin pans warp under high heat. If your baking sheets keep warping and making that terrifying “POP!” sound in the oven, you are launching your cookies into the air and completely disrupting their structural setting process. Throw them in the recycling bin immediately.
Ditch the Peeling Non-Stick Pans
I absolutely despise cheap, dark-coated, non-stick baking sheets. First of all, dark metal absorbs and radiates heat significantly faster than light metal. A dark non-stick pan will aggressively sear the bottom of your cookie, causing the butter to melt out of the base and fry the edges, resulting in a tough, burnt bottom and a raw top.
Secondly, those cheap non-stick coatings inevitably scratch, flake, and peel over time. You do not want mystery chemical polymers flaking off into your organic chocolate chip cookies. It is entirely unnecessary.
You need to invest in heavy-gauge, bare aluminum half-sheet pans. Aluminum is an exceptional conductor of heat, meaning it warms up evenly and steadily, providing a gentle, consistent bake to the bottom of your cookies without scorching them. They are virtually indestructible, they do not peel, and they will last you a lifetime.
Silicone Mats vs. Parchment Paper
While we are on the subject of gear, we need to talk about pan liners. Silicone baking mats have become incredibly popular, and while they are great for certain sugar work or sticky candies, they are often detrimental to cookies.
Silicone is a thermal insulator. It actively impedes the transfer of heat from the aluminum pan to the bottom of the dough. The hidden flaw in silicone baking mats is that they prevent the bottom of the cookie from getting properly crispy, often resulting in a pale, slightly gummy base. Furthermore, because silicone is so slick, the dough has nothing to grip onto as it bakes, which can actually encourage the cookies to spread wider.
Parchment paper is the superior choice for cookie baking. It provides a non-stick surface without acting as a heavy thermal insulator, and it allows the dough to grip the paper just enough to prevent excessive spreading.
How to Rescue Butter You’ve Already Melted
Let’s be realistic. Despite reading all of this, there will be a Tuesday night where you desperately need a cookie, your butter is rock hard in the fridge, and you impatiently throw it in the microwave. You meant to hit 5 seconds, but you got distracted by a text message, and now you have a bowl of hot, completely liquefied butter.
Do not panic, but also, do not proceed with your standard chocolate chip cookie recipe.
Once butter has been melted, the emulsion is broken, and the crystalline structure of the fat is destroyed. You cannot just put it back in the fridge to harden and expect it to behave like properly cool, plastic butter. It will not aerate. If you try to cream chilled melted butter, it will just break into greasy, dense shards. Just as you know that water and hot butter always splatters violently when mixed in a skillet, mixing melted butter into a recipe meant for creamed butter will result in a chaotic, structural failure.
Instead of throwing the melted butter away, you must pivot.
Option 1: The Melted Butter Cookie Recipe
There are specific recipes engineered entirely around melted butter. These recipes do not rely on mechanical aeration (creaming) for lift; instead, they rely heavily on chemical leaveners (baking soda/powder) and the moisture content of the dough. Melted butter cookies are intentionally dense, incredibly chewy, and have a texture closer to a blondie or a brownie. Find a recipe that specifically calls for melted butter and use it.
Option 2: Brown It
If you have already melted the butter, you might as well take it a step further and brown it. Browning butter (beurre noisette) evaporates the water content and toasts the milk solids, creating a profoundly nutty, caramel-rich flavor profile. Because browning removes the water (about 15% of the butter’s volume), you will need to replace that lost moisture in your dough—usually by adding an extra egg yolk or a splash of milk—but the resulting flavor is spectacular.
The Definitive Sassy Sous-Chef Checklist for Perfect Cookies
You do not need to attend a Parisian culinary academy to bake flawless cookies. You just need to respect your ingredients, manage your time, and understand the basic thermodynamics of your kitchen.
To ensure you never bake a sad, flat, greasy puddle ever again, strictly adhere to this master checklist:
- Check Your Temp: Pull your butter out of the fridge 45 to 60 minutes before baking. Do not microwave it. Do not put it on the stove. Let it come to 65°F naturally. It should be cool to the touch and yield to gentle pressure without feeling greasy.
- Cream with Purpose: Beat your 65°F butter and sugar together for 2 to 3 minutes until pale and fluffy. Stop immediately. Do not over-mix and heat up the butter with the friction of the paddle.
- Hydrate and Rest: Once your dough is mixed, cover it tightly and put it in the refrigerator. Wait at least 2 hours, but aim for 24 to 48 hours to unlock those deep, caramelized, enzymatic flavors.
- Portion Cold: Scoop your dough while it is still chilled. Using a heavy-duty, spring-loaded cookie scoop ensures that every single cookie is the exact same mass, meaning they will all bake at the exact same rate.
- Use Safe, Quality Gear: Bake on heavy-gauge, bare aluminum sheet pans lined with parchment paper. Leave the peeling, toxic non-stick pans in the trash where they belong.
- Cool Your Pans: Never put cold cookie dough onto a hot baking sheet. If you are baking in batches, let the aluminum pan cool completely to room temperature before loading it up again.
Baking is a science, but it is a highly accessible one. By simply controlling the temperature of your butter and giving your flour the time it needs to hydrate, you are taking complete control over the chemical reactions happening in your oven. You have the power to dictate whether your cookies are dense and chewy, light and cakey, or perfectly crispy on the edges with a molten center.
Stop letting your environment dictate your baking results. Take control of your butter, respect the chill time, and go bake something that will make your weekend absolutely spectacular. You’ve got this.