
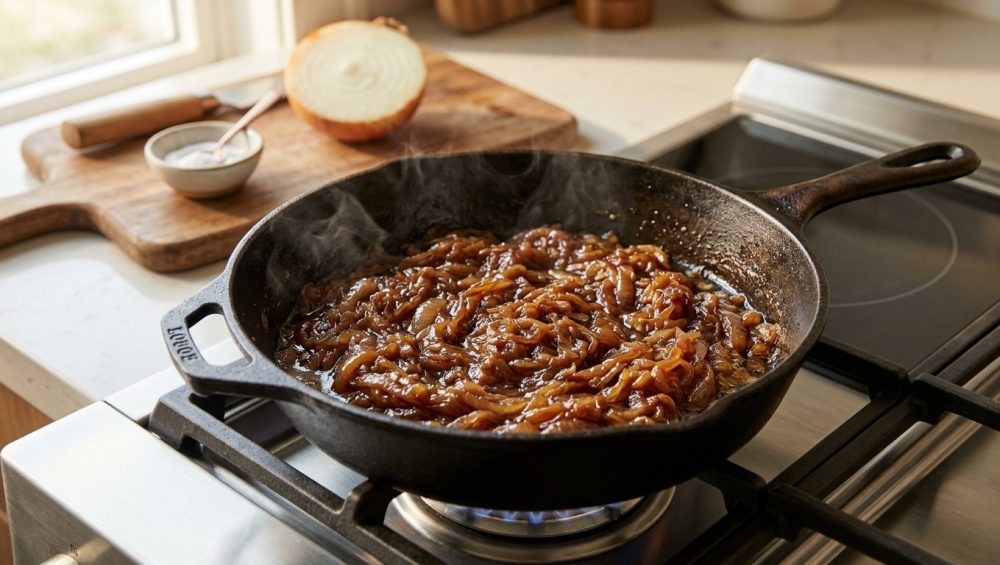
Listen, darling, we need to have a serious, sit-down conversation about the lies you have been fed by the culinary media. Picture this: It is a random Tuesday evening. You just got home from a long, exhausting day at work. You are starving, your patience is wearing thin, and you decide to pull up a seemingly innocent recipe for a “quick weeknight” French onion pasta or a gourmet burger. You scroll past the author’s life story, get to the instructions, and read step one: “Caramelize the onions (about 10 minutes until deeply browned and sweet).”
You follow the instructions. You stand at the stove, exhausted, stirring a mountain of sliced onions. Ten minutes pass. You look down into your skillet, and what do you see? You do not see jammy, mahogany-brown, deeply sweet culinary gold. No, you see a pile of pale, sweaty, translucent alliums that look like they just stepped out of a lukewarm sauna. They are limp, they are sad, and they are nowhere near caramelized.
I am the Sassy Sous-Chef, and I am here to tell you that you are not crazy, your stove is not broken, and you absolutely do not lack culinary talent. You have simply been the victim of the greatest, most pervasive lie in modern recipe writing. Today, we are going to debunk the ten-minute caramelization myth, dive deep into the actual science of why onions take so agonizingly long to brown, and most importantly, I am going to teach you a brilliant, science-backed shortcut. By manipulating the pH level of your skillet with a tiny pinch of a common pantry staple, we are going to force chemistry to bend to our will.
Grab a glass of wine, tie your apron, and let’s get to work.
The Great Recipe Lie: Why “10 Minutes” is a Culinary Crime
Before we fix the problem, we have to understand why the problem exists. Why do so many cookbooks, food blogs, and glossy food magazines blatantly lie about how long it takes to caramelize onions?
It all comes down to the publishing industry and the modern consumer’s shrinking attention span. Recipe developers are under immense pressure to keep the “active prep time” of their weeknight meals under thirty minutes. If a recipe writer truthfully stated, “Stand at the stove for 45 to 60 minutes, stirring your onions constantly until they undergo a complex chain of chemical reactions,” absolutely no one would click on their post, save it to their Pinterest board, or buy their cookbook. The harsh reality of traditional onion caramelization simply does not fit into the highly marketable “30-Minute Meals” narrative.
So, they lie. They casually write “10 to 15 minutes,” leaving millions of everyday home cooks feeling inadequate. This breeds kitchen anxiety. It makes you think you are doing something fundamentally wrong when your food doesn’t match the heavily filtered photos on your screen. As someone who firmly believes that anyone can cook like an absolute expert without a culinary degree, I find this trend infuriating. I survive my weekdays by prioritizing rigorous efficiency and legitimate, science-based shortcuts—not by pretending a one-hour process takes ten minutes. We are breaking this toxic cycle of culinary gaslighting today.
The Anatomy of an Allium: Choosing the Right Contender
If you want to master the art of the caramelized onion, you first have to understand the biological makeup of the vegetable you are throwing into the pan. Not all onions are created equal, and choosing the wrong one will doom your weeknight dinner before you even turn on the burner.
The Yellow Onion: The Undisputed Champion
The standard yellow onion is the absolute workhorse of the kitchen. It boasts an ideal balance of astringency (that sharp, pungent bite) and natural sugars. When cooked down, the sharp sulfur compounds mellow out, and the complex sugars are allowed to shine, creating a deeply savory, rich, and balanced flavor profile. If a recipe just says “onions,” this is what you should be using.
The Sweet Onion: A Deceptive Trap
You might think that varieties like Vidalia, Walla Walla, or Maui onions would be perfect for caramelizing because they are naturally sweeter. This is a rookie mistake. Sweet onions actually have a much higher water content and significantly less structural integrity than yellow onions. While they do break down quickly, they often disintegrate into a watery, unappealing mush rather than a jammy, cohesive marmalade. They also lack the savory depth required to balance out the sweetness, resulting in a cloying, one-note flavor.
The Red and White Onions: Better Left Elsewhere
Red onions are fantastic for pickling or eating raw on a salad, but when subjected to the prolonged heat of caramelization, their beautiful purple hue turns into a muddy, unappetizing greyish-brown. White onions, on the other hand, are incredibly sharp and crisp, making them perfect for raw salsas and garnishes, but they lack the robust sugar content needed for a truly great caramelization process. Stick to the yellow onions.
The Science of the Sizzle: What Caramelization Actually Is
I have zero patience for pretentious chef-speak, but if you want to cook like a pro, you need to understand the actual chemistry happening in your skillet. The term “caramelized onions” is actually a massive culinary misnomer. When you cook down a pan of onions, you are not just caramelizing them; you are primarily relying on a completely different chemical process called the Maillard reaction.
True Caramelization vs. The Maillard Reaction
True caramelization is a relatively straightforward process: it is the pyrolysis (heat-induced decomposition) of sugar. When you heat pure sucrose to about 320°F (160°C), the sugar molecules break down and reform into hundreds of new, complex compounds that taste nutty, bitter, and sweet. Caramelization requires absolutely no proteins—just sugar and high heat.
The Maillard reaction, however, is the real MVP of the savory kitchen. Discovered by French chemist Louis-Camille Maillard in 1912, this is a highly complex cascade of chemical reactions that occurs when amino acids (the building blocks of proteins) react with reducing sugars (like glucose and fructose) under heat. This reaction is responsible for the brown crust on a seared steak, the golden color of baked bread, the flavor of roasted coffee, and yes, the savory, meaty depth of browned onions.
Because onions contain both natural sugars and amino acids, both true caramelization and the Maillard reaction occur simultaneously in your pan.
The Enemy of Browning: Water
So, if we just need heat, sugar, and amino acids, why does it take nearly an hour? The answer is water.
A raw onion is roughly 86% water. This is a massive thermodynamic hurdle. Basic physics dictates that as long as there is liquid water in your pan, the temperature of that food cannot exceed the boiling point of water, which is 212°F (100°C). However, the Maillard reaction does not kick into high gear until the temperature reaches roughly 280°F to 330°F (140°C to 165°C).
Therefore, before your onions can even begin to properly brown, you have to apply enough thermal energy to evaporate almost all of that internal cellular water. You are essentially boiling your onions in their own juices for the first thirty minutes. Only after the water is gone can the temperature of the onion tissue rise high enough to trigger the Maillard reaction. This is the unchangeable law of thermodynamics that recipe writers conveniently ignore.
The Variables of Despair: Why Your Gear Matters
Before we get to the magic shortcut, we have to talk about your equipment. You cannot achieve professional-level results if you are working with terrible tools.
First and foremost, I need you to evaluate your cookware. I absolutely despise cheap, lightweight non-stick pans. Not only do they have terrible heat retention, but when you subject them to the prolonged heat required for caramelizing, those flimsy chemical coatings begin to degrade. You do not want peeling mystery chemicals in your food. We are actively banishing toxic kitchen gear from our lives starting today.
Instead, you need a pan with high thermal mass—something that can absorb heat and distribute it evenly across the surface so your onions brown uniformly instead of scorching in hot spots and boiling in cold spots. A heavy-bottomed, multi-clad stainless steel skillet is phenomenal for this. If you are intimidated by stainless steel, you just need to learn the water drop test to ensure your pan is properly preheated, which will prevent your food from aggressively sticking. Alternatively, utilizing traditional carbon steel cookware is a brilliant choice, as it offers the heat retention of cast iron but with a naturally slick, polymerized surface that handles the sticky sugars of the onion beautifully.
Your knife skills and tools also play a crucial role. A dull knife does not slice through the onion’s cell walls; it violently crushes them. This crushing action releases massive amounts of lachrymatory factor synthase—the specific enzyme that creates the volatile gas that attacks your eyes. If you find yourself weeping uncontrollably at the cutting board, you can almost always blame your onions make you cry on a blunt blade. Sharpen your knives. Furthermore, when it is time to transfer that massive pile of sliced onions from your cutting board to your preheated skillet, do not drag the delicate edge of your freshly sharpened chef’s knife across the wood. That will ruin the blade instantly. Instead, use a cheap, durable stainless steel bench scraper to scoop up the vegetables like a true professional.
Hacking the pH Scale: The Baking Soda Miracle
We have established that physics and chemistry demand 45 to 60 minutes to evaporate water and trigger the Maillard reaction. But remember my core philosophy: time is money during the workweek. We need a shortcut that doesn’t sacrifice flavor. How do we cheat the laws of culinary physics? We manipulate the pH scale.
The Maillard reaction is exquisitely sensitive to the pH level of its environment. In an acidic environment (a lower pH), the reaction slows down to a crawl. But in an alkaline, or basic, environment (a higher pH), the reaction hits the gas pedal and goes into absolute overdrive.
Enter our hero: Sodium Bicarbonate, commonly known as baking soda.
By adding a tiny, calculated pinch of baking soda to your cooking onions, you instantly raise the pH level of the environment in the skillet. On a molecular level, this alkaline environment deprotonates the amino groups within the onion’s proteins. I know this sounds like a college chemistry lecture, but stick with me. Deprotonating the amino groups makes them significantly more nucleophilic, which is a fancy way of saying they become incredibly eager and reactive. This chemical shift dramatically lowers the activation energy required for the Maillard reaction to occur. Suddenly, your onions can begin browning beautifully and developing deep, savory flavors at a much faster rate, even if there is still some moisture present in the pan.
If you have ever seen how baking soda transforms cheap, tough cuts of beef in a Chinese velvet-ing marinade, you already know it is a powerful chemical agent. But its magic doesn’t stop at browning. The higher alkaline environment also aggressively attacks the pectin—the structural glue that holds the onion’s cell walls together. As the pectin weakens and breaks down, the onions soften and collapse into that luxurious, jammy texture in a mere fraction of the standard time.
By utilizing baking soda, we are safely accelerating both the browning and the softening processes simultaneously.
The Golden Ratio: How Much Baking Soda is Too Much?
Before you go dumping a spoonful of Arm & Hammer into your skillet, we need to establish some very strict boundaries. Baking soda is a chemical catalyst, and it must be respected.
Sodium bicarbonate has a highly distinct, incredibly unpleasant flavor profile. It tastes soapy, bitter, and metallic. If you use too much of it, your onions will literally taste like a mouthful of dish detergent. Furthermore, because it is so effective at breaking down pectin, an overdose of baking soda will cause your onions to completely disintegrate, turning your skillet into a bubbling cauldron of grey, unappetizing onion puree.
The golden ratio for culinary success is exact: You must use no more than 1/8 teaspoon of baking soda per 1 pound of raw onions.
For context, one pound of onions is roughly equivalent to two to three medium-to-large yellow onions. Do not eyeball this measurement. Use proper measuring spoons.
Additionally, you should never sprinkle dry baking soda directly over the onions in the pan. It will clump, resulting in localized pockets of extreme alkalinity. One bite of your dinner will be perfect, and the next will taste like a battery. Always dissolve your 1/8 teaspoon of baking soda in one tablespoon of water to create a slurry. This ensures the alkaline catalyst is distributed perfectly and evenly throughout the entire batch of onions.
Step-by-Step Masterclass: The Sassy Sous-Chef’s Rapid Caramelized Onions
Now that you understand the deep science and have gathered the proper tools, it is time to execute. This method, heavily inspired by the brilliant food scientists at America’s Test Kitchen and refined by my own impatient weeknight testing, will yield deeply browned, sweet, jammy onions in about 20 to 25 minutes.
Step 1: The Proper Cut
Peel your yellow onions and cut them in half from the root to the stem (pole-to-pole). Lay the flat side down on your cutting board, cut off the stem end, and leave the hairy root end intact for a moment to hold the layers together. Slice the onion radially, following the natural curve of the vegetable, about 1/4-inch thick. Slicing pole-to-pole rather than orbitally (across the equator) ensures the onion slices hold their shape much better during the aggressive softening phase, preventing them from turning to complete mush.
Step 2: The Steam Phase (0 to 10 Minutes)
Place your large, heavy-bottomed skillet on the stove. Add your sliced onions (let’s assume 1 pound for this recipe), 1 tablespoon of neutral cooking oil, 1 tablespoon of unsalted butter (for flavor), and 1/2 teaspoon of kosher salt. The salt will immediately begin drawing moisture out of the cell walls via osmosis.
Now, we are going to do something that feels incredibly counterintuitive: pour 1/2 cup of water directly into the pan and turn the heat to high. Cover the skillet with a tight-fitting lid.
Why are we adding water when I just told you water is the enemy of browning? Because water is an exceptional conductor of heat. By trapping the steam inside the skillet, we are rapidly raising the internal temperature of the onions to 212°F, forcing them to sweat and collapse in a matter of minutes. If we relied solely on dry heat from the bottom of the pan, this softening phase would take twenty minutes. We are steam-rolling through the structural breakdown phase. Let them steam for about 10 minutes.
Step 3: The Sizzle Phase (10 to 15 Minutes)
Remove the lid. The onions should be totally limp, translucent, and swimming in liquid. Keep the heat on medium-high. We now need to evaporate all that excess water. Stir occasionally. You will hear the sound in the pan change from a wet, rolling boil to an aggressive, crackling sizzle. That sound change is your auditory cue that the water has evaporated and the onions are finally frying in the residual oil and butter.
Press the onions down into a flat, even layer across the bottom and sides of the skillet. Maximizing surface area contact with the hot metal is critical here. Let them sit undisturbed for a minute or two to build up some color, then stir.
Step 4: The Baking Soda Catalyst (15 to 20 Minutes)
Once the onions have just begun to pick up a light golden hue, it is time to deploy the secret weapon. Mix your 1/8 teaspoon of baking soda with 1 tablespoon of water in a small ramekin. Pour this slurry evenly over the onions in the skillet and immediately stir to combine.
Lower the heat to medium. Within seconds, you will witness a dramatic visual transformation. The onions will rapidly shift from pale yellow to a deep, vibrant yellow, and then quickly begin to develop a rich, mahogany brown color. The Maillard reaction is now operating at warp speed. You must stir frequently during this phase, as the sugars are highly reactive and prone to burning.
Step 5: The Deglaze (20 to 25 Minutes)
As the onions rapidly brown, you will notice a dark, sticky residue forming on the bottom of your stainless steel or carbon steel skillet. This is called the “fond,” and it is the concentrated essence of flavor. You do not want this to burn.
When the fond becomes dark brown, you must deglaze the pan by pouring in a small splash (about 2 tablespoons) of water, chicken broth, or dry white wine. The liquid will instantly boil and lift those sticky sugars off the metal. This is the ultimate secret to turning burnt bits into sauce and incorporating all that incredible flavor back into the onions. Use a sturdy, flat-edged wooden spoon to scrape the bottom of the pan vigorously.
Continue this process—letting the fond build up, splashing with liquid, and scraping it up—for the last five minutes until the onions are uniformly dark, jammy, and smell like heaven. Turn off the heat. You have just achieved in 25 minutes what normally takes an hour.
Troubleshooting: When Good Onions Go Bad
Even with science on our side, the kitchen is a dynamic environment. If your rapid caramelized onions didn’t turn out perfectly, let’s diagnose the issue so you can fix it next time.
The Onions Turned into a Puddle of Mush:
You either used a sweet onion variety (like Vidalia) which lacks structural integrity, or you were too heavy-handed with the baking soda. Remember, the alkaline environment destroys pectin. If you exceed the 1/8 teaspoon per pound ratio, the cell walls will completely obliterate. Measure carefully.
The Onions Taste Bitter or Soapy:
Again, this is the hallmark of too much baking soda. Sodium bicarbonate is not a seasoning; it is a chemical catalyst. Do not eyeball it. Alternatively, you may have let the fond burn on the bottom of the pan before deglazing. There is a fine line between deeply browned and carbonized. Once sugar turns to carbon, it is bitter and unredeemable.
The Onions are Aggressively Sticking:
If you are using a stainless steel pan and the onions are welding themselves to the metal before they even begin to brown, your heat management is off. You likely allowed the pan to get too hot during the sizzle phase, causing the proteins to bond with the metal. Lower your heat slightly, use a bit more oil, and rely on frequent deglazing splashes to keep the surface lubricated.
Beyond the Pan: How to Use Your Liquid Gold
Congratulations, you now possess a batch of deeply flavorful, savory-sweet caramelized onions, and you didn’t have to sacrifice your entire evening to get them. Now, how do we deploy this culinary liquid gold to elevate your weeknight meals?
Elevate Your Soups:
If you ever find that your quick, weeknight homemade soups taste flat and uninspired, dropping a large spoonful of these jammy onions into the broth will instantly provide a massive boost of umami and complex sweetness that usually takes hours of simmering to achieve. It is a cheat code for instant depth of flavor.
The Ultimate Smash Burger:
A great burger doesn’t need fifteen different toppings; it needs a few high-quality, deeply flavorful components. If your goal is to make juicier burgers that rival your favorite high-end pub, skip the raw red onion and drape a hefty portion of these rapid caramelized onions over the melting cheese. The savory sweetness cuts through the rich, fatty beef perfectly.
Gourmet Pizza and Tartines:
Spread a layer of ricotta or goat cheese on a piece of toasted sourdough or a pre-made pizza crust. Top it with your caramelized onions, a sprinkle of fresh thyme, and a drizzle of balsamic glaze. You instantly have a sophisticated, artisan-level meal that looks and tastes like it took all day to prepare.
The Greatest French Onion Dip:
Throw away those sad, dehydrated onion soup packets. Chop up your freshly caramelized onions and fold them into a mixture of sour cream, a touch of mayonnaise, a dash of Worcestershire sauce, and some fresh chives. Serve it with thick-cut potato chips, and you will be the absolute hero of your next mindful gathering.
The Sassy Sign-Off
Cooking should not be an exercise in frustration, and you should never have to feel like a failure just because a recipe writer decided to bend the truth about prep times. By understanding the underlying chemistry of your food—the dance of the Maillard reaction, the thermodynamics of water, and the pH-altering magic of baking soda—you take control of your kitchen.
You do not need a culinary degree to make mind-blowing food. You just need the right tools, a healthy dose of skepticism when reading internet recipes, and the willingness to let science do the heavy lifting for you. Keep your knives sharp, respect the golden ratio of your baking soda, and never let a recipe dictate your sanity. Now go forth and caramelize with confidence!






