
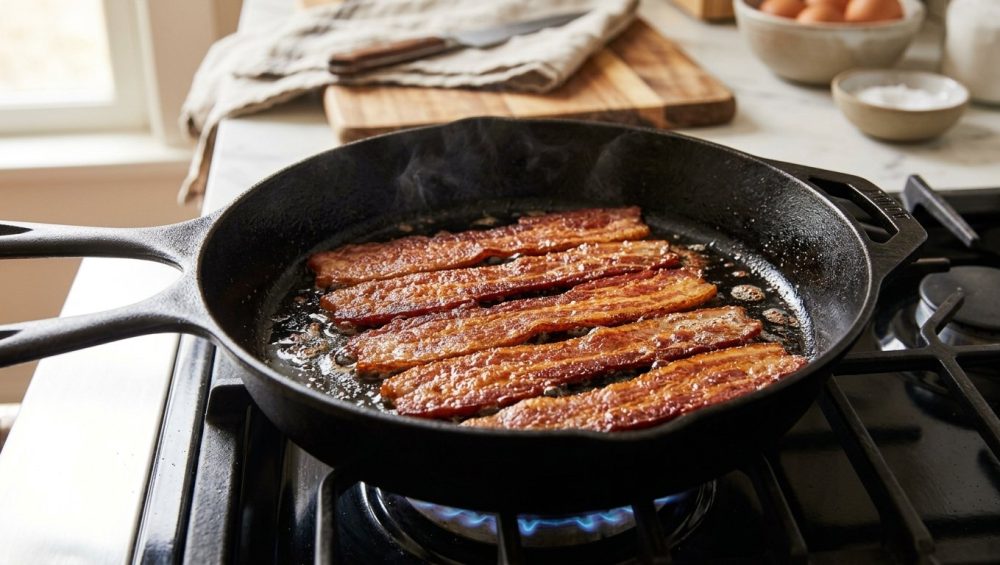
The Great Breakfast Tragedy: Why We Settle for Sad, Warped Bacon
Pour yourself a cup of coffee—or a mimosa, if it is that kind of morning—and let us have a brutally honest conversation about the greatest culinary tragedy occurring in your kitchen right now. I am talking about your bacon. You buy a beautiful, expensive package of thick-cut, hardwood-smoked pork belly. You envision a weekend breakfast spread worthy of a glossy food magazine. But then, the moment those gorgeous strips hit the hot frying pan, chaos ensues. They seize up. They buckle. They contort themselves into gnarled, unidentifiable shapes of pork-based origami.
By the time you pull them out of the skillet, you are left with a massive disappointment. The edges are burnt to a crisp, tasting faintly of carbon and regret, while the middle fatty sections remain flabby, chewy, and entirely undercooked. You tell yourself that this is just the way home-cooked bacon is supposed to look. You convince yourself that perfectly flat, uniformly crispy bacon is a dark art reserved only for professional diners and high-end brunch spots.
I am here to tell you that you are entirely wrong, but I say that with the utmost love and encouragement. You do not need a culinary degree to make mind-blowing food, and you certainly do not need to accept mediocre breakfast meats. I spent years setting off my apartment’s smoke detector and dodging aggressive grease splatters before I finally figured out the mechanics of rendering pork fat. The truth is, perfect bacon is not about luck, and it is not about having a commercial flat-top grill. It is entirely about understanding basic kitchen physics. Once you understand exactly why your bacon throws a temper tantrum in the pan, you can outsmart it. We are going to break down the science of the swirl, banish the bad habits that are ruining your mornings, and equip you with fail-proof techniques to achieve perfectly flat, uniformly crispy bacon every single time.
The Science of the Swirl: Why Your Bacon Curls Up in the Pan
To fix the problem, we must first understand the enemy. And in this case, the enemy is differential shrinkage. That might sound like pretentious chef-speak, but I promise you, it is just basic biology. Your bacon is not a uniform, homogenous ingredient like a potato or a piece of tofu. It is a complex cut of meat with competing textures that react to heat in entirely different ways.
The Anatomy of a Bacon Strip: Muscle vs. Fat
Take a good, hard look at a raw strip of streaky bacon. You will notice that it looks like a striped ribbon, alternating between dark pink sections and stark white sections. The pink sections are the muscle fibers—the actual meat of the pig. These fibers are packed with water and tightly wound proteins, specifically collagen (types I and III, if we are getting nerdy about it). The white sections are the adipose tissue, commonly known as the fat. This fat is a structural matrix that holds lipids (fats) and a much smaller amount of water.
When you drop this complex, two-part strip into a hot environment, you are essentially forcing two completely different materials to undergo thermal reactions while they are physically glued to one another. It is a recipe for structural tension.
Heat and the Shrinkage Discrepancy
Here is the exact moment everything goes wrong. When the muscle fibers (the pink meat) hit a temperature of around 140°F (60°C), the collagen proteins begin to rapidly denature. Imagine a coiled phone cord being exposed to a blowtorch; the proteins violently contract, squeeze out their internal moisture, and shrink significantly. In fact, depending on the cut, the muscle portion of your bacon can shrink by up to 30% of its original length in a matter of minutes.
The fat, however, plays by a different set of rules. Adipose tissue begins to render (melt) at around 130°F (54°C). As it heats up, the fat cells rupture and release their liquid lipids into the pan, which is what creates that glorious sizzling grease. But while the fat is melting, its structural matrix does not contract and shrink at the same rapid rate as the muscle fibers.
So, what happens when a rapidly shrinking pink muscle fiber is permanently attached to a relatively stationary white fat matrix? Tension. The muscle pulls tight like a drawn bowstring, dragging the fat along with it. The strip has no choice but to buckle, warp, and curl to accommodate the discrepancy in size. The faster and hotter you cook the bacon, the more violent this contraction becomes, resulting in severely curled strips that lift off the surface of the pan, leading to uneven cooking.
The Moisture Factor: Evaporation and Warping
We also have to talk about water. Unless you are buying artisanal, dry-cured bacon from a local butcher (which is fantastic, but let us be real, most of us are grabbing the standard stuff from the supermarket), your bacon is “wet-cured.” This means the pork belly was injected with a liquid brine solution containing water, salt, sodium nitrite, and sugar to cure it quickly.
When you throw wet-cured bacon into a scorching hot pan, that injected surface water immediately begins to evaporate and turn into steam. Just like patting your meat dry is a non-negotiable step for getting a proper crust on a steak, managing the moisture in your bacon is critical. Rapid evaporation on the surface of the bacon causes the exterior of the muscle fibers to dry out and shrink even faster than the interior of the strip. This creates a secondary layer of tension, pulling the edges of the bacon upward and exacerbating the dreaded curl.
The Toxic Pan Rant: Stop Cooking Your Bacon on Peeling Teflon
Before we get into the actual cooking techniques, I need to pause and address a massive pet peeve of mine. I have zero patience for toxic, cheap kitchenware, and if you are cooking your bacon in a scratched, peeling, ten-dollar non-stick skillet from a big-box store, we need to have an intervention.
Why Cheap Non-Stick is Ruining Your Breakfast (and Your Health)
Many home cooks assume that because bacon is sticky, they absolutely must use a non-stick pan. Furthermore, because they are in a rush on a weekday morning, they crank the burner up to high heat to get the bacon sizzling immediately. If you are doing this, you are actively ruining your non-stick pans. Traditional Teflon (PTFE) coatings are not designed to withstand the high, dry heat required to sear meat. When you heat these cheap pans past 500°F (which happens shockingly fast on a gas burner), the chemical coating begins to break down, releasing invisible, toxic fumes and shedding microscopic flakes of mystery chemicals into your rendered bacon fat.
It is officially time to banish toxic kitchen gear from your life. You do not need a synthetic chemical coating to cook bacon. Bacon is literally half fat; it is entirely self-lubricating!
The Only Pans You Actually Need for Perfect Bacon
If you want professional-level results in a home kitchen, you need to use professional-level materials. You have three acceptable choices for stovetop bacon: cast iron, carbon steel, or high-quality, fully-clad stainless steel.
Cast iron and carbon steel are phenomenal because they have incredible thermal mass. They heat up slowly and hold that heat evenly, which is exactly what we need to gently render pork fat. Furthermore, once the bacon begins to release its lipids, you will naturally stop food from sticking to the metal surface. The fat creates a natural, slick barrier. If you are using a bare metal pan, you are also going to get much better browning (the Maillard reaction) than you ever would on a muted non-stick surface. Do yourself a favor, throw away the peeling Teflon, and invest in a pan that will outlive you.
Method 1: The Cold Pan Technique (Your New Weekday Best Friend)
Now that we have covered the science and the equipment, let us talk about execution. Time is money, especially on a chaotic Tuesday morning before work. You need a method that requires minimal babysitting, prevents grease fires, and yields perfectly flat bacon. Enter the Cold Pan Technique.
Why Starting Cold Changes Everything
The biggest rookie mistake you can make is dropping cold bacon into a pre-heated, scorching hot skillet. Remember the science of the swirl? Hitting cold protein with high heat causes an immediate, violent thermal shock. The muscle fibers instantly seize, contract, and curl the strip into a knot before the fat even has a chance to begin melting.
By starting with a cold pan, you completely eliminate this thermal shock. You are giving the bacon a gentle, gradual runway to come up to temperature. As the pan slowly warms up, it crosses the 130°F threshold where the fat begins to render and melt before it reaches the temperature where the protein violently contracts. By the time the muscle fibers get hot enough to shrink, the strip is already swimming in a shallow pool of its own rendered liquid fat. This liquid fat acts as a buffer, cooking the meat evenly from all sides and significantly reducing the tension that causes curling.
Step-by-Step Guide to the Cold Pan Method
- The Setup: Take your heavy skillet (if you have spent any time maintaining cast iron skillets, you know they are perfect for this) and place it on the stove while the burner is completely off.
- The Arrangement: Lay your bacon strips flat in the cold pan. It is okay if the edges touch slightly, as they will shrink a bit, but do not overlap them, or they will steam instead of fry.
- The Slow Burn: Turn the burner onto medium-low heat. Do not rush this. Let the pan heat up gradually.
- The Render: Within a few minutes, you will hear a gentle, rhythmic sizzle. You will see the opaque white fat turn translucent and begin to pool in the pan as liquid grease.
- The Flip: Because the bacon is cooking in a pool of its own fat, you only really need to flip it once or twice. Wait until the bottom is deeply golden brown, then use a pair of tongs to flip the strips.
- The Finish: Once the bacon reaches your desired level of crispiness, transfer it to a wire rack or a paper towel-lined plate to drain. You will be left with remarkably flat, evenly cooked bacon and a pan full of clean, usable grease.
Method 2: The Water-Simmer Trick (The Weekend Perfectionist’s Secret)
The cold pan method is great for a quick weekday breakfast, but when the weekend rolls around and you have the time to be an absolute perfectionist, you need to elevate your game. I am about to ask you to do something that goes against every survival instinct you have in the kitchen: I want you to pour water into your bacon pan.
Wait, Boil My Bacon? The Science Behind the Madness
I know what you are thinking. Hot grease and water are a recipe for a localized explosion. But we are not adding water to hot grease; we are adding water to raw bacon in a cold pan. The science behind cooking bacon in water is flawlessly sound, and once you try it, it will change your culinary life.
Here is the physics lesson: Liquid water cannot exceed 212°F (100°C) at sea level. When it reaches that temperature, it turns into steam. By adding a shallow layer of water to your bacon pan, you are effectively putting a strict temperature cap on the cooking environment. As long as there is water in the pan, the bacon cannot get hotter than 212°F.
This temperature is the absolute sweet spot. It is hot enough to fully render the tough, chewy fat, but it is low enough that the muscle fibers remain relaxed and tender. The bacon essentially poaches, remaining perfectly flat and releasing all of its excess grease into the water. As the water slowly simmers away and evaporates, the temperature in the pan naturally and gently rises. By the time the pan is dry, the bacon is already fully cooked, perfectly flat, and sitting in a pool of rendered fat. The final stage is just a quick, even crisping process. No burnt edges, no chewy fat, no violent curling.
How to Execute the Water-Simmer Method
- The Submersion: Place your raw bacon strips in a cold, heavy-bottomed skillet. Pour in just enough cold tap water to barely cover the bottom of the pan—you want the water to come about halfway up the thickness of the bacon strips. Do not drown them; a quarter cup to a half cup of water is usually plenty.
- The Simmer: Turn the burner to medium-high heat. Bring the water to a gentle boil.
- The Evaporation: Let the water bubble away. You will notice the bacon turning a dull, grayish-pink color. Do not panic; this is normal. The fat is rendering beautifully.
- The Sizzle: As the very last drops of water evaporate, the sound in the pan will change from a bubbling boil to a sharp, crackling fry. Turn the heat down to medium-low immediately.
- The Crisp: The bacon is now frying in its own rendered fat. Because the meat is already fully cooked and the fat is rendered, it will only take a minute or two per side to achieve a glorious, even, mahogany-brown crispness.
Method 3: The Oven-Baking Strategy (For Crowds and Chaos)
If you are hosting a Sunday brunch, trying to cook a pound of bacon in a standard 12-inch skillet is an exercise in futility. You will be standing over the stove for an hour, cooking in batches, while your guests drink all your mimosas. When volume is the priority, you must move the operation to the oven. But even in the oven, bacon wants to curl. Here is how to stop it.
The Wire Rack Advantage
The reason bacon curls in a skillet is partly due to the unilateral heat source—the heat is only coming from the bottom, causing the bottom fibers to shrink faster than the top fibers. The oven solves this by providing ambient, 360-degree convection heat. However, if you just slap bacon directly onto a baking sheet, it will end up swimming in a deep pool of its own grease, and the edges will still warp.
The secret is elevation. You need to place a stainless steel wire cooling rack inside a rimmed baking sheet. This allows the hot oven air to circulate completely around the strips, cooking the top and bottom simultaneously. The fat renders and drips away into the pan below, leaving you with incredibly crispy, perfectly flat strips. Just make sure you are using high-quality equipment; a flimsy pan will warp violently under the heat, so investing in a heavy-duty commercial pan is crucial for preventing warped baking sheets and avoiding a dangerous grease spill in your oven.
Baking Bacon Step-by-Step
- The Prep: Preheat your oven to 400°F (200°C). Line a heavy-duty, rimmed half-sheet pan with aluminum foil or parchment paper (this is strictly for easy cleanup).
- The Rack: Set an oven-safe wire rack inside the lined pan. Spray it very lightly with a touch of oil if you are worried about sticking, though the bacon fat usually takes care of this.
- The Layout: Arrange the bacon strips on the wire rack. They can be close together, but should not overlap.
- The Bake: Place the pan in the center of the oven. Bake for 15 to 25 minutes, depending on the thickness of your bacon and your desired level of crispness.
- The Rest: Because the fat has already dripped away, you do not even need to drain these on paper towels. Just let them cool on the rack for two minutes so the proteins can set, and serve.
Method 4: The Heavy Object Approach (Bacon Presses and Alternatives)
Sometimes, despite your best efforts with temperature control, a particularly stubborn, thick-cut piece of artisanal bacon will still try to curl up on you. When finesse fails, it is time to resort to brute force. You simply pin the bacon down so it physically cannot buckle.
The Vented Chef’s Press vs. The Cast Iron Iron
In diners and professional kitchens, cooks use a flat, heavy piece of metal called a bacon press or a grill weight. You place the bacon in the pan and immediately set the heavy weight on top of it. The weight forces the strip to remain flush against the cooking surface, ensuring perfectly even browning and zero curling.
However, there is a trap here. Traditional solid cast-iron bacon presses are heavy, but they trap steam. As the moisture cooks out of the bacon, it hits the solid bottom of the press, turns to condensation, and drips back down, essentially steaming your bacon instead of frying it. This leads to a flabby texture.
Instead, I highly recommend using a chef’s press to pin down your meat. A modern chef’s press is made of stainless steel and features staggered vents or holes. It provides the mechanical weight needed to keep the bacon perfectly flat, but the vents allow the evaporating moisture to escape freely, ensuring you still get that shatteringly crisp texture. If you do not want to buy a specialized tool, you can achieve a similar effect by wrapping a heavy brick in aluminum foil, or simply nesting a smaller, heavy skillet directly on top of the bacon in your main cooking pan.
The Cutting Board Trick: Pre-Scoring the Fat
If you want to attack the problem at its structural root before the bacon even hits the pan, you can use a technique favored by old-school butchers and prep cooks: pre-scoring the fat.
Snip the Edges, Save the Strip
Remember that the curl is caused by the muscle shrinking faster than the fat, creating a tension line along the edge of the strip. If you physically break that tension line, the strip cannot buckle.
Take your raw bacon and lay it flat on a clean cutting board. Please, make sure you are using a non-porous plastic board or a meticulously maintained end-grain board, because cracked wooden cutting boards are a playground for bacteria when dealing with raw pork.
Take a sharp chef’s knife, or even a pair of clean kitchen shears, and make small, perpendicular cuts along the fatty edge of the bacon strip, spaced about one inch apart. You only want to snip through the outer edge of the white fat; do not cut all the way through the pink muscle, or you will end up with bacon crumbles.
When you cook this scored bacon, the muscle will still shrink, but the snipped sections of fat will fan out and expand to accommodate the tension. The strip will remain completely flat, and as a bonus, the exposed edges of the scored fat will render out faster and get incredibly crispy.
Bacon Storage and Prep: Setting Yourself Up for Success
Great cooking does not start at the stove; it starts with how you handle your ingredients. How you prep and store your bacon has a direct impact on how it behaves in the pan.
Does Temperature Matter Before Cooking?
Yes, it absolutely does. Throwing ice-cold bacon straight from the refrigerator into a pan increases the likelihood of thermal shock and curling. When you pull your bacon out of the fridge, let it sit on the counter for about 10 to 15 minutes before you cook it. You do not want it to get warm, but taking the deep chill off allows the fat to soften slightly. This small step helps the fat render much more smoothly and evenly once it hits the pan, further reducing the risk of warping.
Once you are done prepping your bacon on the counter, grab your trusty stainless steel bench scraper to quickly clear away any raw pork juices or stray fat trimmings from your cutting board. Hygiene is just as important as technique.
Storing Leftover Bacon Grease (Liquid Gold)
If you use the cold pan method or the water-simmer method, you are going to be left with a pan full of beautifully rendered, clean bacon fat. Do not you dare throw that away, and absolutely do not pour it down your sink drain unless you enjoy paying exorbitant plumbing bills.
Bacon grease is culinary liquid gold. It has a high smoke point and is packed with smoky, savory flavor. Let the grease cool in the pan for a few minutes so it is not dangerously hot, then strain it through a fine-mesh sieve (to catch any burnt bits) into a glass mason jar. Keep it in your fridge. Use it to roast potatoes, sear steaks, pop popcorn, or fry your morning eggs.
Troubleshooting Common Bacon Disasters
Even with the best techniques, you might run into a few hiccups as you perfect your process. Here is how to diagnose and fix the most common bacon woes.
Why is my bacon chewy instead of crispy?
If your bacon is flat but stubbornly chewy, you likely cooked it at too high of a temperature for too short of a time. The high heat cooked the exterior muscle fibers quickly, but did not give the internal fat enough time to fully melt and render out. The result is a flabby, rubbery texture. Turn the heat down. Low and slow is the mantra for rendering fat.
Why is it burning on the edges but raw in the middle?
This is a classic symptom of a severely warped, curled strip of bacon. Because the bacon curled up like a U-shape, only the very ends of the strip were in contact with the hot metal of the pan. Those ends burned, while the elevated middle section just steamed in the ambient heat. If you use the cold pan method, the water-simmer method, or a chef’s press, you will maintain full, even contact with the pan, completely eliminating this issue.
Conclusion: Reclaiming Your Breakfast Glory
Cooking should never be a source of stress, and you should never have to settle for sad, misshapen, burnt breakfast meats just because you are cooking at home. You do not need a culinary degree to understand that protein shrinks and fat melts. You just need a little bit of patience, a decent pan that isn’t shedding toxic chemicals into your food, and a willingness to try something counterintuitive—like pouring water into your frying pan.
The next time you bring home a beautiful package of thick-cut bacon, ditch the high heat. Start it in a cold pan on a Tuesday, or simmer it in water on a Sunday. Treat the ingredient with respect, let the fat render on its own schedule, and watch as those strips lay perfectly flat, crisping up into the glorious, golden-brown perfection you actually deserve. Your weekend breakfast is about to level up, and your smoke detector can finally get some rest. Now go cook something amazing.






