
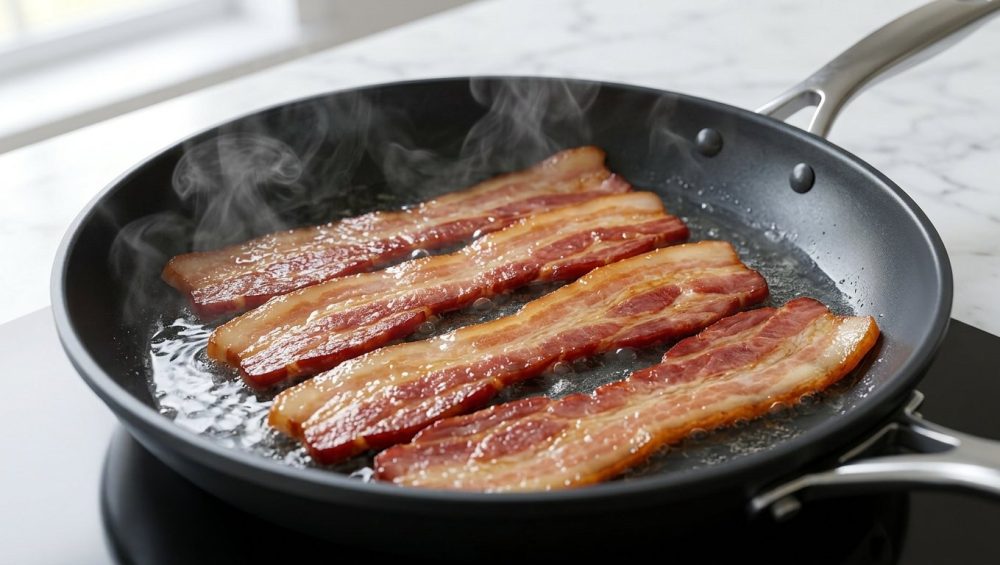
We’ve all been there. It’s Sunday morning. You’re trying to channel your inner domestic god or goddess, treating yourself to a proper weekend breakfast. You throw some bacon into a hot pan, and within three minutes, your kitchen sounds like a war zone. Grease is aggressively popping, the smoke detector is screaming the song of its people, and you are standing there wielding a pair of tongs like a shield.
When the smoke finally clears, you are left looking at a tragedy on a plate: strips of bacon that are charred and brittle on the edges, yet somehow boasting pockets of chewy, unrendered, flabby white fat in the center. It’s a culinary injustice. You deserve better. We all deserve better.
As a home cook who has set off more smoke alarms than I care to admit, I am here to tell you that the secret to flawless, shatteringly crisp, perfectly flat bacon is not some pretentious chef technique. It doesn’t require a culinary degree or a commercial flat-top grill. It requires something you can get out of your tap for free: water.
Yes, you heard me correctly. We are going to put water in a pan full of raw pork fat. I know it sounds like a complete violation of everything you’ve ever been taught about cooking meat. I know it sounds like a recipe for soggy, boiled sadness. But I promise you, this counterintuitive food science trick is the absolute magic bullet for breakfast perfection. By the time we are done here, you will never cook bacon the old-fashioned way again.
The Thermodynamics of the Breakfast Skillet
To understand why the water trick works, we first have to understand why the traditional method of dry-frying bacon is fundamentally flawed. Let’s take a brutally honest look at the anatomy of a standard strip of bacon.
Bacon is cut from the pork belly, meaning it is a highly striated combination of muscle (the lean, pink meat) and adipose tissue (the white fat). These two components have drastically different physical properties and, more importantly, completely different thermal requirements to become palatable.
When you drop bacon into a dry, preheated skillet, you are essentially throwing it into a chaotic thermal battleground. The lean muscle tissue wants to brown. This browning is caused by the Maillard reaction, a complex chemical process between amino acids and reducing sugars that gives browned food its distinctive flavor. The Maillard reaction kicks into high gear at temperatures above 300°F (150°C).
The fat, on the other hand, needs to render. Rendering is the process of melting the solid structure of the fat so that the liquid lipids are released, leaving behind a delicate, crispy cellular matrix. Pork fat begins to render slowly at around 130°F to 140°F (55°C to 60°C).
Do you see the problem here? In a hot, dry skillet, the exterior of the lean meat rapidly hits 300°F and starts browning—and eventually burning—long before the thick pockets of fat have had enough time to hang out in that crucial 130°F to 140°F zone to fully melt. The meat finishes cooking before the fat is done. You are forced to make a terrible choice: pull the bacon early and suffer through chewy, rubbery fat, or leave it in the pan until the fat renders and completely incinerate the lean meat.
This is the exact kind of kitchen frustration that makes people want to give up and start breaking your takeout habit all over again. But understanding the science is the first step to mastering the home kitchen.
Why H2O is Your Bacon’s Best Friend
Enter the hero of our story: a splash of cold water.
When you add water to a skillet containing raw bacon, you are introducing a brilliant, foolproof thermal regulator into the equation. It all comes down to the basic physics of boiling points. At sea level, water boils at exactly 212°F (100°C). As long as there is liquid water in that pan, the temperature of the cooking environment physically cannot exceed 212°F. The energy from your stove is used to convert the water from a liquid to a gas (steam), rather than raising the temperature of the pan.
This 212°F temperature cap is the absolute “Goldilocks Zone” for bacon. It is well above the 130°F to 140°F threshold required to melt the fat, meaning the adipose tissue begins to break down and release its liquid gold into the pan. However, 212°F is significantly below the 300°F threshold required for the Maillard reaction.
During this initial simmering phase, the lean meat is protected from burning. It gently cooks and tenderizes in the hot water, while the fat has all the time in the world to slowly and completely render out. You are effectively decoupling the rendering process from the browning process.
As the fat melts into the water, the water slowly evaporates. Eventually, the pan boils dry. But now, instead of dry, raw bacon sitting in a hot pan, you have perfectly rendered, tenderized bacon sitting in a generous pool of its own liquid fat.
Once the water is completely gone, the thermal cap is lifted. The temperature of the pan rapidly climbs past 212°F and enters the crisping zone. The bacon now fries evenly in its own fat. Because the fat structure has already been broken down, the strips crisp up uniformly, beautifully, and most importantly, flatly. No more wrestling with meat that curls up into an unrecognizable knot. If you’ve ever wondered why your bacon curls up aggressively, it’s because the lean muscle contracts faster than the unrendered fat. The gentle water bath prevents this aggressive contraction.
Furthermore, this method drastically reduces grease splatters. Splattering happens when water molecules inside the meat rapidly expand into steam and violently burst through a layer of hot oil. By the time the oil in our water-method pan gets hot enough to splatter, almost all the moisture has already been gently evaporated away. It is a peaceful, controlled, and remarkably clean process.
The Sassy Sous-Chef’s Step-by-Step Masterclass
Alright, enough theory. Let’s get our hands dirty (or rather, keep our stovetops clean). Here is the definitive, no-nonsense method for executing the water trick perfectly every single time.
Step 1: The Cold Start
Do not touch that burner dial yet. You must always start bacon in a cold pan. Dropping cold fat into a hot pan shocks the meat, causing the proteins to seize and the strips to instantly curl. Lay your bacon strips flat in the cold skillet. It is perfectly fine if they overlap slightly at this stage; as the fat renders, they will shrink and naturally create more space for themselves.
Step 2: The Splash
Pour cold tap water into the skillet. How much? You want just enough to coat the bottom of the pan and barely reach the edges of the bacon strips. You are not making a pork belly soup. For a standard 12-inch skillet holding half a pound of bacon, about a quarter cup to a third of a cup of water is usually sufficient. The water should just barely pool around the meat.
Step 3: The Simmer
Now, turn your burner to medium-high heat. Wait for the water to come to a vigorous simmer. Once it starts bubbling, immediately drop the heat down to medium-low. This is the rendering phase. Let the bacon hang out in its little jacuzzi. You will see the water turn cloudy as the fat begins to melt and mix with the liquid. The meat will start to look a little gray and unappetizing. Do not panic. Trust the process.
Step 4: The Transition
After several minutes (usually around 5 to 8 minutes, depending on the thickness of your cut), the auditory cues in your kitchen will change. The gentle, rolling boil of the water will suddenly shift into a sharper, more aggressive sizzle. This is the sound of the water evaporating completely. The pan is now transitioning from a boiling environment to a frying environment.
Step 5: The Crisp
Keep a close eye on the pan now. The temperature is climbing, and the Maillard reaction is taking over. The bacon will begin to brown beautifully and evenly in its own rendered fat. Use a pair of tongs to flip the strips occasionally, ensuring both sides get equal access to the hot fat. Because the meat is already fully cooked and the fat is rendered, this crisping phase happens relatively quickly—usually just 2 to 4 minutes.
Step 6: The Drain
When the bacon reaches your desired level of crispness—a deep, mahogany brown with a rigid structure—pull it from the pan immediately. Do not just throw it on a flat paper towel. The steam trapped underneath will make your perfectly crisped meat soggy. Instead, transfer the bacon to a wire cooling rack set over a baking sheet, or at the very least, a plate lined with crumpled paper towels to allow air circulation.
A Brutally Honest Rant on Toxic Cookware
Now that we have the technique down, we need to have a serious talk about the vessel you are using. If you are attempting this method in a scratched, peeling, lightweight non-stick pan that you bought for fifteen dollars at a big-box store five years ago, we have a major problem.
I have zero patience for toxic kitchen gear. The vast majority of cheap non-stick pans rely on PTFE (Polytetrafluoroethylene) coatings, which are part of a broader class of chemicals known as PFAS (per- and polyfluoroalkyl substances). These are the infamous “forever chemicals” that do not break down in the environment or in the human body.
When you heat a cheap non-stick pan past a certain threshold—or worse, when the coating begins to scratch and flake off into your food—you are inviting a chemical cocktail into your breakfast. The regulatory landscape is finally catching up to this nightmare. As of 2026, states like Minnesota, Colorado, and Maine have enacted strict bans on the sale of cookware containing intentionally added PFAS. The European Union is heavily regulating them as well. The writing is on the wall: toxic non-stick coatings belong in the garbage, not in your kitchen.
If you are serious about cooking, you need to invest in safe, durable materials. The Holy Trinity of safe cookware consists of cast iron, carbon steel, and multi-clad stainless steel. Yes, they require a tiny bit more maintenance, but they will outlive you, and they won’t leach forever chemicals into your food.
For bacon, a well-seasoned cast iron skillet is a thing of beauty. The exceptional heat retention of cast iron provides a steady, even temperature that is perfect for the final crisping phase. If you are worried that your cast iron leaves black specks on your food, it simply means you need to properly clean and re-season it—not throw it away.
Carbon steel is another phenomenal option, offering the non-stick properties of cast iron but with a lighter weight and faster temperature response. And if you prefer the sleek look and low maintenance of stainless steel, a heavy-bottomed, fully clad pan will work wonders. You might think stainless steel is a nightmare to clean after frying meat, but once you master the temperature control, you’ll find that making your stainless steel pan actually non-stick is entirely achievable. Plus, the fond (the browned bits stuck to the bottom) left behind in a stainless pan is culinary gold. Instead of dreading the cleanup, you can easily deglaze the pan with a little liquid, effectively turning burnt bits into sauce for a savory breakfast gravy.
And please, for the love of all things culinary, stop spraying aerosol non-stick sprays into your high-quality pans. The soy lecithin and propellants in those cans build up into an impossible-to-remove sticky polymer that completely ruins the pan’s surface. ruining your nonstick pans with aerosol spray is one of the most common rookie mistakes I see. You don’t need it, especially when cooking a food that is literally 50% fat.
Adjusting for Bacon Varieties
Not all bacon is created equal, and the water method needs slight tweaks depending on what you brought home from the butcher or the supermarket.
Thick-Cut vs. Thin-Cut
The water method was practically invented for thick-cut bacon. Because the strips are so dense, the fat takes significantly longer to render. If you dry-fry thick-cut bacon, the outside will almost certainly burn before the inside is cooked. For thick-cut, do not be afraid to add a little extra water—perhaps up to half a cup—to give the fat ample time to melt before the crisping phase begins.
For standard or thin-cut supermarket bacon, you need a much lighter hand. A mere two tablespoons of water might be all you need to kickstart the rendering process without turning the thin strips to mush.
Dry-Cured vs. Wet-Cured
Most commercial supermarket bacon is “wet-cured,” meaning it has been injected with a liquid brine to cure it quickly and increase its weight. This bacon already contains a significant amount of water, which will leach out into the pan as it cooks. When using wet-cured bacon, use slightly less tap water to start, as the meat will contribute its own moisture to the boiling phase.
Artisanal, dry-cured bacon is rubbed with salt and spices and left to cure for weeks. It contains very little moisture and has a much more intense, concentrated pork flavor. Because it is so dry, it benefits immensely from the water method, which rehydrates the lean meat slightly while gently coaxing out the fat.
Turkey Bacon and Plant-Based Alternatives
Let me be perfectly clear: the water method relies entirely on the rendering of abundant animal fat. Turkey bacon is incredibly lean, and plant-based “bacon” relies on emulsified vegetable oils that do not behave like pork fat. If you try to cook turkey bacon or vegan strips using the water method, you will simply boil them into a soggy, depressing pulp. For these lean alternatives, you must use a traditional dry pan with a little bit of added cooking oil to achieve any semblance of crispness. But honestly, if you’re eating turkey bacon, you’re on your own.
Troubleshooting: Where You’re Still Messing Up
Even with a foolproof method, human error finds a way. If your water-method bacon isn’t coming out like a shatteringly crisp revelation, you are likely committing one of these common offenses.
You Are Drowning the Pig
The biggest mistake people make is adding way too much water. We are simmering, not poaching. If you submerge the bacon entirely, it will take twenty minutes for the water to evaporate. By that point, the lean meat will have broken down completely, resulting in a shredded, mealy texture. Remember: just enough water to coat the bottom of the pan.
You Are Blasting the Heat
Patience is a virtue, especially in the kitchen. If you crank the burner to high in an attempt to boil the water off faster, you defeat the entire purpose of the gentle rendering phase. High heat will cause the water to evaporate before the fat has had a chance to melt, putting you right back in the danger zone of burnt meat and chewy fat. Furthermore, once the water is gone, high heat will cause the rendered fat to smoke and burn instantly. Keep it at medium-low.
You Are Crowding the Pan
While a little bit of overlap is okay at the very beginning, you cannot cram an entire pound of bacon into a single 10-inch skillet. As the water evaporates and the crisping phase begins, the strips need direct contact with the hot surface of the pan. If they are piled on top of each other, they will simply steam in their own juices, resulting in flabby, rubbery meat. Cook in batches, or use two skillets.
You Are Trusting the Wrong Tools
Cooking is about sensory observation, not just relying on gadgets. If you are trying to temp your breakfast meats or check the exact heat of your pan with a cheap, uncalibrated dial thermometer, you are setting yourself up for failure. A bad read can ruin a meal, which is exactly why your meat thermometer is lying to you most of the time. Trust your eyes (the browning), your ears (the shift from boiling to sizzling), and your nose (the smell of toasted, rendered fat).
And when it comes to handling the bacon, ditch the flimsy plastic spatulas. A sturdy pair of metal tongs or a sharp-edged metal scraper is essential for maneuvering the strips and releasing any bits that might stick to the pan. There are countless uses for your bench scraper in the kitchen, but for delicate pan work, a flexible fish spatula or precision tongs are your best friends. Having the right beginner kitchen tools makes an astronomical difference in your daily cooking stress levels.
The Liquid Gold: Preserving and Using Bacon Fat
One of the greatest fringe benefits of the water method is the sheer volume of pristine, rendered bacon fat you are left with at the end. Because the temperature was kept relatively low and the meat didn’t burn, the leftover grease in your pan is not a blackened, bitter mess. It is pure, clean, liquid gold.
Do not—I repeat, do not—pour this down your sink drain. Unless you enjoy paying exorbitant emergency plumbing bills, hot animal fat has no place in your pipes, where it will cool, solidify, and create a blockage that rivals concrete.
Instead, let the fat cool slightly in the pan for a few minutes. Then, carefully pour it through a fine-mesh strainer (or a coffee filter, if you want it impeccably clean) into a heat-proof glass jar or a dedicated ceramic grease keeper. Straining removes the tiny, browned bits of meat that would otherwise spoil and turn the fat rancid over time.
Once strained and cooled, this fat is a culinary secret weapon. It has a high smoke point and carries a deeply savory, smoky flavor profile that elevates almost anything it touches. Store it in the refrigerator, where it will solidify into a creamy white paste and keep for months.
Use a spoonful of it instead of butter to fry your eggs. Toss your roasted Brussels sprouts or potatoes in it before they go into the oven. Use it to pop stovetop popcorn for a movie night snack that will blow your mind. It is a free, high-quality cooking fat that you earned through your own patience and technique. Treat it with respect.
Conclusion: Reclaiming Your Weekend Breakfast
Cooking shouldn’t be a source of stress, and it certainly shouldn’t involve dodging flying projectiles of boiling grease before you’ve even had your first cup of coffee. By embracing the counterintuitive science of the water method, you are taking control of the thermal dynamics in your kitchen.
You are capping the temperature at 212°F to allow the fat to slowly, gently render. You are protecting the delicate lean muscle from the aggressive, searing heat of the Maillard reaction until the very last moment. You are producing bacon that is evenly cooked, perfectly flat, and shatteringly crisp, all while keeping your stovetop clean and your smoke detector silent.
It might feel wrong the first time you pour cold tap water over raw pork. Your instincts might scream at you. But trust the chemistry. Trust the process. Ditch the toxic cookware, grab a heavy skillet, and give the water trick a try this weekend. I promise you, once you experience the magic of a perfectly rendered, water-started strip of bacon, you will never look back. Now go pour yourself a mimosa and get cooking. You’ve got this.






