Podcast:
The promise of a complete, elegant meal in under 30 minutes often suggests a compromise—a sacrifice of texture, flavor, or technique for the sake of speed. This report challenges that notion. The preparation of pan-seared salmon with tender-crisp asparagus is not a shortcut, but a masterclass in culinary efficiency, a testament to the fact that perfection can be achieved swiftly when execution is guided by knowledge. This dish, which frequently intimidates the home cook, is notorious for its potential pitfalls: the salmon’s skin rendered flabby instead of shatteringly crisp, its flesh dry and chalky instead of moist and flaky; the asparagus limp and dull, a shadow of its vibrant potential.
This guide serves as a definitive manual to eliminate such failures. It moves beyond a simple list of ingredients and steps to deconstruct the entire process, from procurement to plating. By exploring the foundational science, mastering precise techniques, and understanding the causal relationships between action and outcome, any ambitious cook can transform this seemingly fraught dish into a reliable, restaurant-quality showpiece. This is not a recipe, but a roadmap to mastery. It posits that the perfect 30-minute plate is not the result of chance or luck, but the deliberate and confident application of culinary principles.
Foundational Elements: Sourcing and Equipment
The final quality of any dish is circumscribed by the quality of its raw materials and the suitability of the instruments used. Before a pan is heated or a single ingredient is seasoned, critical choices are made that will dictate the potential for success. This section provides a professional framework for navigating these initial, crucial decisions, establishing the non-negotiable foundation upon which a perfect meal is built.
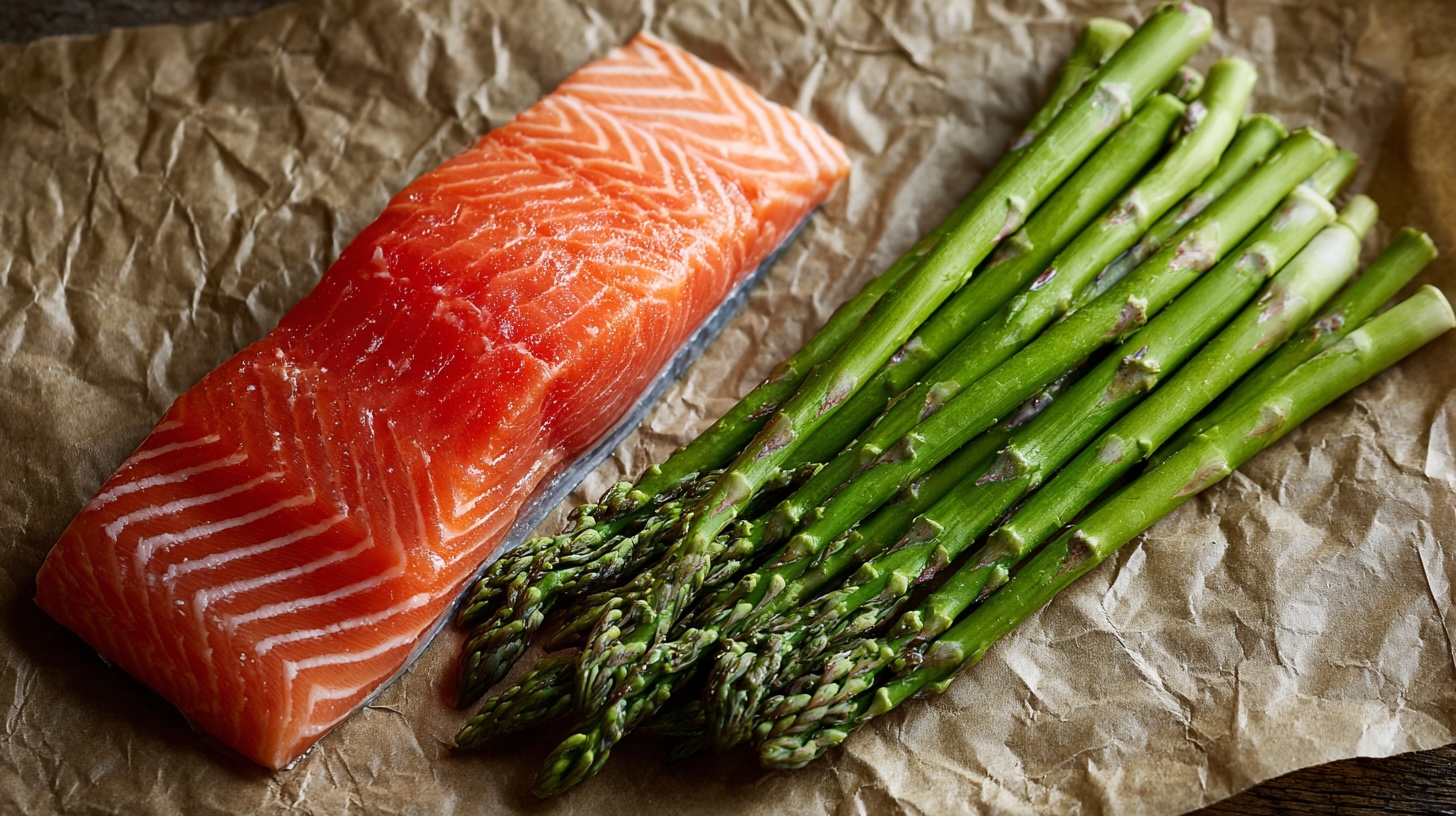
The Anatomy of a Perfect Fillet: A Buyer’s Guide
The selection of salmon and asparagus is the first and most impactful step in the cooking process. Nuances in fat content, freshness, and physical dimensions directly influence cooking times and techniques.
Salmon Selection
The choice of salmon fillet is a decision with significant downstream consequences for texture and cooking method. The primary distinction lies between wild-caught and farm-raised varieties. Wild salmon, such as Sockeye or Coho, possesses a firmer texture and a leaner profile due to a life of active swimming and a natural diet. This firm flesh is ideally suited for the high-heat environment of pan-searing, holding its structure well. In contrast, farm-raised salmon, particularly Atlantic salmon, has a higher fat content, resulting in a softer, more buttery texture. This additional fat can be more forgiving, providing a buffer against overcooking, but it will also render more oil into the pan during cooking.
Beyond the type of salmon, the fillet’s physical characteristics are paramount. Opt for thicker, center-cut fillets whenever possible. A thick fillet, ideally around one to one-and-a-quarter inches, provides a wider window for achieving a crispy skin without overcooking the delicate interior. Thinner tail pieces, with their lack of uniform thickness, are notoriously difficult to cook evenly and are more prone to drying out. When purchasing, look for fillets with vibrant, moist flesh that springs back when pressed; avoid any that appear dull, dry, or have a strong fishy odor, which are all signs of deteriorating quality.
Asparagus Selection
The ideal asparagus for this dish is fresh, vibrant, and properly sized. When selecting asparagus, look for firm, bright green stalks with no soft spots or blemishes. The tips, or crowns, should be tightly closed and compact; open, flowering tips are an indication that the asparagus is past its prime.
The thickness of the asparagus stalk is a critical factor that dictates cooking time and method. Stalks can range from pencil-thin to thick and woody. For pan-sautéing, thin to medium stalks are generally preferred as they cook quickly and evenly, achieving a desirable tender-crisp texture in minutes. Very thick spears may require peeling and are often better suited for roasting or grilling, where they have more time to become tender without overcooking on the exterior. Uniformity within a bunch is also important for ensuring all spears cook at the same rate.
The Essential Toolkit: Your Instruments for Success
The right tools are not a luxury but a necessity for executing this dish with precision. The choice of pan, in particular, has a profound impact on the final texture of the salmon skin, while other tools ensure safety, accuracy, and ease of handling.
Pan Selection (The Searing Surface)
The surface on which the salmon is seared is arguably the most critical piece of equipment. The goal is to achieve a rapid, intense, and even transfer of heat.
- Cast Iron: A classic choice, revered for its exceptional heat retention and even distribution. Once hot, it stays hot, providing the unwavering thermal energy needed for a deep, consistent sear. A well-seasoned cast iron pan develops a natural non-stick patina that aids in releasing the fish. However, its weight can make it cumbersome, and its reactive surface is not ideal for making acidic pan sauces with ingredients like lemon juice or wine, which can strip the seasoning and impart a metallic taste. It can also retain odors from previous meals.
- Stainless Steel: The workhorse of professional kitchens and the optimal choice for this dish if a pan sauce is desired. Stainless steel allows for the formation of fond—the browned, flavorful bits of protein and sugar that stick to the bottom of the pan—which is the essential foundation for a rich pan sauce. It is non-reactive, making it perfect for acidic ingredients, and durable. The primary challenge is that it is not inherently non-stick and requires precise temperature control and proper technique to prevent the delicate salmon skin from adhering permanently.
- Carbon Steel: This material offers a compelling blend of cast iron and stainless steel’s best qualities. It heats up much faster than cast iron but retains heat nearly as well, making it excellent for quick-searing applications. Like cast iron, it must be seasoned and is reactive to acidic ingredients.
- Why to Avoid Non-Stick: While a non-stick pan may seem like the safest option for a beginner, its coating is designed to prevent the very reactions needed for a superior sear. These pans generally cannot be heated to the high temperatures required for an aggressive Maillard reaction without damaging the coating, and they inhibit the formation of fond, rendering the creation of a true pan sauce impossible.
The choice of pan is not merely about searing; it is a strategic decision that dictates the potential for the entire dish. If the goal is simply a piece of crispy-skinned salmon, a well-seasoned cast iron pan is an excellent tool. However, if the objective is a complete, restaurant-style plate featuring a complex pan sauce created from the cooking process itself, a stainless-steel pan is the superior, if more challenging, choice. The fond that develops on its surface is a treasure trove of flavor that cannot be replicated in a non-stick or perfectly seasoned cast iron pan. This elevates the pan selection from a tactical choice to a strategic one that defines the meal’s flavor architecture.
|
Pan Type |
Sear Quality |
Heat Retention |
Sticking Potential |
Pan Sauce Capability |
Maintenance |
|
Cast Iron |
Excellent |
Excellent |
Low (if well-seasoned) |
Poor (non-reactive surface prevents fond; reactive to acids) |
Requires seasoning; heavy |
|
Stainless Steel |
Excellent |
Good |
High (requires technique) |
Excellent (promotes fond; non-reactive) |
Easy to clean; can be scrubbed |
|
Carbon Steel |
Excellent |
Excellent |
Low (if well-seasoned) |
Poor (reactive to acids) |
Requires seasoning |
Table 1: Pan Selection Matrix for Searing Salmon. This table provides a comparative analysis of the three most suitable pan types for searing salmon, enabling an informed decision based on desired outcome and skill level.
Oil Selection (The Heat Transfer Medium)
The choice of cooking fat is critical. Searing requires high heat, and using an oil with a low “smoke point”—the temperature at which it begins to break down and burn—will ruin the dish, imparting a bitter, acrid flavor. Extra-virgin olive oil and butter, while flavorful, have low smoke points and should be avoided for the initial sear; they are better used for finishing or in lower-heat applications.
The ideal oil for searing has a high smoke point (400°F / 204°C or higher) and a neutral flavor that will not overpower the delicate taste of the salmon.
|
Oil |
Smoke Point (Approx.) |
Flavor Profile |
Best Use for this Meal |
|
Avocado Oil |
520°F / 271°C |
Neutral, slightly buttery |
Excellent for searing |
|
Grapeseed Oil |
400°F / 204°C |
Neutral, clean |
Excellent for searing |
|
Canola Oil |
400°F / 204°C |
Neutral |
Good for searing |
|
Ghee (Clarified Butter) |
450°F / 232°C |
Nutty, buttery |
Excellent for searing, adds flavor |
|
Vegetable Oil |
400°F / 204°C |
Neutral |
Good for searing |
|
Extra-Virgin Olive Oil |
375°F / 191°C |
Fruity, peppery |
Avoid for searing; use for finishing |
|
Butter |
300°F / 149°C |
Buttery, rich |
Avoid for searing; use for basting/sauce |
Table 2: High-Smoke-Point Oil Comparison. This table offers a quick-reference guide to appropriate oils for high-heat searing, preventing the common mistake of using a low-smoke-point fat that can burn and ruin the flavor of the dish.
A fascinating feedback loop exists between the type of salmon chosen and the optimal cooking technique, specifically regarding the “hot pan vs. cold pan” debate. Fattier, farm-raised salmon contains a significant layer of subcutaneous fat. Starting this type of fillet in a cold pan allows this fat to render out slowly and gently, essentially creating its own high-quality frying medium that contributes to an exceptionally crispy skin. In contrast, leaner wild-caught salmon has less internal fat to render. It relies more heavily on the external oil and the immediate, intense heat of a pre-heated pan to kickstart the browning process. This connection between the sourcing decision and a nuanced technical choice is a hallmark of advanced cooking.
Essential Tools
Beyond the pan and oil, a few other tools are indispensable for achieving professional results.
- Fish Spatula: A thin, flexible, slotted metal spatula is crucial. Its angled head and flexible design allow it to slide cleanly under the delicate salmon fillet without tearing the flesh or leaving the crispy skin behind in the pan.
- Fish Tweezers: Salmon fillets often contain a line of small “pin bones,” which are actually calcified nerve endings. While not dangerous in the same way as larger bones, they are unpleasant to encounter. A dedicated pair of fish tweezers or clean needle-nose pliers makes their removal simple and efficient.
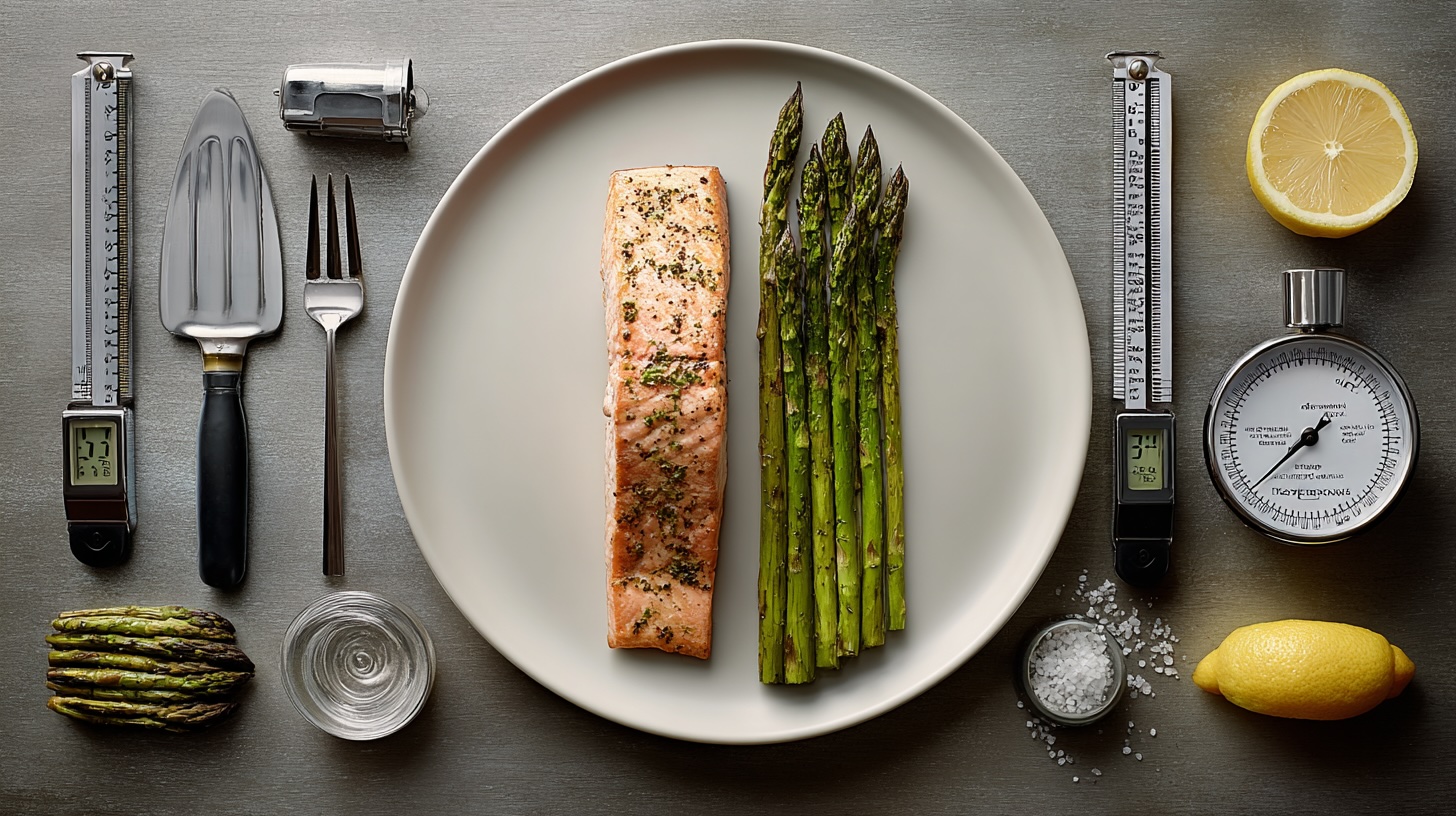
- Instant-Read Thermometer: This is the single most important tool for eliminating the guesswork of doneness. Relying on visual cues or timing alone is a recipe for inconsistency. A reliable digital thermometer provides objective, precise data, guaranteeing that the salmon is cooked to the desired temperature every single time.
The Science of the Sear: Mastering Crispy Salmon Skin
Achieving a perfectly crisp, golden-brown salmon skin while keeping the flesh beneath moist and tender is not an act of culinary magic; it is an exercise in applied science. Understanding the chemical and physical transformations that occur under high heat empowers the cook to control the outcome with precision, turning abstract principles into tangible, delicious results.
The Maillard Reaction Deconstructed
At the heart of any great sear is the Maillard reaction. Named after French chemist Louis Camille Maillard, this is a complex series of chemical reactions that occur between amino acids (the building blocks of protein) and reducing sugars when subjected to heat. It is crucial to distinguish this from caramelization, which is simply the browning of sugar. The Maillard reaction is responsible for the deep, savory, and complex flavors and aromas we associate with roasted, fried, and seared foods—from the crust of bread to a grilled steak, and, most importantly, to the skin of our salmon.
This reaction typically begins to occur rapidly at temperatures around 140°C to 165°C (280°F to 330°F). The process generates hundreds of new aromatic compounds, creating a flavor profile that is impossible to achieve through lower-temperature cooking methods like boiling or steaming, which are limited by the boiling point of water (100°C / 212°F). The goal of searing, therefore, is to create and sustain the ideal conditions for the Maillard reaction to flourish on the salmon’s skin without overcooking the flesh.
The Five Pillars of the Perfect Sear
Mastery of the sear rests on five fundamental technical pillars. Each step is designed to optimize the conditions for the Maillard reaction.
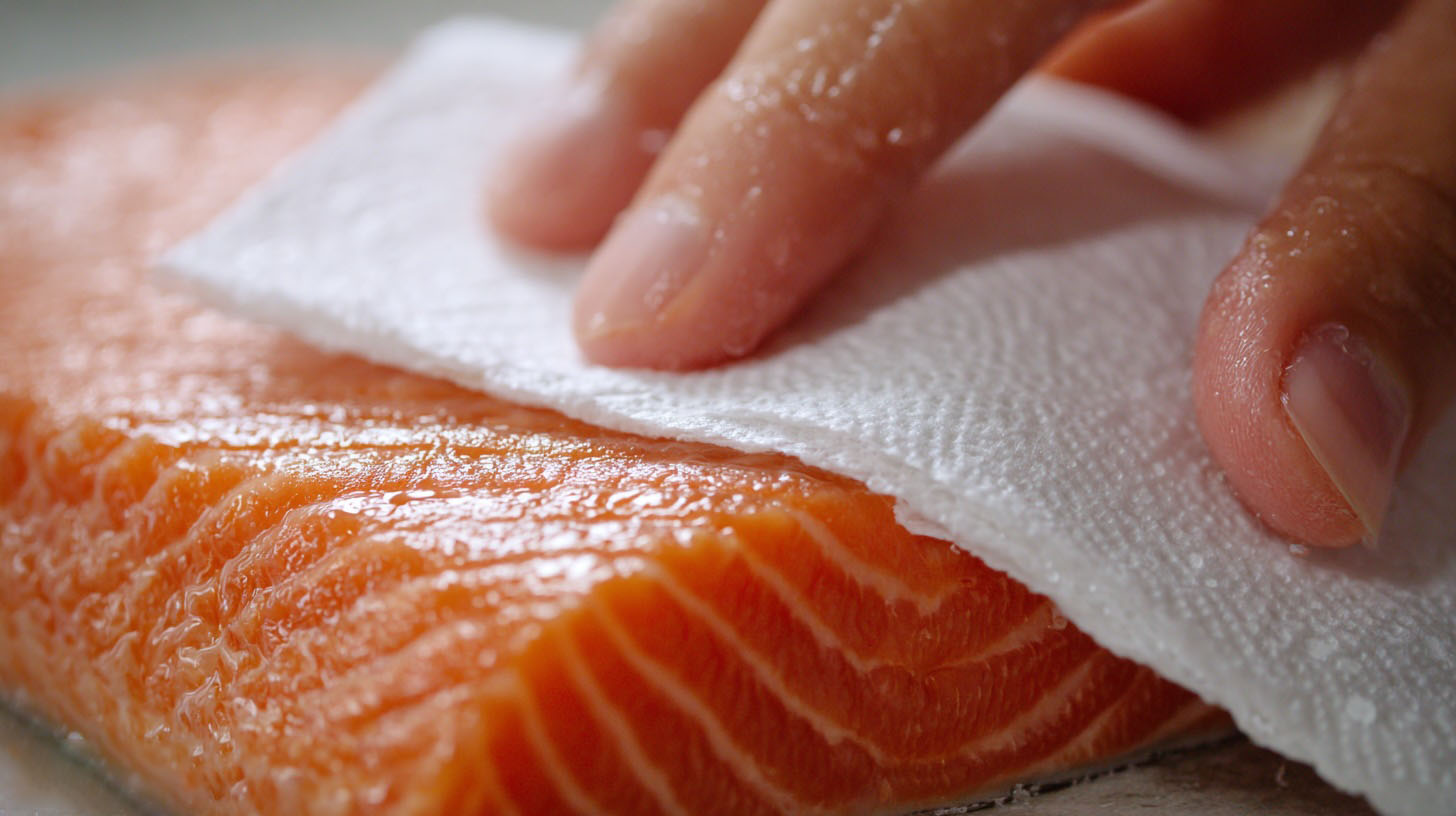
1. Surface Preparation (The Dry Imperative)
Moisture is the absolute nemesis of a good sear. The Maillard reaction cannot begin in earnest until all surface water has evaporated. As long as water is present, the surface temperature of the fish will be pinned at the boiling point of water, 100°C (212°F), which is well below the Maillard threshold. Instead of searing, the fish will steam, resulting in a pale, flabby skin.
Therefore, the most critical preparatory step is to create a bone-dry surface. Begin by thoroughly patting the salmon fillets—both flesh and skin—with paper towels until they feel completely dry to the touch. For the ultimate crispy skin, an additional step is highly recommended: place the patted-dry fillets on a rack, skin-side up, and let them air-dry uncovered in the refrigerator for at least 15-30 minutes. This allows for maximum surface moisture evaporation. During this preparation phase, also check for and remove any scales by gently scraping the skin with the back of a knife. Finally, run your fingers along the flesh to locate and remove any pin bones with tweezers.
2. Heat Management (The Hot Pan Principle)
The classic and most reliable method involves preheating the pan. Place a dry, empty stainless steel or cast iron skillet over medium to medium-high heat and allow it to get very hot, which can take several minutes. A common test is to flick a drop of water into the pan; if it sizzles and evaporates instantly, the pan is ready. Only then should the high-smoke-point oil be added. Heat the oil until it shimmers and flows like water, but before it begins to smoke. This ensures that when the salmon is added, the searing process begins immediately and vigorously. Just before cooking, season the salmon generously with salt.
3. The Initial Press (Ensuring Contact)
When the cold salmon fillet hits the hot pan, the proteins in the skin will contract instantly, causing the fillet to buckle and curl away from the pan’s surface. This creates uneven contact, leading to a mottled sear with crispy spots and soggy patches. To counteract this, as soon as the fillet is placed in the pan skin-side down, use a flexible fish spatula to press down firmly but gently on the flesh for 5 to 15 seconds. This action forces the entire surface of the skin to remain in flush contact with the hot pan during the crucial initial moments of cooking, guaranteeing a uniform, edge-to-edge crisp crust.
4. Patience and Monitoring (The 90/10 Rule)
Once the initial press is complete, the most important action is inaction. Resist the powerful urge to poke, prod, or move the salmon. The vast majority of the cooking—approximately 80-90% of the total time—should occur on the skin side. This allows the skin to fully render its fat and develop a deep, crispy crust, while the insulative properties of the skin and subcutaneous fat gently cook the flesh from below.
The common fear is that the fish will stick permanently. However, this is where an understanding of the cooking process builds confidence. Initially, the proteins in the fish will form chemical bonds with the metal of the pan, causing it to stick. As the Maillard reaction proceeds and the skin crisps and browns, its surface dehydrates and transforms into a stable, carbonized layer. This new surface no longer has the same chemical affinity for the pan. Simultaneously, the rendering fat creates a lubricating layer between the skin and the pan. At this point, the bonds break, and the fish will “release” itself, sliding easily in the pan. Attempting to force it before this point will only tear the skin and ruin the crust.
Instead of prodding, use visual cues. Watch the side of the fillet. A “wave of opacity” will be visible as the flesh cooks, changing from translucent dark pink to a pale, opaque pink. This wave will slowly climb from the bottom of the fillet upwards.
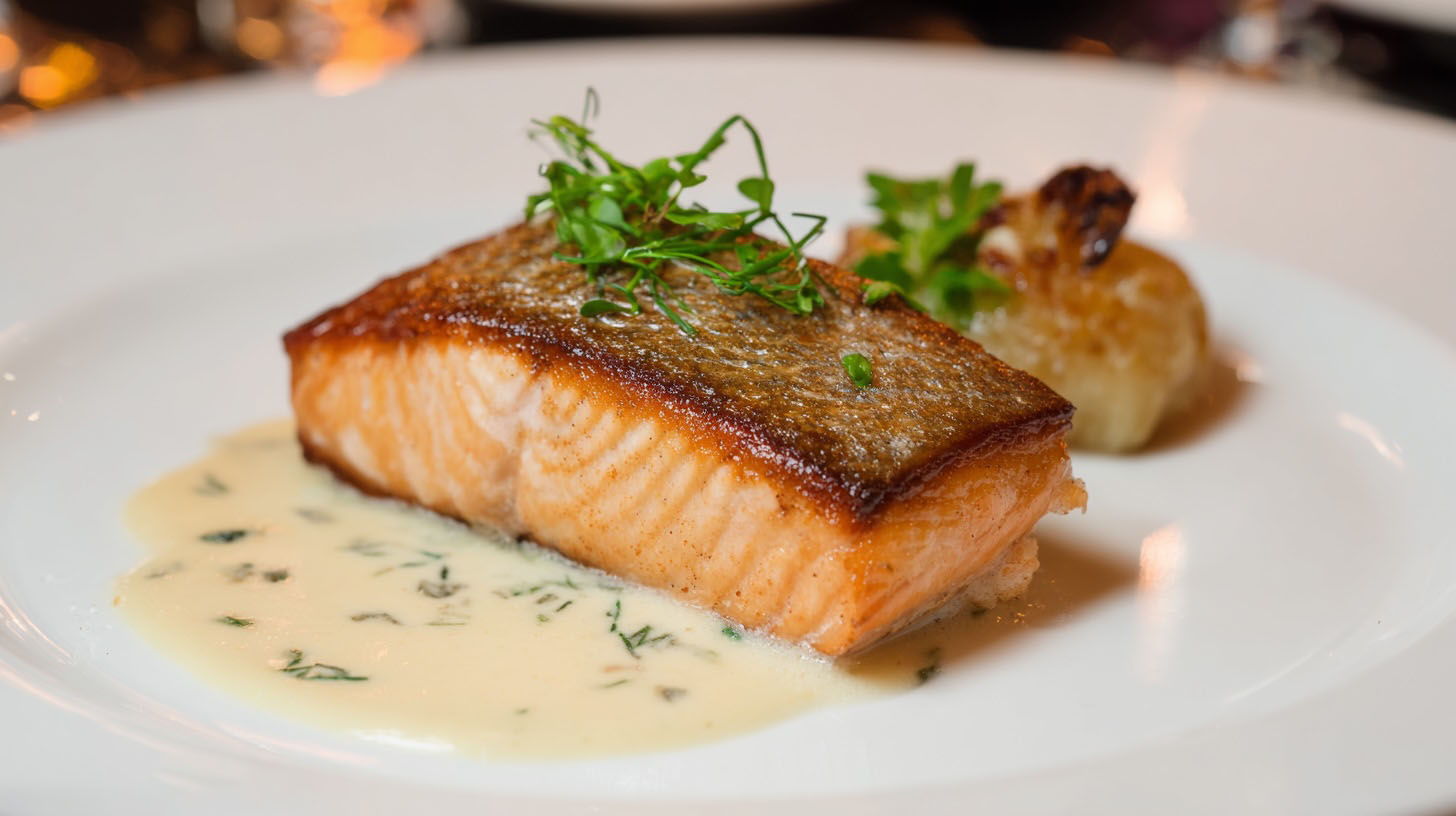
5. The Final Kiss (Finishing the Flesh)
The flip is the final, brief step in the cooking process. When the wave of opaque color has traveled about three-quarters of the way up the side of the fillet, it is time to flip. This final stage is not about searing the flesh side but simply about finishing the cooking. The fillet should be cooked on the flesh side for a very short time, typically between 15 and 60 seconds, depending on thickness. Any longer risks overcooking the delicate top layer.
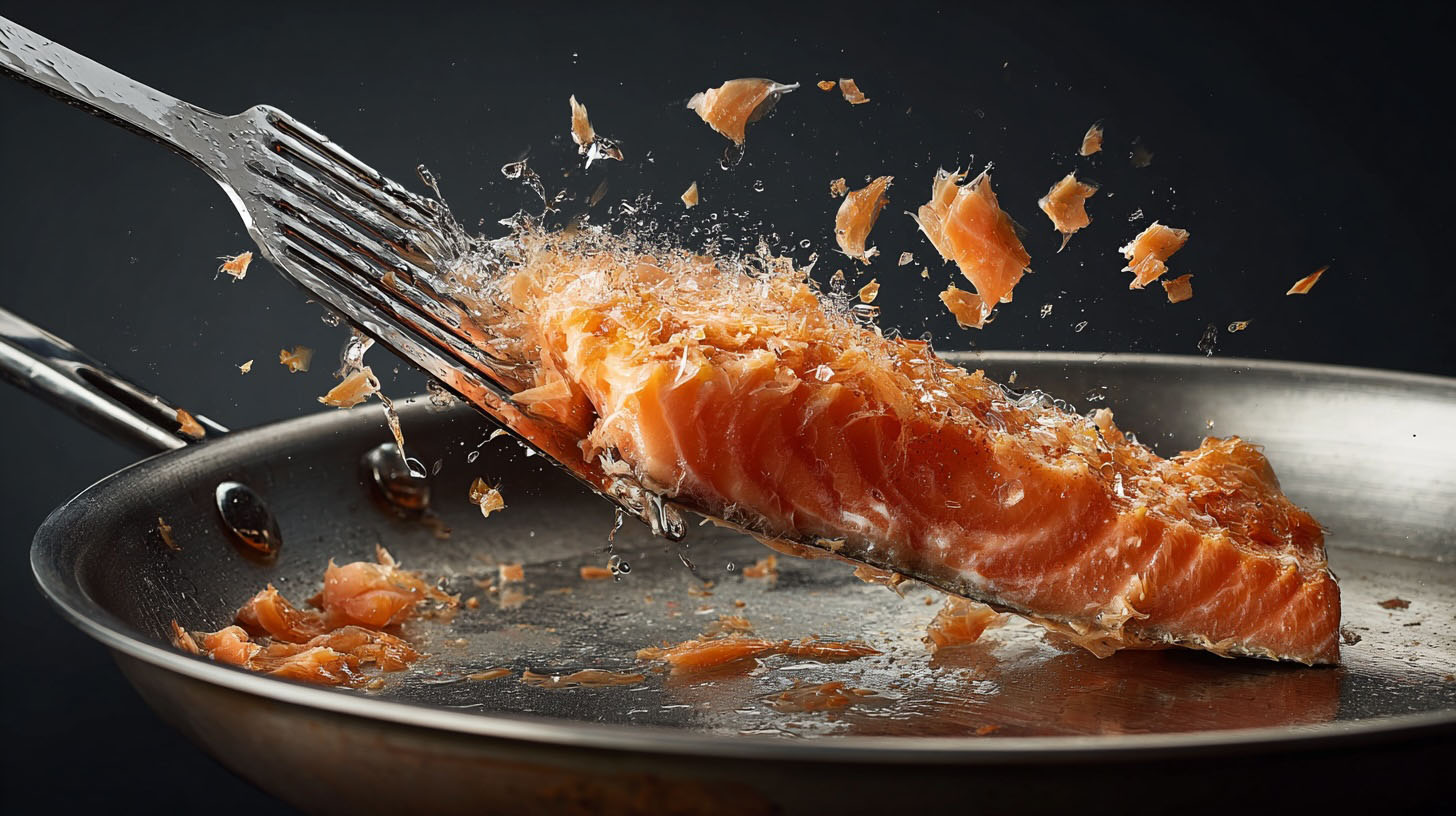
The Doneness Spectrum: Beyond “Flakes with a Fork”
The vague instruction to cook until the fish “flakes easily with a fork” is subjective and often leads to overcooked salmon. The only foolproof method for achieving a specific, repeatable level of doneness is to use an instant-read thermometer.
It is also critical to account for “carryover cooking.” After the salmon is removed from the heat, its residual thermal energy will continue to cook the interior, raising the temperature by several degrees. Therefore, the salmon should always be pulled from the pan about 5°F (3°C) below the final target temperature.
A common issue that signals improper cooking is the appearance of a white, curdled substance seeping from the flesh. This is a protein called albumin. While harmless, its presence is a direct visual indicator that the fish is being cooked too quickly or at too high a temperature. The intense heat causes the muscle fibers to contract violently, squeezing out the albumin. This is a symptom of a process that will lead to a dry, tough fillet. By using a more moderate heat (medium to medium-low), the muscle fibers contract more gently, keeping the albumin—and moisture—inside the fillet, resulting in a more succulent texture and a cleaner presentation. Brining the salmon in a 6% salt solution for 30-45 minutes before cooking can also help prevent albumin release by gently denaturing the surface proteins.
|
Target Doneness |
Pull Temperature |
Final Temperature (after rest) |
Visual & Textural Cues |
|
Rare |
110-115°F (43-46°C) |
115-120°F (46-49°C) |
Center is still cool and translucent; sashimi-like texture. |
|
Medium-Rare |
120°F (49°C) |
125°F (52°C) |
Center is warm and deep pink; very moist and tender. This is the ideal for many chefs. |
|
Medium |
125-130°F (52-54°C) |
130-135°F (54-57°C) |
Mostly opaque and flaky, with just a hint of translucency in the very center. |
|
Well-Done |
135-140°F (57-60°C) |
140-145°F (60-63°C) |
Fully opaque, firm, and flaky throughout; begins to dry out. |
Table 3: Salmon Doneness Temperature and Cue Guide. This table provides a definitive, objective reference for cooking salmon to a precise temperature, removing guesswork and catering to individual preferences.
The Perfect Partner: Achieving Tender-Crisp Asparagus
The asparagus in this dish is not a mere afterthought; it is a co-star that requires its own precise technique to shine. The most common failure is producing soggy, limp, and olive-drab spears. Achieving the ideal “tender-crisp” texture—where the vegetable is cooked through but retains a pleasant snap and vibrant color—is a matter of proper preparation and controlled cooking.
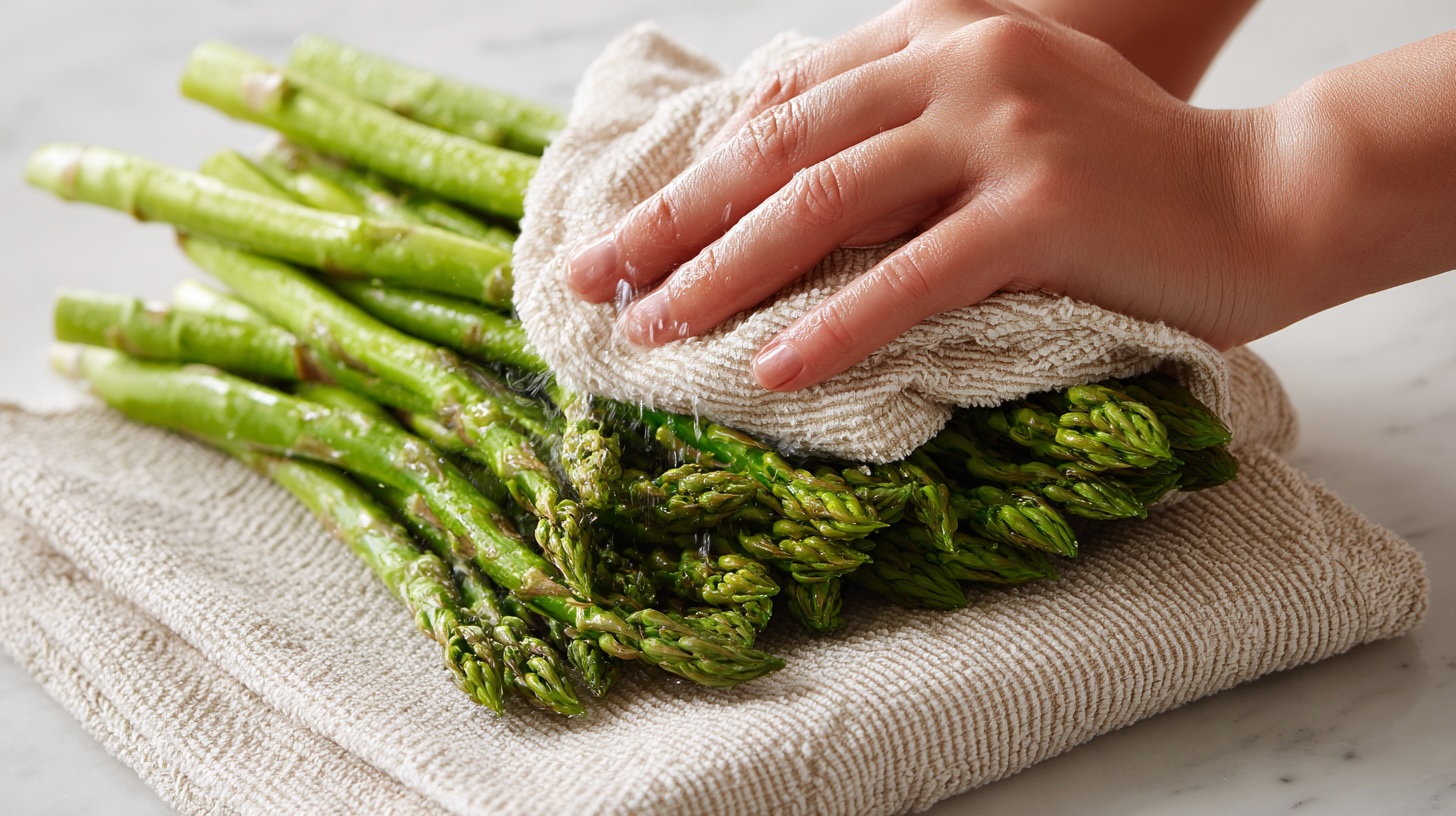
Preparation for Perfection
Success with asparagus begins before it enters the pan. The first step is to remove the tough, woody bottom ends of the stalks. There are two common methods. The “snap” method involves holding a spear at both ends and bending it until it naturally breaks; this point is theoretically where the tender part meets the tough part. However, this can be wasteful, often snapping off more of the usable spear than necessary. A more precise and less wasteful method is to use a knife to trim off the bottom one to two inches of the stalks.
After trimming and washing the asparagus under cool water, it is imperative to dry the spears thoroughly with a paper towel or clean kitchen towel. Just as with salmon skin, any residual moisture on the asparagus will create steam in the hot pan, hindering the browning and searing process and leading to a softer, less flavorful result.
The Sauté Method: Speed and Precision
For a 30-minute meal, sautéing is the most efficient and effective stovetop method for cooking asparagus. The technique is straightforward:
- Heat a tablespoon or two of a suitable oil (like olive oil or avocado oil) in a large skillet over medium to medium-high heat.
- Once the oil is shimmering, add the trimmed and dried asparagus to the pan, preferably in a single layer to avoid overcrowding.
- Season with salt and pepper and cook, stirring or tossing frequently, until the spears turn a vibrant, bright green and are just tender enough to be pierced with a fork but still retain a firm, crisp texture. This process typically takes between 3 and 8 minutes, depending directly on the thickness of the stalks. Thin spears may be done in as little as 3 minutes, while thicker ones may require closer to 8.
- If adding aromatics like minced garlic, it is crucial to add them during the last 30-60 seconds of cooking. Garlic cooks very quickly and will burn if added at the beginning, imparting a bitter taste to the dish.
- Finish the dish off the heat with a squeeze of fresh lemon juice or a pat of butter to add brightness and richness.
Troubleshooting Soggy Spears
The primary culprit behind soggy, mushy asparagus is unequivocally overcooking. The texture of asparagus is governed by its fibrous cellular structure. When heated, these cell walls begin to soften and break down. The ideal “tender-crisp” state is a delicate balance where the cell walls have softened enough to be palatable but still possess enough structural integrity to provide a satisfying “snap.” When cooking continues past this point, the cellular structure collapses completely, releasing all the internal water and turning the vegetable limp and mushy.
The visual cue of the asparagus turning a brilliant, bright green is a key indicator. This color change happens as air between the plant’s cells is expelled, making the green chlorophyll more visible. This moment occurs just before the cell walls begin to fully break down. Therefore, this vibrant color should be seen as the final signal to remove the asparagus from the heat.
To prevent overcooking, always account for carryover cooking; the spears will continue to soften after being removed from the pan. For maximum control, especially if preparing the asparagus slightly ahead of the salmon, one can employ “shocking.” This involves immediately plunging the cooked asparagus into a bowl of ice water. The ice bath instantly halts the cooking process, locking in the tender-crisp texture and preserving the vibrant green color.
The 30-Minute Symphony: A Unified Workflow
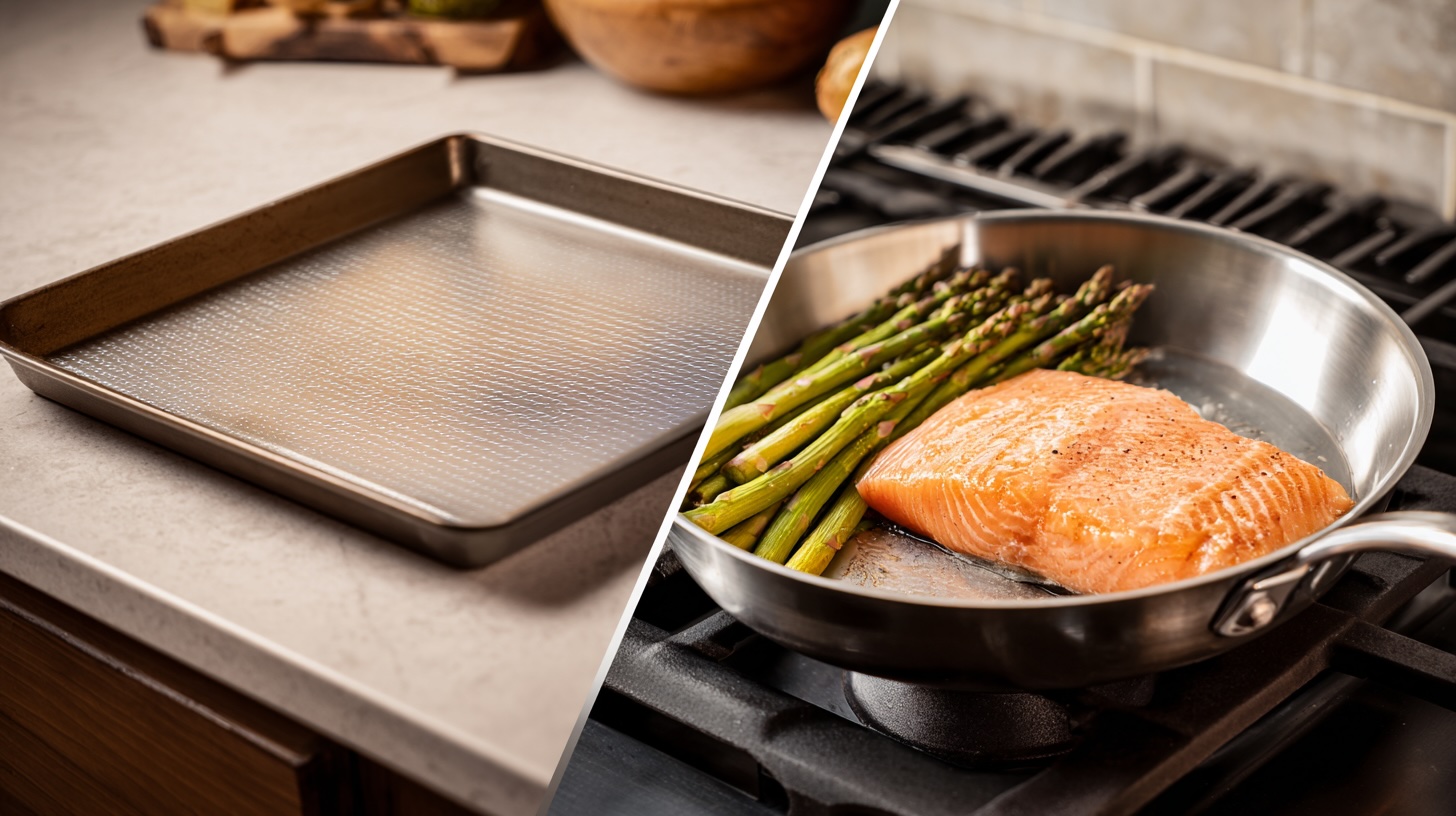
Bringing the perfectly seared salmon and tender-crisp asparagus together into a cohesive, elegant meal that is ready in 30 minutes requires a well-orchestrated plan. The choice between a stovetop-centric method and a hands-off sheet-pan approach comes down to a fundamental trade-off between control and convenience. The stovetop offers unparalleled precision over the texture of each component, while the sheet pan provides ease of execution and cleanup.
The Stovetop Ballet: A Minute-by-Minute Guide
This workflow prioritizes textural perfection, particularly the crispiness of the salmon skin, by cooking the components sequentially in a single pan. This method allows for the development of fond for a pan sauce. A typical timeline would be as follows:
- Minutes 0-5: Preparation. Remove salmon fillets from the refrigerator to allow them to approach room temperature. Trim and thoroughly dry the asparagus spears. Pat the salmon fillets completely dry with paper towels. Season the asparagus with salt and pepper.
- Minutes 6-10: Cook the Asparagus. Heat a large stainless steel or cast-iron skillet over medium-high heat. Add oil, and once shimmering, add the asparagus. Sauté, tossing occasionally, for 3-4 minutes until bright green and tender-crisp. Remove the asparagus from the pan and set aside on a plate.
- Minutes 11-18: Sear the Salmon. Return the same skillet to the heat. If needed, add a bit more oil. Season the salmon skin with salt just before cooking. Carefully place the salmon fillets skin-side down in the hot pan. Press firmly with a spatula for 10-15 seconds. Cook undisturbed for 6-8 minutes, watching the color change up the side of the fillet.
- Minutes 19-20: Finish the Salmon and Rest. Flip the salmon and cook on the flesh side for 30-60 seconds. Remove the salmon from the pan and place it on a plate to rest, skin-side up.
- Minutes 21-25: Create the Pan Sauce. With the pan off the heat but still hot, begin the pan sauce. Deglaze with wine or lemon juice, scraping up all the flavorful browned bits (fond) from the bottom of the pan. Whisk in butter, herbs, and other sauce ingredients.
- Minutes 26-30: Plating. Arrange the rested salmon and the cooked asparagus on serving plates. Spoon the pan sauce over or around the dish and serve immediately.
An alternative one-pan stovetop method involves pushing the cooked asparagus to the side of the pan and adding the salmon to cook alongside it, which saves a step but can lead to slight overcrowding.
The Sheet-Pan Alternative: A Hands-Off Approach
For those prioritizing convenience and minimal cleanup, the sheet-pan method is an excellent option. It requires less active management but offers less granular control over the final textures.
- Preheat and Prepare: Preheat the oven to a high temperature, typically between 400°F and 450°F (200°C to 230°C). For best results, place the sheet pan in the oven as it preheats. A hot pan will help the ingredients begin to roast immediately rather than steam. Line the pan with parchment paper or aluminum foil for easy cleanup.
- Combine and Roast: Toss the trimmed and dried asparagus with oil, salt, and pepper. Arrange the asparagus in a single layer on the hot sheet pan. Pat the salmon fillets dry, brush with oil, and season. Nestle the salmon fillets among the asparagus.
- Cook: Roast for 8-15 minutes, depending on the oven temperature and the thickness of the salmon and asparagus. The salmon is done when it reaches the desired internal temperature, and the asparagus is tender-crisp.
- Serve: Remove from the oven and serve immediately, perhaps with a pre-made sauce or a simple squeeze of lemon.
The two workflows highlight a core culinary choice. The stovetop method provides maximum control. The cook can manage the heat applied to the salmon skin with exacting precision, remove the asparagus at the exact moment it reaches tender-crisp perfection, and build a complex sauce from the pan’s fond. This is the path to ultimate textural quality. The sheet-pan method, conversely, offers maximum convenience. It is a largely hands-off process with minimal cleanup. However, this convenience comes at the cost of control. The oven environment contains more ambient moisture, especially from the roasting asparagus, and relies on convective heat rather than the direct, intense conductive heat of a skillet. This makes achieving a truly shatter-crisp salmon skin less likely. The informed cook can thus choose their method based on the priority for a given meal: ultimate texture (stovetop) or ease of execution (sheet-pan).
Architecture of Flavor: Pan Sauces and Seasonings
With the core techniques for cooking salmon and asparagus mastered, the next level of artistry lies in the deliberate construction of flavor. This section moves beyond the basics of salt and pepper to explore a spectrum of seasoning profiles and the elegant, rapid creation of pan sauces that elevate the dish from simple to sublime.
Seasoning Profiles
The rich flavor of salmon and the green, earthy notes of asparagus provide a versatile canvas for a wide range of seasonings.
- Simple and Classic: The most fundamental approach is a generous seasoning of kosher salt and freshly ground black pepper applied just before cooking. This minimalist approach allows the natural flavors of the high-quality ingredients to shine.
- Mediterranean Rub: A dry rub of aromatic Mediterranean spices imparts a savory depth. A common blend includes dried oregano, garlic powder, and sweet paprika, which can be rubbed onto the flesh side of the salmon before searing.
- Cajun Spice: For a bolder, spicier profile, a pre-made or homemade Cajun spice blend can be used. This typically includes paprika, cayenne, garlic powder, onion powder, and herbs. This rub can be applied to both the salmon and the asparagus for a cohesive flavor profile.
- Herb-Infused Oils: A subtle yet elegant way to add flavor is to use an herb-infused oil. Gently simmering olive oil with aromatics like garlic, thyme, and rosemary creates a fragrant oil that can be brushed onto the salmon and tossed with the asparagus before cooking.
- Marinades: While effective, marinades must be used with caution. Salmon’s delicate flesh can be “cooked” by acidic ingredients like citrus juice or vinegar if left to marinate for too long, resulting in a mushy texture. If using an acidic marinade, limit the time to 20-30 minutes maximum.
The Art of the Pan Sauce
Creating a pan sauce is the epitome of culinary efficiency and flavor extraction. It is here that the choice of a stainless-steel pan truly pays dividends. The fond—those caramelized, browned bits left in the pan after searing the salmon—is a concentrated base of flavor waiting to be unlocked. The general process is simple: remove the cooked salmon, pour off excess fat, and use the hot pan to build a sauce in minutes.
1. Classic Lemon-Butter-Caper Sauce
This bright, acidic, and briny sauce cuts through the richness of the salmon perfectly.
- Technique: After removing the salmon, add minced garlic to the pan and sauté for 30 seconds until fragrant. Deglaze the pan by pouring in a splash of dry white wine or fresh lemon juice, using a wooden spoon or spatula to scrape up all the fond from the bottom of the pan. Allow the liquid to reduce by about half. Turn off the heat and whisk in several pats of cold, unsalted butter, one at a time. The cold butter emulsifies with the liquid, creating a creamy, stable sauce. Stir in chopped capers and fresh herbs like parsley or dill, and season to taste.
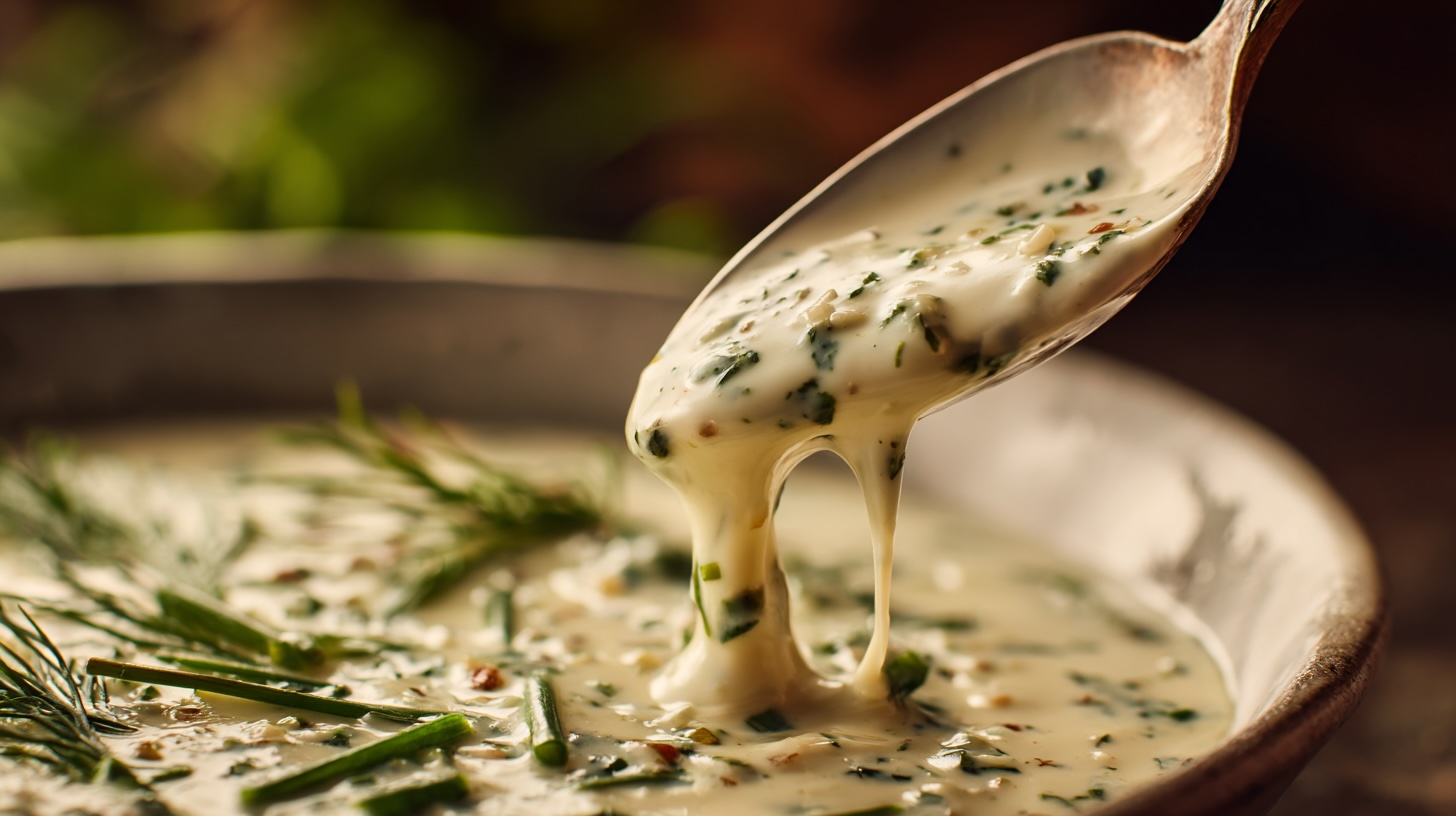
2. Rich Creamy Garlic-Herb Sauce
This sauce is more decadent, offering a luxurious, velvety texture that coats the salmon and asparagus.
- Technique: In the same pan, melt butter and sauté minced garlic until fragrant. Pour in chicken broth or white wine to deglaze the pan. Bring to a simmer and let it reduce slightly. Lower the heat and stir in heavy cream. Let the sauce gently simmer and thicken for a few minutes. For extra thickness and flavor, stir in finely grated Parmesan cheese until it melts into the sauce. Finish by stirring in a generous amount of fresh herbs, such as a combination of dill, chives, tarragon, or parsley.
3. Vibrant Honey-Soy Glaze
This sweet and savory glaze offers a different flavor dimension. Because of its high sugar content, it is best made as a finishing sauce to avoid burning.
- Technique: In a small bowl, whisk together soy sauce (or coconut aminos), honey (or maple syrup), minced garlic, and an acid like fresh lemon or lime juice. After the salmon is cooked and removed from the pan, pour this mixture into the hot skillet. Bring to a simmer and cook for 2-3 minutes, stirring constantly, until the glaze has thickened enough to coat the back of a spoon.
A critical point of technique arises when dealing with glazes and crispy skin. There is an inherent paradox: the goal is crispy skin, but glazes are wet, and moisture is the enemy of crispiness. Applying a wet glaze directly onto the perfectly crisped salmon skin will instantly render it soggy, undoing all the careful work of the searing process. The professional solution is to reframe the glaze as a
sauce. Instead of coating the fish, the salmon should be plated skin-side up, and the glaze should be pooled on the plate underneath or artfully drizzled around the fillet. This allows the diner to get the flavor of the glaze in every bite by dragging the piece of salmon through it, while the textural integrity of the crispy skin remains perfectly preserved until the last moment. An even more advanced technique involves carefully removing the crisped skin, cutting it into decorative shapes, and using it as a crispy garnish, or “chicharrón,” on the glazed fish.
Culinary Triage: A Troubleshooting Guide
Even with careful planning, challenges can arise in the kitchen. The ability to diagnose and correct issues in real-time is a key skill of a confident cook. This section serves as a practical guide to identifying, understanding, and solving the most common problems encountered when preparing this dish.
Salmon Issues
- Problem: Flabby, Not Crispy, Skin
- Causes: The primary cause is insufficient heat or the presence of moisture. This can be due to: 1) The pan not being hot enough when the salmon was added; 2) The salmon skin not being patted completely dry before cooking; 3) Overcrowding the pan, which creates steam; or 4) Using an oil with a low smoke point that burned before a proper sear could form.
- Solutions: Ensure the pan is properly preheated until it is very hot. Pat the salmon skin meticulously with paper towels, or for best results, air-dry it in the fridge. Use a high-smoke-point oil. Cook in batches if necessary to avoid overcrowding.
- Problem: Salmon Sticks to the Pan
- Causes: This is almost always a result of improper heat management or impatience. The causes include: 1) The pan was not hot enough before the fish was added; 2) Insufficient oil was used to create a lubricating layer; or 3) An attempt was made to flip the fish before the Maillard reaction was complete and the skin had naturally released.
- Solutions: Preheat the pan thoroughly. Use enough oil to coat the bottom of the pan. Most importantly, be patient and wait for the fish to signal it is ready to be moved by releasing itself from the pan surface. For a foolproof method, especially on stainless steel, a small square of parchment paper can be placed under the salmon fillet in the pan.
- Problem: White Gunk (Albumin) Leaking
- Cause: The heat is too high. The muscle fibers of the salmon are contracting too rapidly and violently, squeezing out the protein albumin.
- Solution: Lower the heat. A gentle, steady cook over medium or medium-low heat will minimize this contraction, resulting in a moister, more attractive fillet. A pre-cook brine can also mitigate this issue.
- Problem: Overcooked and Dry
- Causes: The most common cause is cooking by time or unreliable visual cues instead of by internal temperature. Another frequent error is not accounting for carryover cooking after the fish is removed from the heat.
- Solution: Use an instant-read thermometer. It is the only way to guarantee perfection. Pull the salmon from the pan when it is 5°F (3°C) below the desired final temperature and let it rest for 3-5 minutes, during which it will continue to cook to its target doneness.
Asparagus Issues
- Problem: Soggy and Limp
- Cause: This is singularly caused by overcooking. The fibrous cellular structure has completely broken down.
- Solutions: Cook for less time than you think is necessary, monitoring it closely. Remove it from the heat the moment it turns bright green and is just tender. To completely stop the cooking process, immediately transfer the asparagus to an ice bath (shocking).
- Problem: Uneven Cooking
- Cause: The asparagus stalks in the bunch are of significantly different thicknesses. The thin spears overcook while the thick ones are still raw.
- Solution: When purchasing, select a bunch with stalks of a uniform thickness. If the bunch has varied sizes, sort them by thickness and cook them in separate batches, giving the thicker spears a head start.
|
Problem |
Potential Causes |
Solutions |
|
Flabby Salmon Skin |
1. Pan not hot enough. 2. Skin was wet. 3. Pan was overcrowded. 4. Wrong oil used. |
1. Preheat pan thoroughly. 2. Pat skin bone-dry. 3. Cook in batches if needed. 4. Use a high-smoke-point oil. |
|
Salmon Sticks to Pan |
1. Pan not hot enough. 2. Not enough oil. 3. Flipped too soon. |
1. Ensure pan is very hot before adding fish. 2. Use enough oil to coat pan bottom. 3. Wait for fish to release naturally. |
|
White Albumin Leaks |
1. Heat is too high. |
1. Cook at a lower, more gentle heat (medium or medium-low). 2. Consider a pre-cook brine. |
|
Soggy Asparagus |
1. Overcooked. |
1. Cook for less time. 2. Remove from heat when bright green. 3. Use an ice bath to stop cooking. |
Table 4: Common Problems and Solutions. This table acts as a quick diagnostic tool for in-the-moment troubleshooting, turning potential failures into learning opportunities.
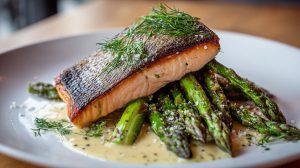
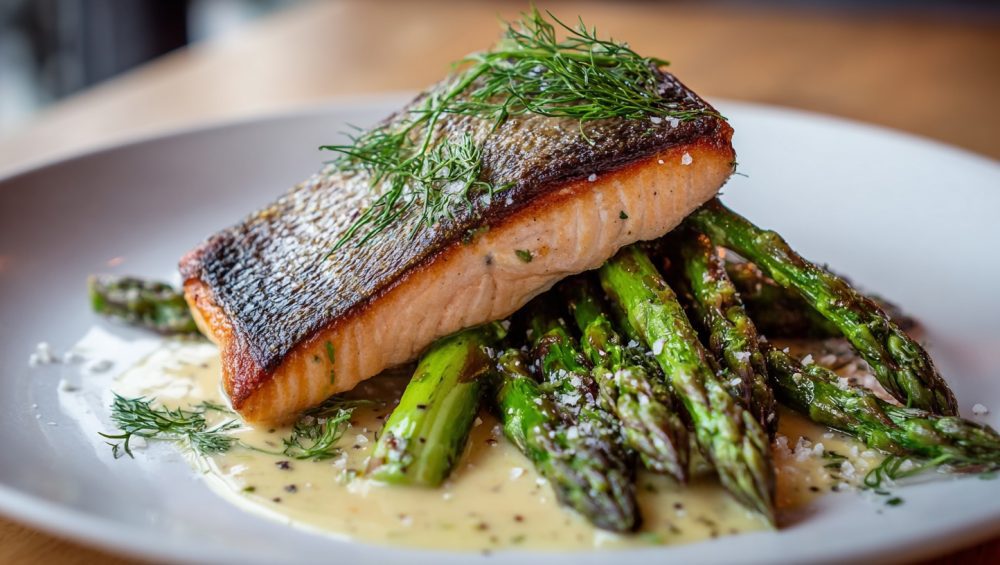
The Final Presentation: Plating with Professional Intent
The final act of preparing this meal is the presentation. Plating is not merely about arranging food on a dish; it is about composition, preserving texture, and creating a visual experience that signals the quality of the meal to come. A few professional principles can elevate the dish from a simple home-cooked meal to a composed, intentional plate.
Principles of Plating
- Layering and Height: Avoid a flat, two-dimensional presentation. Create visual interest and dimension by building height. A common professional technique is to create a bed for the main protein. The asparagus spears can be laid down first, and the salmon fillet placed on top, either directly or at an angle. If a starch like rice or potatoes is included, it can be used as a base to prop up one side of the salmon, creating a dynamic lean.
- The Rule of Odds: Compositions are often more visually appealing when elements are grouped in odd numbers. For instance, arranging three or five asparagus spears is typically more dynamic and aesthetically pleasing than an even number.
- Negative Space: A crowded plate looks chaotic. A professional plate uses the empty, or “negative,” space as a deliberate part of the design. This allows the individual components to stand out and gives the overall composition a sense of elegance and focus.
Practical Techniques
- Sauce Application: Sauce should be applied with precision, not poured haphazardly. For a clean, modern look, use a squeeze bottle to create elegant lines, dots, or even a rectangular design on the plate. A classic technique is the “swoosh,” created by placing a spoonful of sauce on the plate and dragging it across with the back of the spoon. Alternatively, pooling the sauce in the center of the plate and placing the salmon on top creates a beautiful contrast.
- Garnishes: The cardinal rule of garnishing is that everything on the plate should be edible and contribute to the dish’s flavor or texture. Avoid inedible garnishes like whole sprigs of thyme or rosemary. Instead, opt for functional garnishes that enhance the meal:
- Fresh Herbs: Finely chopped fresh herbs like dill, parsley, or chives add a burst of color and fresh flavor.
- Flaky Sea Salt: A final sprinkle of a high-quality finishing salt, such as Maldon salt, adds a pleasant crunch and pockets of salinity.
- Citrus Zest: Freshly grated lemon zest provides a vibrant aroma and a pop of color.
- Crispy Skin: As mentioned previously, if a glaze is used on the salmon flesh, the skin can be crisped separately, broken into shards, and used as a textural garnish (“chicharróns”).
A crucial aspect of professional plating is its role in preserving texture. The arrangement of components is a functional strategy to protect the hard-won textures created during cooking. The crispy salmon skin is the prime example. Placing the fillet directly onto a wet bed of vegetables or pooling a sauce over the top will immediately introduce moisture and compromise the skin’s crispiness. The professional approach is to plate in a way that isolates the crispy element from wet ones. By placing the salmon skin-side up on top of the asparagus, or nestling it beside the sauce rather than in it, the cook ensures that the delightful, crackling texture is maintained until the very moment the diner takes a bite.
The Nutritional Duet: Why This Meal is a Power Couple

Beyond its culinary merits, the pairing of salmon and asparagus represents a powerful nutritional synergy. This meal is not only quick and delicious but also remarkably nutrient-dense, with each component complementing the other.
Salmon is renowned as an exceptional source of high-quality protein and heart-healthy omega-3 fatty acids, which have been shown to support cardiovascular health. It is also one of the best natural sources of Vitamin D, which is crucial for bone health and immune function, and is packed with B vitamins, particularly Vitamin B12, which is essential for nerve function and the formation of red blood cells.
Asparagus, meanwhile, contributes significant dietary fiber, which aids in digestion and promotes satiety. It is a rich source of folate (Vitamin B9), vital for cell growth and development, and provides a host of antioxidants, including lutein, zeaxanthin, and quercetin, which help protect the body from oxidative stress.
The true nutritional brilliance of this pairing lies in their synergistic relationship. Asparagus is an excellent source of Vitamin K, a nutrient essential for blood clotting and bone metabolism. Vitamin K is a fat-soluble vitamin, meaning it requires fat for proper absorption by the body. When eaten alongside a fatty fish like salmon, the healthy fats in the salmon enhance the bioavailability and absorption of the Vitamin K from the asparagus. Furthermore, while salmon is rich in Vitamin B12 and Vitamin D, asparagus lacks these nutrients, making them a “perfect pair” that covers a wider range of nutritional needs when consumed together.
Conclusion
The creation of a perfect pan-seared salmon and asparagus meal within 30 minutes is an achievable goal that stands as a benchmark of culinary competence. Success is not predicated on speed for its own sake, but on a foundation of knowledge and the precise execution of a well-conceived workflow. As this report has detailed, every step—from the selection of a thick, center-cut fillet and a heavy-bottomed stainless-steel pan, to the meticulous drying of the salmon skin and the patient observation of the Maillard reaction—is a deliberate action with a predictable and controllable outcome.
Mastery of this dish requires an understanding that a dry surface is the prerequisite for a crispy sear, that the white albumin is a symptom of excessive heat, and that an instant-read thermometer is the arbiter of perfect doneness. It involves recognizing the textural trade-offs between the stovetop and the sheet pan, and the flavor architecture inherent in building a pan sauce from fond. Finally, it culminates in a plating strategy that is not just aesthetic, but functional—designed to preserve the very textures that were so carefully created.
By internalizing these principles, the ambitious home cook can move beyond the anxiety of potential failure and approach this dish with confidence. The perfect 30-minute plate is not a matter of luck; it is the tangible result of applied science and practiced technique, a symphony of flavor and texture conducted with purpose and skill.