Podcast:
The modern kitchen is the undisputed heart of the home, a magnetic center for family life and social connection. Yet, for many, it is also a source of persistent chaos and low-grade stress. The countertops become a repository for mail, keys, and half-finished projects; the cabinets, a jumble of mismatched containers and forgotten appliances; the pantry, a graveyard of expired goods. This state of disorder is not a personal failing but a systemic problem. The kitchen’s role has fundamentally evolved, expanding from a contained, utilitarian workspace into a multifunctional hub for living, dining, and entertaining. This evolution has placed immense pressure on layouts that were never designed to accommodate such a diverse range of activities, leading to an inevitable breakdown of order.
The consequences of this design-lifestyle mismatch are more than just aesthetic. A perpetually cluttered environment takes a significant psychological toll. Research indicates that visual clutter overwhelms the brain’s processing centers, impairing focus and reducing working memory capacity. It is the mental equivalent of having too many browser tabs open at once; everything slows down, and concentration becomes difficult. This disorganization can trigger a physiological stress response, elevating levels of the hormone cortisol. One study found that individuals who described their homes as “cluttered” exhibited higher cortisol levels throughout the day, suggesting that the chaotic environment was a source of chronic stress. This constant, low-level alarm state can contribute to anxiety, frustration, and a diminished sense of well-being.
The constant navigation of a disorganized kitchen depletes finite mental energy. Every search for a matching lid, every moment spent rummaging for a specific spice, every item that must be moved to access another is a small problem-solving exercise. Cumulatively, these micro-frustrations drain the cognitive resources that could otherwise be directed toward the creative and joyful aspects of cooking. The desire for an organized kitchen, therefore, is not merely a desire for clean surfaces; it is a subconscious yearning for reduced cognitive load and a clearer, calmer mind.
The solution lies not in more frequent tidying, but in a fundamental rethinking of the kitchen’s organizational architecture. The 5-Zone System offers a holistic design philosophy that addresses the root cause of the chaos. It provides a logical framework that aligns the physical space with the way modern life is actually lived. By implementing this system, the kitchen transforms from a source of stress into a sanctuary of order, making daily routines smoother and the act of cooking a therapeutic, mindful practice rather than a frantic chore. It restores a sense of control over one’s environment, a feeling that can create a positive ripple effect into all other areas of life.
From Triangle to Territory: The Evolution of Kitchen Design
To appreciate the revolutionary simplicity of the 5-Zone System, it is essential to understand the design principle it evolved from: the Kitchen Work Triangle. This concept, which dominated kitchen design for the better part of a century, was a product of the early 20th-century efficiency movement. Pioneered by industrial engineers and psychologists like Lillian Moller Gilbreth and formally developed in the 1940s at the University of Illinois School of Architecture, the work triangle was designed to standardize construction and maximize the efficiency of a one-cook kitchen.
The theory was elegant in its logic. It identified the three primary work centers in any kitchen—the refrigerator (food storage), the sink (preparation and cleaning), and the stove (cooking)—and arranged them as the three points of a triangle. By optimizing the distances between these points, the triangle aimed to minimize the number of steps a cook had to take, thereby reducing fatigue and improving workflow. The National Kitchen and Bath Association (NKBA) established specific guidelines: each leg of the triangle should measure between 4 and 9 feet, and the total perimeter of the triangle should be between 13 and 26 feet. This prevented the workspace from being either too cramped or too spread out. For decades, this geometric model was the undisputed gold standard of functional kitchen design.
However, as the kitchen’s role in the home transformed, the limitations of the work triangle became increasingly apparent. The model was conceived for a smaller, enclosed room with a single person performing the domestic labor. It did not account for the realities of the modern home: open-plan layouts where kitchens flow into living areas, the presence of multiple cooks working simultaneously, and the proliferation of new appliances like microwaves and dishwashers that create additional, distinct work centers. The rigid geometry of the triangle could not adapt to this new, more complex and social environment.
In response, a more flexible and sophisticated approach emerged, largely from European design experts. Concepts like the “Intelligent Kitchen” or “Dynamic Kitchen,” developed by the German Modern Kitchen Workgroup (AMK) and championed by companies like Blum and Hettich, proposed organizing the kitchen not by fixed appliance locations, but by activity-based “zones”. This led to the creation of the 5-Zone System, which divides the kitchen into five logical territories based on task: Consumables (food storage), Non-consumables (dish and cookware storage), Cleaning, Preparation, and Cooking.
This represents a crucial philosophical shift from a location-based logic to a task-based logic. The work triangle is defined by the physical placement of three appliances; the organization flows from these fixed points. The 5-Zone system, conversely, is defined by human activities; the layout and organization flow from the tasks a person needs to perform. This makes the system inherently more intuitive and adaptable. While one cannot always move a sink or stove, one can always group items according to their purpose. This insight empowers anyone to apply the principles of zone-based organization to achieve peak efficiency, regardless of whether their kitchen’s fixed layout forms a perfect triangle. It is a system designed for real life, acknowledging that a kitchen’s true function is dictated not by its geometry, but by the people who use it.
The Anatomy of an Intuitive Kitchen: Mastering the Five Zones
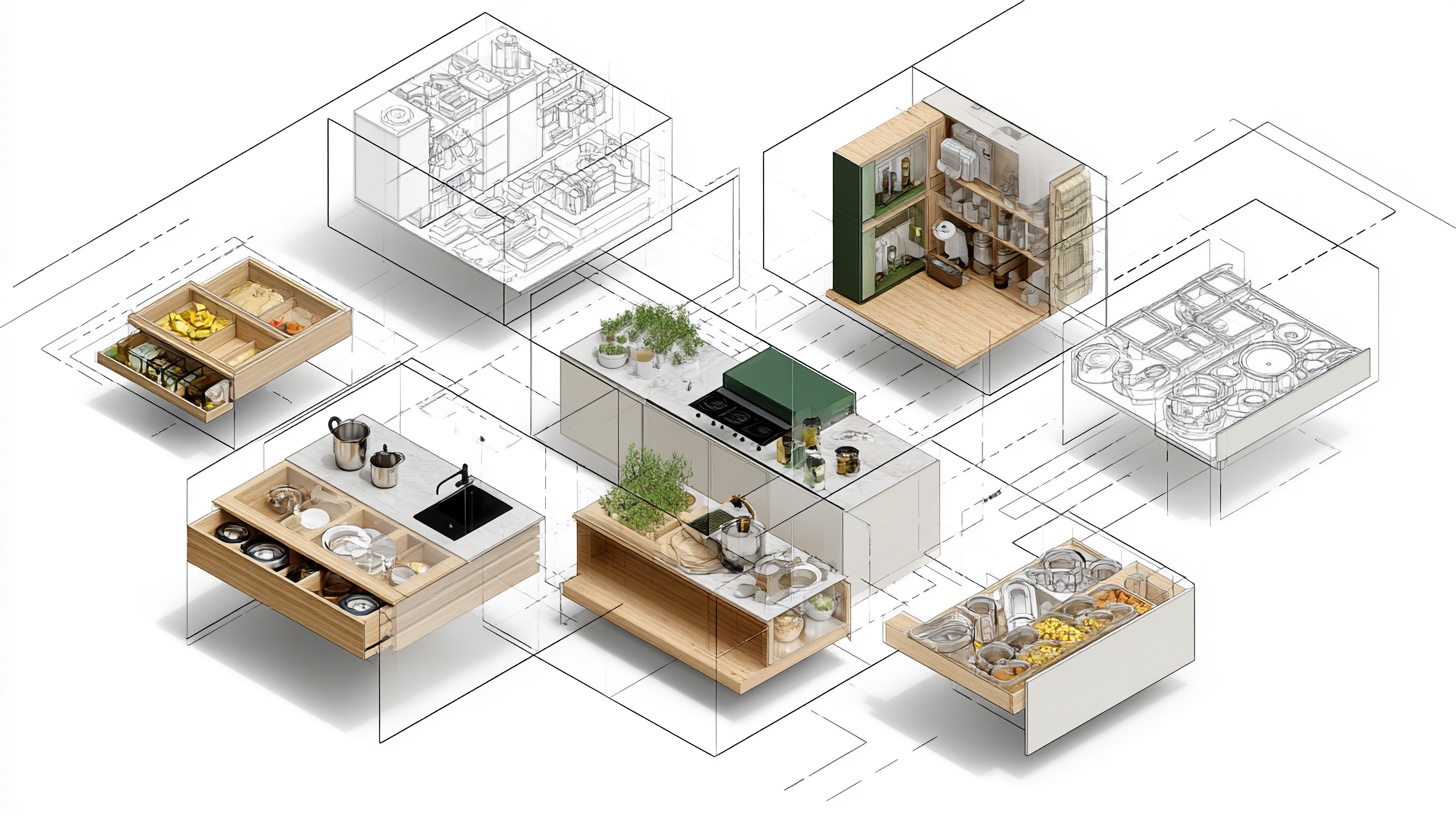
The power of the 5-Zone system lies in its intuitive and comprehensive approach to organization. By deconstructing the kitchen into five distinct, function-driven areas, it creates a logical map for every item, ensuring that tools and ingredients are precisely where they are needed, when they are needed. This part provides a detailed examination of each zone, outlining its purpose, ideal location, a complete checklist of its contents, and advanced strategies for maximizing its efficiency and ergonomic comfort.
The Consumables Zone: Your Culinary Library
Purpose and Philosophy
The Consumables Zone is the kitchen’s comprehensive library, housing every food item, from fresh perishables to dry pantry staples. The primary philosophy behind this zone is centralization. By grouping all food items into one cohesive area, it streamlines the entire culinary process, from unpacking groceries and taking inventory to planning meals and gathering ingredients. This consolidation has a powerful secondary benefit: it significantly reduces food waste. When all food is visible and easily accessible, items are less likely to be forgotten, purchased in duplicate, or left to expire in the dark recesses of a cabinet.
Ideal Location
For maximum efficiency, the Consumables Zone should physically unite the refrigerator and freezer (cold storage) with the pantry or designated food cabinets (dry storage). Creating a contiguous block of food storage prevents unnecessary movement across the kitchen when gathering ingredients for a recipe. Critically, this entire zone should be located immediately adjacent to the Preparation Zone. This creates a seamless workflow: retrieve ingredients from the Consumables Zone, then take one step to the Preparation Zone to begin chopping and mixing.
Item Checklist
- Cold Storage (Refrigerator & Freezer): All perishable items, including fresh fruits and vegetables, dairy products (milk, cheese, yogurt), meats, poultry, and fish. The freezer holds frozen produce, meats, prepared meals, and ice.
- Dry Storage (Pantry & Cabinets): All non-perishable food items. This includes grains (rice, quinoa), pasta, legumes, canned goods, baking supplies (flour, sugar, baking soda), spices, oils, vinegars, condiments, bread, cereals, and snacks.
Organizational Strategies
- Sub-zoning for Clarity: Within the larger Consumables Zone, create smaller, dedicated sub-zones. Group all baking ingredients together, all breakfast items (cereals, oats) in one area, and all oils and vinegars on a single shelf or tray. This micro-organization makes finding specific items effortless.
- Prioritize Accessibility: Apply the principle of “valuable real estate.” Place the items used most frequently—such as everyday cooking oils, salt, pepper, and favorite snacks—on lower shelves or at eye level where they can be reached without effort. Items used less often, like specialty flours or bulk supplies, can be stored on higher shelves.
- Maximize Visibility: Visibility is the cornerstone of an effective Consumables Zone. Decant dry goods like pasta, grains, flour, and sugar from their bulky packaging into clear, airtight containers. This not only keeps food fresher and protects against pests but also allows for an immediate visual inventory, preventing unnecessary purchases. In the refrigerator, use clear bins to group items like yogurts, condiments, or produce, which keeps shelves tidy and makes it easy to see what you have at a glance.
- Leverage Smart Storage Solutions: Modern cabinet solutions can transform the Consumables Zone. Full-extension pull-out shelves or drawers in a pantry ensure that nothing gets lost in the back; the entire contents of the shelf become accessible. For corner cabinets, multi-tiered rotating shelves (lazy susans) bring items from the dark corners to the forefront. For spices, consider a dedicated drawer with angled inserts or a narrow pull-out cabinet next to the pantry.
The Non-Consumables Zone: The Tools of the Trade
Purpose and Philosophy
The Non-Consumables Zone is the arsenal of the kitchen, containing all the hardware used for cooking, baking, serving, and eating. The guiding philosophy for this zone is “storage at the point of first use.” Rather than being one single area, this zone is often strategically split to place items exactly where their function begins, thus optimizing the kitchen’s overall workflow and ergonomic efficiency.
Ideal Location
The location of non-consumable items is dictated by their function, creating two primary sub-zones:
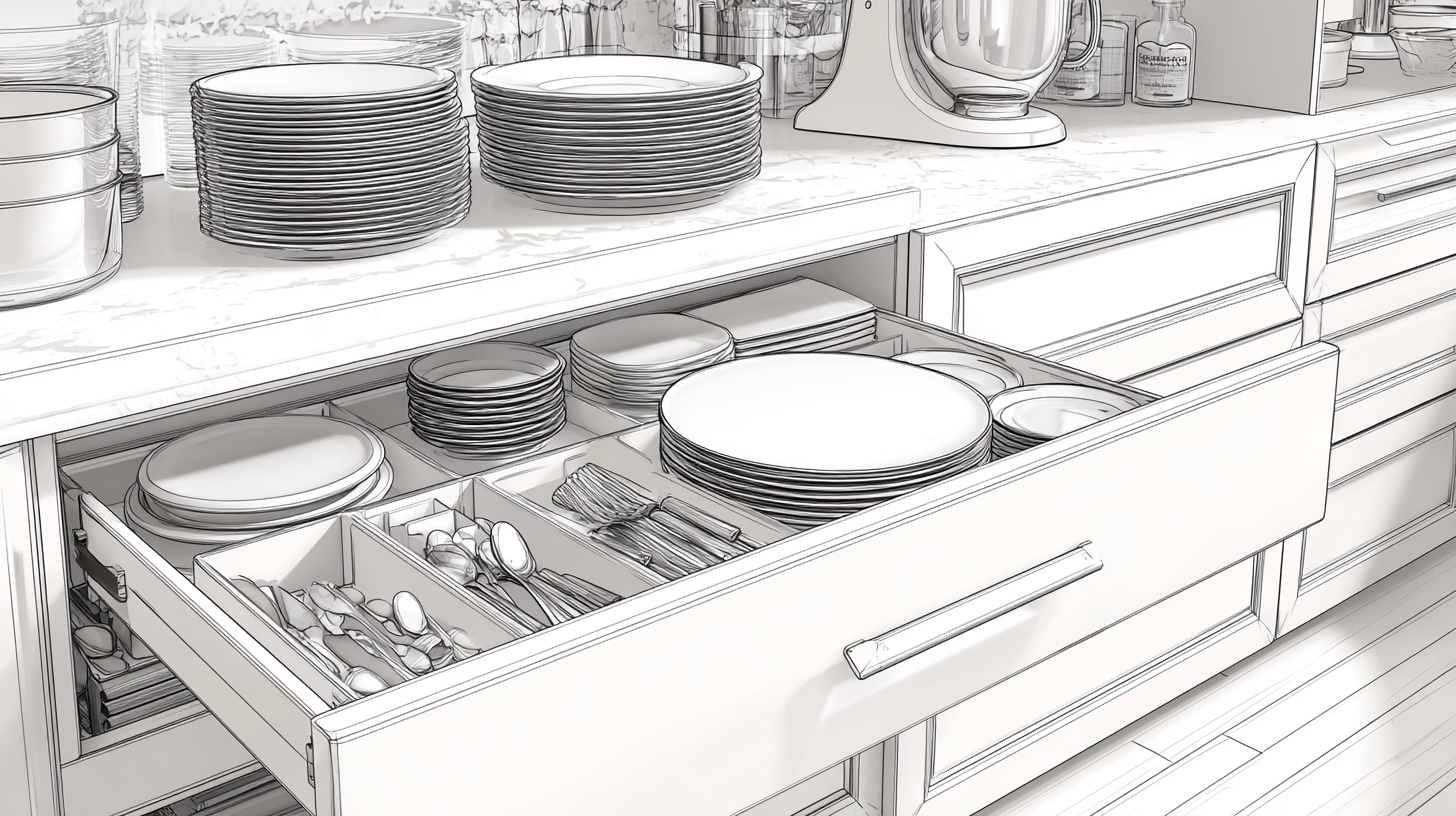
- Everyday Dishware and Cutlery: This sub-zone, containing plates, bowls, glasses, and eating utensils, should be located as close as physically possible to the Cleaning Zone, specifically the dishwasher. This adjacency creates an incredibly efficient loop: dirty dishes go into the dishwasher, and clean dishes are unloaded and put away in the nearest cabinets and drawers with minimal steps.
- Cookware and Bakeware: This sub-zone, which includes pots, pans, baking sheets, and casserole dishes, belongs in or directly next to the Cooking Zone. Having a heavy Dutch oven or a primary frying pan within arm’s reach of the stovetop is both a matter of convenience and safety.
Item Checklist
- Dishware: Everyday plates, salad plates, bowls of various sizes, drinking glasses, and mugs.
- Eating Cutlery: Forks, knives, spoons, and serving utensils.
- Cookware: Pots, saucepans, frying pans, woks, Dutch ovens, and their corresponding lids.
- Bakeware: Baking sheets, muffin tins, cake pans, pie plates, and casserole dishes.
- Food Storage Containers: Reusable plastic or glass containers (e.g., Tupperware), as well as disposable wraps, foils, and storage bags.
Organizational Strategies
- Embrace Drawer Storage: For everyday dishware, deep, sturdy drawers are ergonomically superior to high wall cabinets. Using adjustable pegboard systems or custom dividers within drawers allows plates and bowls to be stacked securely, preventing chipping and making them easy to access without reaching overhead.
- Store Flat Items Vertically: The common practice of stacking baking sheets, cutting boards, and pot lids creates unstable, hard-to-access piles. A far better solution is to store these items vertically, like files in a cabinet. Use simple metal or plastic partitions inside a deep drawer or cabinet to keep these items upright and individually accessible. Expandable pot-lid holders are an excellent off-the-shelf tool for this purpose.
- Conquer Corner Cabinets: Awkward corner cabinets are notorious for becoming black holes where kitchenware disappears. Tame these spaces with modern hardware. A two-tiered rotating carousel (lazy susan) makes the entire space usable with a simple spin. For even greater access, articulated or “magic” corner pull-out units swing the contents of the cabinet completely out into the open.
- Incorporate Advanced Cabinetry: To enhance ergonomics and accessibility, especially in upper cabinets, consider pull-down systems. These mechanisms allow an entire shelf to be pulled down to counter height, bringing the contents directly to the user. This is particularly beneficial for those with limited mobility or for storing heavier items like stacks of glasses without reaching.
The Cleaning Zone: The Center of Operations
Purpose and Philosophy
The Cleaning Zone is the operational hub for all washing, rinsing, and waste disposal activities. A thoughtfully designed Cleaning Zone can transform one of the most tedious kitchen tasks into a streamlined, efficient process. The philosophy is to create a logical, ergonomic sequence that minimizes mess and effort, from initial clearing to final cleanup.
Ideal Location
This zone is anchored by the sink and the dishwasher, which should be located side-by-side. The ideal placement for the entire zone is between the Preparation and Cooking zones. This allows for easy rinsing of produce during prep, quick handwashing, and the immediate soaking of used pots and pans during the cooking process, preventing food from hardening on them.
Item Checklist
- Major Hardware: Kitchen sink, dishwasher, and garbage disposal.
- Waste Management: Dedicated bins for trash, recycling, and compost. These are integral parts of the cleaning workflow.
- Cleaning Supplies: Dish soap, sponges, brushes, scrubbers, dishwasher detergent, all-purpose cleaning sprays, and microfiber cloths.
- Linens: Dish towels and washcloths.
Organizational Strategies
- Design an Ergonomic Workflow: The most effective Cleaning Zones are designed to support a natural, unidirectional flow. This often means moving from left to right (or right to left, depending on user preference and layout). The sequence should be: a “dirty” landing spot on the counter for used dishes, followed by the trash/compost bin for scraping, then the sink for rinsing, and finally the dishwasher for loading.
- Optimize Under-Sink Storage: The cabinet directly beneath the sink is the prime real estate for cleaning supplies. However, it can easily become a chaotic mess. To prevent this, use smart organizers. A pull-out caddy or tiered shelving unit utilizes the vertical space and makes items in the back accessible. Racks mounted on the inside of the cabinet doors are perfect for holding sponges, brushes, and rolls of trash bags. A tilt-out tray at the front of the sink is an ingenious spot for sponges and scrubbers, keeping the sink deck clear.
- Integrate Waste and Recycling: Freestanding trash cans consume valuable floor space and can be an eyesore. A superior solution is an integrated pull-out cabinet that houses bins for trash, recycling, and compost. This keeps waste hidden, contains odors, and seamlessly incorporates disposal into the cleaning workflow.
- Dedicated Towel Storage: Constantly searching for a clean dish towel is a common frustration. An elegant and practical solution is a narrow pull-out cabinet, often installed next to the sink, fitted with bars for hanging towels. This keeps them dry, accessible, and neatly out of sight.
The Preparation Zone: The Chef’s Workshop
Purpose and Philosophy
The Preparation Zone is the kitchen’s primary workshop, the space where raw ingredients are transformed into culinary creations. The goal of this zone is to facilitate the practice of mise en place—a French term meaning “everything in its place”—where all ingredients are measured, chopped, and organized before cooking begins. A successful Preparation Zone is characterized by ample, clear counter space and having every necessary tool within immediate reach, eliminating the need to search for items mid-recipe.
Ideal Location
This zone should be the largest single, uninterrupted stretch of countertop in the kitchen. Its placement is critical for a logical workflow: it must be situated between the Consumables Zone (for easy access to ingredients from the fridge and pantry) and the Cooking Zone (for a seamless transfer of prepped food to the stove or oven). In many modern kitchens, a central island serves as the ideal Preparation Zone, allowing for movement on all sides and often providing dedicated storage below.
Item Checklist
- Cutting and Chopping Tools: A full set of knives, multiple cutting boards (for different food types like meat and vegetables), vegetable peelers, graters, and kitchen scissors.
- Mixing and Measuring Tools: A nested set of mixing bowls, liquid and dry measuring cups, measuring spoons, and a kitchen scale.
- Frequently Used Consumables: To avoid constant trips to the pantry, a small selection of core ingredients should be kept directly in the Prep Zone. This includes everyday cooking oils, vinegars, salt, pepper, and a small rack of frequently used spices.
- Small Prep Appliances: If used regularly, items like a food processor, blender, or stand mixer should be stored in an easily accessible cabinet or an “appliance garage” within this zone.
Organizational Strategies
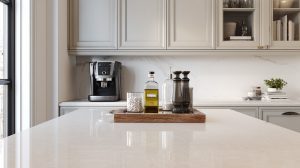
- Protect Counter Space: The most valuable asset in the Prep Zone is clear, open counter space. Experts recommend aiming for a minimum of 4 feet of uninterrupted surface. This area should be treated as sacred workspace, not a storage area for appliances, mail, or fruit bowls.
- Organize Drawers Intelligently: The drawers within the Prep Zone are its most critical storage. Free up valuable counter space by storing knives safely in an in-drawer knife block. Use adjustable drawer dividers to create custom compartments for every prep utensil—peelers, whisks, can openers—preventing a jumbled mess.
- Strategic Spice Storage: While many people store spices next to the stove, the heat and steam can degrade their quality and shorten their shelf life. A more ideal location is a dedicated spice drawer with an angled insert or a narrow pull-out cabinet located within the Preparation Zone. This keeps them cool, dark, and perfectly positioned for when they are needed during prep.
- Utilize Vertical Wall Space: To keep countertops clear while maintaining accessibility, leverage the wall space above the prep area. A magnetic knife rack is a stylish and functional way to store knives. A wall-mounted rail system with hooks can hold small baskets for garlic and shallots or hang frequently used tools like graters and measuring spoons.
The Cooking Zone: The Heart of the Hearth
Purpose and Philosophy
The Cooking Zone is the “hot zone,” the area dedicated to the application of heat. The organizational philosophy here is centered on safety and efficiency. Every tool and piece of cookware needed for the active process of cooking should be immediately at hand, minimizing the need to turn away from a hot stove or leave a simmering pan unattended.
Ideal Location
This zone is naturally centered around the primary cooking appliances: the stove or cooktop, the oven(s), and the microwave. It must be directly adjacent to the Preparation Zone, allowing for a smooth and safe transition of prepped ingredients from the cutting board to the hot pan.
Item Checklist
- Primary Cookware: The most frequently used pots, pans, and skillets should be stored in the most accessible locations within this zone.
- Cooking Utensils: The tools used directly at the stove, such as spatulas, tongs, ladles, large spoons, and whisks.
- Safety Equipment: Potholders, oven mitts, and trivets for handling hot dishes must be within immediate reach of the oven and stove.
- Finishing Ingredients: While most spices belong in the Prep Zone, it is practical to keep core seasonings like salt, pepper, and primary cooking oils in the Cooking Zone as well, often overlapping with the prep area.
Organizational Strategies
- Capitalize on Prime Real Estate: The cabinets and drawers directly flanking and underneath the stove are the most valuable storage in the Cooking Zone. These should be reserved for heavy pots, pans, and frequently used cooking utensils.
- Utensil Storage: Crock vs. Drawer: For maximum accessibility, keeping essential cooking utensils (spatulas, tongs, wooden spoons) in a decorative crock or canister on the countertop next to the stove is a classic and effective strategy. For those who prefer a cleaner, uncluttered countertop aesthetic, a dedicated utensil drawer with dividers located right next to the stove is an equally functional alternative.
- Ergonomic Cookware Storage: Deep, wide drawers are a far more ergonomic and efficient solution for storing pots and pans than traditional base cabinets with fixed shelves. Drawers allow you to see all your cookware from above and access items without needing to kneel and rummage through the back of a dark cabinet.
- Consider Overhead Storage: In kitchens where lower cabinet space is limited, a hanging pot rack installed above an island or a section of the Cooking Zone can be a highly efficient and visually appealing storage solution. It keeps bulky cookware accessible and frees up cabinet space. However, it is important to note that items stored in the open can accumulate dust and grease splatters, requiring more frequent cleaning.
At-a-Glance Zone Guide
The following table distills the core principles of the 5-Zone System into a single, actionable reference. It serves as a practical checklist for mapping out the zones and placing items to create a kitchen that is intuitive, efficient, and permanently organized.
|
Zone |
Purpose & Philosophy |
Ideal Location |
Key Items to Store Here |
Pro-Storage Solutions |
|
Consumables |
Centralize all food items to streamline grocery shopping, meal planning, and reduce food waste. |
Fridge and pantry located next to each other; adjacent to the Preparation Zone. |
Cold: Produce, dairy, meat. Dry: Grains, pasta, cans, spices, oils, baking goods, snacks. |
Clear airtight containers, pull-out pantry shelves, lazy susans, tiered can organizers, spice drawer inserts. |
|
Non-Consumables |
Store all tools for cooking and eating. Group by frequency and point of use. |
Dishware/Cutlery: Next to the dishwasher. Cookware: Next to the stove. |
Plates, bowls, glasses, cutlery, pots, pans, baking sheets, food storage containers, wraps, foils. |
Deep drawers with peg dividers for dishes, vertical partitions for baking sheets, corner cabinet carousels. |
|
Cleaning |
Create an efficient, ergonomic workflow for all washing and waste management tasks. |
Centered on the sink and dishwasher. |
Sink, dishwasher, trash/recycling bins, soaps, sponges, detergents, cleaning sprays, towels. |
Integrated pull-out trash/recycling bins, under-sink caddies and pull-outs, narrow towel pull-out cabinet. |
|
Preparation |
The primary, clear workspace for all chopping, mixing, and measuring. Mise en place happens here. |
Largest stretch of counter space, located between the Consumables and Cooking zones. |
Knives, cutting boards, mixing bowls, measuring tools, small prep appliances, frequently used spices/oils. |
In-drawer knife blocks, utensil drawer dividers, magnetic wall strips, clear counter space. |
|
Cooking |
The “hot zone” for applying heat. All necessary tools should be within immediate reach. |
The area including the stove, oven, and microwave; adjacent to the Preparation Zone. |
Most-used pots and pans, cooking utensils (spatulas, tongs, spoons), oven mitts, trivets. |
Deep drawers for cookware, utensil crock or adjacent drawer, pot-lid organizers, hanging pot rack. |
The Blueprint for Transformation: A Step-by-Step Implementation Guide
Transforming a kitchen from a state of chaos to one of ordered efficiency is a project of process, not just products. This section provides a clear, three-phase blueprint to guide this transformation. By following these methodical steps, anyone can implement the 5-Zone system, turning theory into tangible, lasting results. The approach is designed to be thorough yet manageable, ensuring the journey toward an organized kitchen is as rewarding as the destination.
Phase One: The Essential Purge (Decluttering)
The foundational truth of any organizational project is that one cannot organize clutter. Before any zones can be established, a comprehensive purge is essential. This is not merely about tidying; it is about making deliberate decisions about every single item in the kitchen to ensure that only the useful, necessary, and beloved remain.
The process should be systematic to avoid overwhelm. Instead of tackling the entire kitchen at once, work by category or by a single cabinet or drawer at a time. Begin by completely emptying the chosen area, placing all contents on a clear surface like a dining table or protected countertop. This step is critical because it provides a true, unvarnished look at the sheer volume of what is owned. As items are removed, sort them into like-with-like piles—all spatulas together, all baking pans together, all mugs together. This simple act immediately reveals redundancies and duplicates that were previously hidden across different cabinets.
With items sorted, employ a clear decision-making framework, often called the “Three-Box Method”. Prepare containers labeled: KEEP, DONATE, and TOSS. Evaluate each item critically. Be ruthless with duplicates (does one truly need five can openers?), broken gadgets, or specialty appliances that have not been used in over a year. A good rule of thumb is the “container concept”: if an item doesn’t fit comfortably within the logical storage space designated for its category, it doesn’t stay. Once the sorting is complete, and before a single “keep” item is put back, thoroughly clean the now-empty shelves, drawers, and cabinets. Wiping away crumbs and dust creates a true blank slate, both physically and psychologically, for the new organizational system.
This decluttering phase is more than just a clearing of space; it is a vital diagnostic process. The act of confronting every item forces an honest assessment of one’s actual lifestyle and cooking habits. The discovery of an unused pasta maker or a collection of expired, exotic spices provides valuable data. It reveals the kind of cook one actually is, as opposed to the cook one aspires to be. This self-knowledge is indispensable for the next phase, as it allows for the creation of zones that are tailored to real-world needs, not a fantasy life, ensuring the final system is both practical and sustainable.
Phase Two: Mapping Your Territory
With the kitchen purged of all non-essential items, the next phase involves moving from the abstract concept of zones to a concrete plan tailored to the unique layout of the space. This is the mapping phase, where the architectural blueprint for the new, organized kitchen is drawn.
The process begins with a simple act of visualization and analysis. Walk through the kitchen and make a list of all the primary tasks performed there: making coffee, packing lunches, preparing dinner, baking, cleaning up. This personal inventory helps clarify which zones are most critical and how they should interact.
The most effective tool for this phase is a pack of Post-it notes and a marker. Write down the key categories of items that need a home (“Everyday Dishes,” “Pots & Pans,” “Spices,” “Cleaning Supplies,” etc.) on individual notes. Then, begin placing these notes directly onto the cabinet doors and drawer fronts where it seems most logical for those items to live. This tactile, flexible method allows for easy experimentation without moving a single physical object.
As the notes are placed, the primary consideration must be workflow. The goal is to minimize steps and create a smooth, intuitive path through any given task. The “Prep” note should be on a long stretch of counter, with the “Knives” and “Mixing Bowls” notes on the drawers below it. The “Pots & Pans” note should be on a cabinet or drawer immediately adjacent to the stove. The “Everyday Dishes” note should be on the cabinet closest to the dishwasher. Stand back and trace the path of a typical activity. Does the flow feel logical? Are there any points of friction where one would have to walk across the entire kitchen to get a needed item? Continue to move the Post-it notes around until the layout feels effortless and efficient. This process is universally applicable, whether the kitchen is a sprawling open-plan space or a compact galley. The objective is to apply the
principles of zoning to the existing layout, creating the most functional system possible within the given constraints.
Phase Three: Strategic Placement
The final phase is the physical act of populating the newly mapped zones. This is where the decluttered items are placed into their permanent, logical homes according to the Post-it note blueprint. The success of this phase hinges on a key principle: the strategic use of “valuable real estate.”
The most valuable real estate in any kitchen is the storage space that is easiest to access: top drawers, eye-level shelves in upper cabinets, and the front of lower shelves. These prime locations should be reserved exclusively for the items used daily or multiple times a week. Everyday plates, the go-to frying pan, the most-used cooking utensils—these belong in the most convenient spots. Conversely, items used less frequently—specialty bakeware, large serving platters, seasonal items—should be placed in the less accessible areas: the highest shelves, the back of deep cabinets, or above the refrigerator. This simple prioritization ensures that daily tasks are frictionless.
Within each designated zone, continue the practice of grouping like with like. All food storage containers should be nested together, all baking pans stored vertically in their assigned cabinet, and all dish towels folded or rolled in their specific drawer. This micro-organization within the macro-zone structure is what makes the system truly intuitive.
Before considering the project complete, perform a final workflow test. Mentally, or even physically, walk through the entire process of preparing a familiar meal. Start by gathering ingredients from the Consumables Zone, move to the Prep Zone, then to the Cooking Zone. Plate the food using items from the Non-Consumables Zone, and finally, simulate the cleanup process in the Cleaning Zone. Pay close attention to your movements. If at any point the process feels awkward or requires an unnecessary trip across the room, it signals a point of friction. Do not hesitate to make small adjustments, swapping the contents of two drawers or shifting a category of items to a more logical cabinet. This final refinement ensures the new system is not just organized, but truly optimized for the way you live and cook.
Advanced Applications and Long-Term Success
Implementing the 5-Zone system is a transformative act, but ensuring its permanence requires adapting it to specific needs and cultivating habits that maintain order. This final part explores how to tailor the system for various kitchen layouts, customize it with personalized zones, and establish the routines necessary for long-term success. This elevates the framework from a one-time project to a sustainable lifestyle, solidifying its role as a permanent solution to kitchen chaos.
Tailoring the System: Adapting Zones for Every Kitchen Layout
The 5-Zone system is a set of principles, not a rigid template, making it remarkably adaptable to any kitchen footprint. Its success lies in applying the logic of workflow and proximity to the unique constraints and opportunities of a given space.
- The Galley Kitchen: Characterized by two parallel walls and a narrow corridor, the galley kitchen demands ruthless efficiency and a focus on vertical space. The zones will be arranged in a linear fashion. An effective layout might place the Consumables, Preparation, and Cooking zones along one wall, creating a streamlined path for meal creation. The opposite wall would then house the Cleaning Zone (sink/dishwasher) and the Non-Consumables Zone (everyday dishes), allowing for easy cleanup and storage without interfering with the cooking workflow. Maximizing storage is key: ceiling-height cabinets, wall-mounted racks for spices or utensils, and magnetic knife strips are essential for keeping countertops clear. Opting for counter-depth appliances and handleless or integrated-handle cabinetry can further enhance the sense of space by reducing physical and visual clutter.
- The L-Shaped Kitchen: This common and versatile layout, formed by two perpendicular walls, naturally lends itself to zoning. The corner, often a challenging area, becomes a critical design element that can be mastered with solutions like a lazy susan or a blind corner pull-out shelf system, ensuring no space is wasted. The two legs of the “L” can be assigned distinct primary functions. For example, the shorter leg might become a compact Cleaning and Non-Consumables (dishware) zone, while the longer leg accommodates the Consumables-to-Prep-to-Cooking sequence. Many L-shaped kitchens, especially in open-plan homes, benefit from the addition of a kitchen island. This island often becomes the primary Preparation Zone, creating a highly efficient work triangle (fridge-prep island-stove) within the broader zoned layout.
- The U-Shaped and Open-Plan Kitchen: These larger layouts are ideal for implementing a pure 5-Zone system and can comfortably accommodate multiple cooks without congestion. In a U-shaped kitchen, each of the three walls can be dedicated to one or two zones, creating very clear and distinct work areas. In open-plan kitchens, a large central island is often the star of the show, typically serving as the main Preparation Zone and sometimes incorporating a secondary sink or cooktop. The surrounding perimeter walls are then free to house the other four zones in a logical sequence, such as a full wall of tall cabinets for the Consumables Zone, a Cooking Zone on another wall, and a Cleaning Zone with adjacent dishware storage on the third.
Beyond the Core Five: Creating Personalized Zones
The true elegance of the zone system lies in its capacity for personalization. The five core zones provide a robust foundation, but the framework can and should be expanded to reflect individual lifestyles, hobbies, and family routines. By creating specialized micro-zones, the kitchen becomes a truly bespoke space.
Popular personalized zones include:
- The Baking Zone: For avid bakers, consolidating all related items into one dedicated area is a game-changer. This zone typically includes storage for a stand mixer (perhaps on a spring-loaded shelf that lifts it to counter height), drawers for baking pans, cookie sheets, and cooling racks, and canisters for flours, sugars, and other baking-specific dry goods. Utensils like rolling pins, spatulas, and measuring tools would also live here.
- The Coffee & Beverage Station: This is one of the most common and useful additions. It creates a self-service drink area that keeps traffic out of the main kitchen workflow. This zone houses the coffee maker, electric kettle, coffee grinder, mugs, teas, filters, and sweeteners. It can be a small section of countertop, a dedicated cabinet, or even a separate bar cart.
- The Lunch Preparation Zone: For busy families, a dedicated lunch prep station can streamline hectic mornings. This area consolidates lunchboxes, reusable food storage containers, sandwich bags, wraps, and thermoses into one easily accessible cabinet or drawer, often located near the refrigerator.
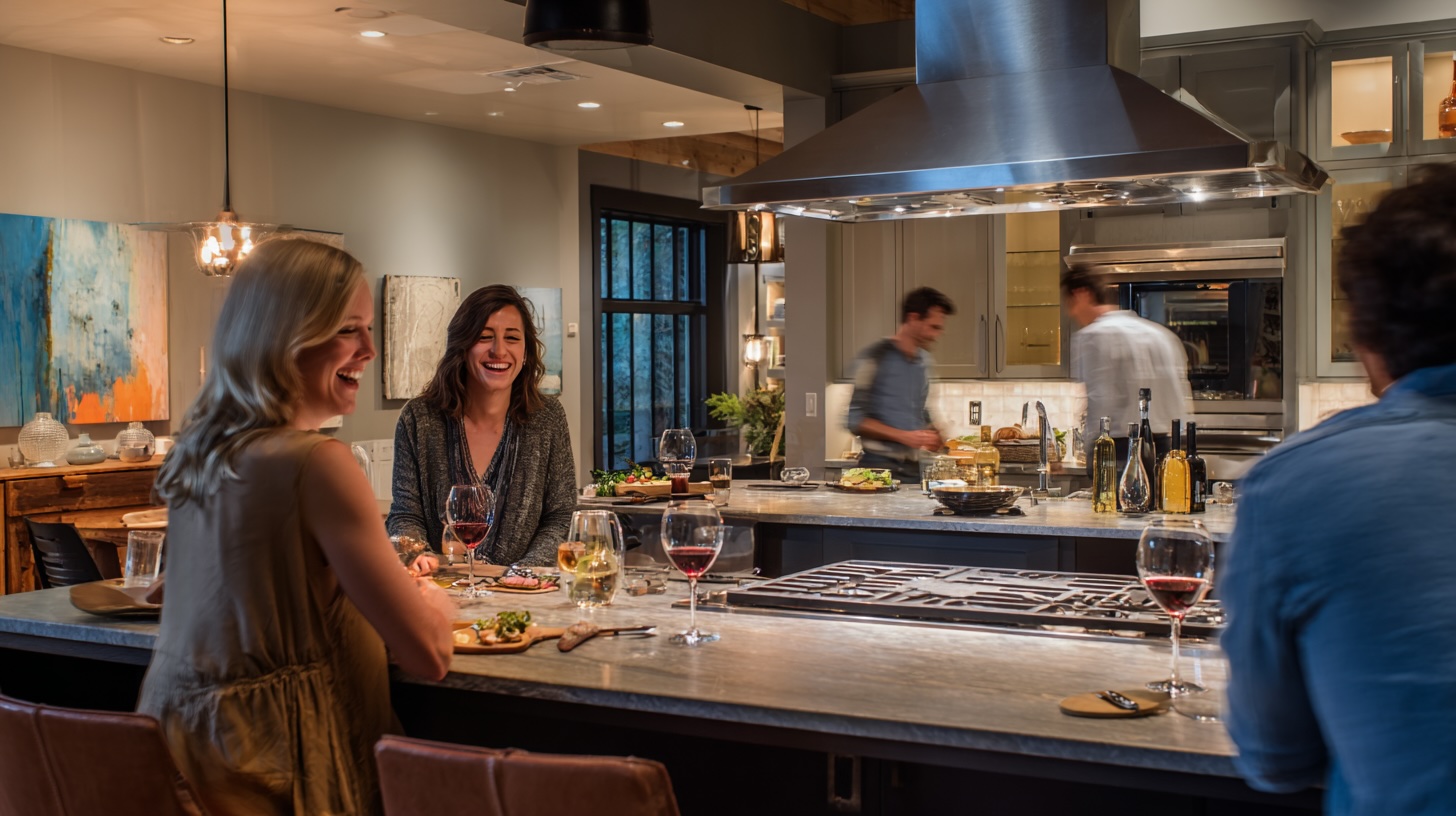
- The Social & Entertainment Zone: In kitchens designed for hosting, it is wise to create a zone that allows guests to feel included without obstructing the cook. This could be bar-style seating at an island or peninsula, a small wet bar with a beverage fridge and glassware, or a comfortable seating nook slightly removed from the primary work triangle.
The Art of Maintenance: Keeping Your Kitchen Organized for Good
Organization is not a one-time event; it is an ongoing practice built on a foundation of simple, consistent habits. A well-zoned kitchen is easier to maintain, but permanence requires a conscious commitment to order.
Integrating with Other Philosophies: 5-Zones and KonMari
Before establishing habits, it is useful to understand how the 5-Zone system interacts with other popular organizing philosophies, most notably the KonMari Method™. They are not competing systems but complementary tools for different stages of the process. The KonMari Method™, with its focus on the emotional question of “Does it spark joy?”, is a powerful framework for the initial decluttering phase. It guides the difficult decisions about what to keep and what to let go. The 5-Zone system, however, is a framework for the
organizing phase. It provides the functional, task-based logic for where the joy-sparking items should live to create an efficient and ergonomic workflow. One can use KonMari to purge their kitchenware, and then use the 5-Zone principles to put everything back in a way that makes sense for daily life.
Habits for Lasting Order
- Daily and Weekly Rituals: The most powerful habit is the “end-of-day reset.” Dedicate 10-15 minutes each evening to restoring order: clear and wipe down all countertops, load and run the dishwasher, and put away any stray items. Another key habit is to clean messes immediately as they occur; wiping a spill or washing a pot right away is far easier than scrubbing it later.
- The “One In, One Out” Rule: To prevent the slow creep of clutter, adopt a strict policy: for every new kitchen item that comes into the home, a similar old one must be donated or discarded. This applies to mugs, gadgets, water bottles, and cookware, ensuring that inventory levels remain stable.
- The “Don’t Put It Down, Put It Away” Mindset: This is perhaps the single most impactful habit for preventing clutter. Instead of placing an item—mail, a spice jar, a dirty glass—on the counter with the intention of dealing with it later, take the extra few seconds to put it directly in its designated home: the mail sorter, the spice drawer, the dishwasher. This prevents clutter from ever taking root.
- Periodic Reviews: An organized kitchen requires occasional editing. At least once per quarter, perform a quick review of each zone. Check expiration dates in the pantry, purge any accumulated duplicates, and toss or repair any broken or worn-out items like stained dish towels or chipped mugs.
- Involve the Entire Household: A perfectly organized kitchen cannot be maintained by one person alone. It must be a team effort. Clearly communicate the new system to all family members, labeling drawers and shelves if necessary in the beginning. Assign age-appropriate chores, such as unloading the dishwasher, taking out the trash, or wiping counters, to build a shared sense of responsibility for maintaining the home’s most important space.
By embracing these principles of adaptation, personalization, and consistent maintenance, the 5-Zone system becomes more than an organizational method—it becomes the foundation for a more efficient, peaceful, and enjoyable life at home.